A Palm Desert golf experience unlike any other – Play the Iconic Firecliff Course at Desert Willow Golf Resort
New Greens. New Tees.
Same Firecliff Challenge – Now Elevated.
Challenge your game and awaken your senses on one of Southern California’s top desert golf courses – ranked among the best places to play by Golf Digest and Golfweek.
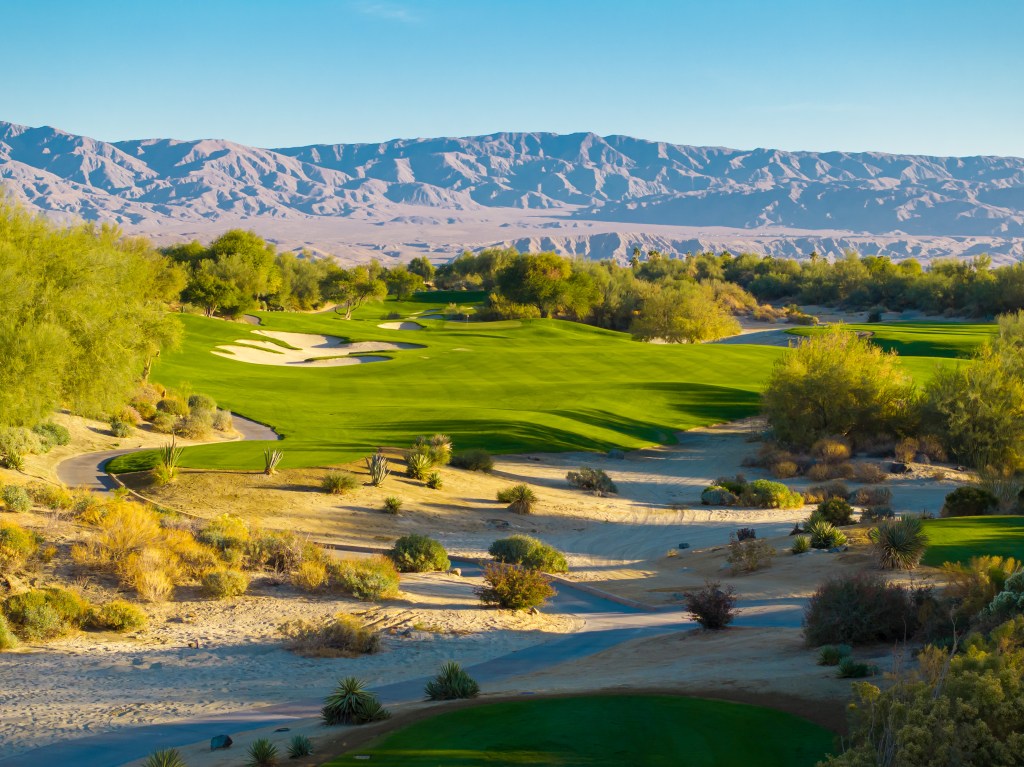
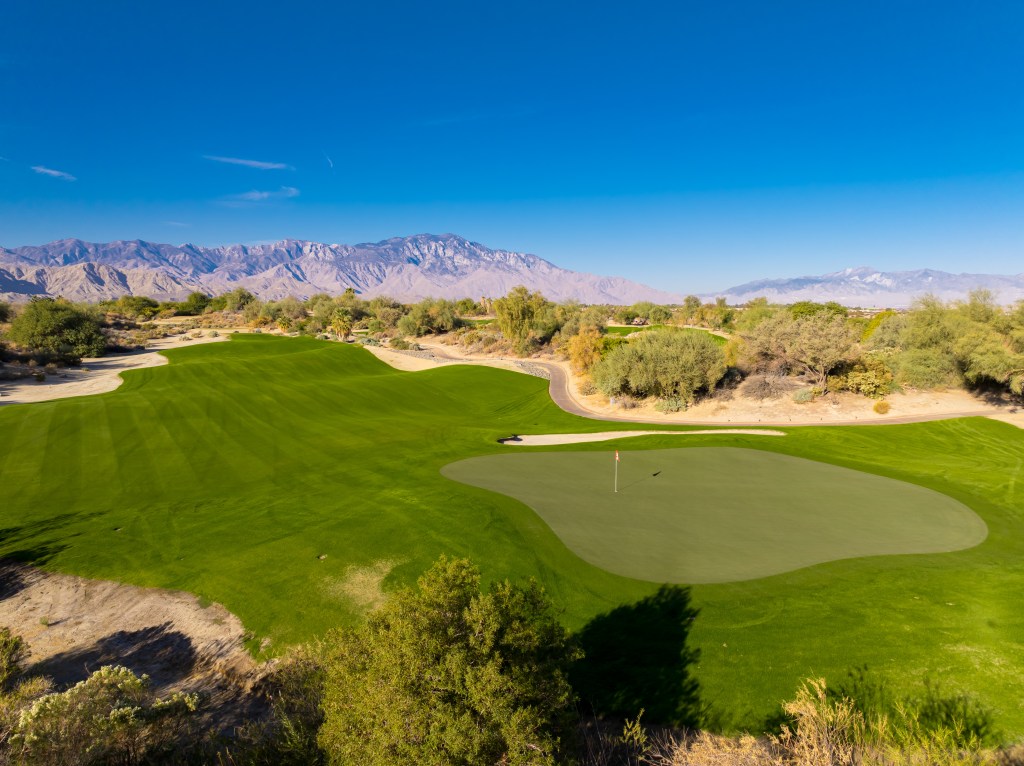
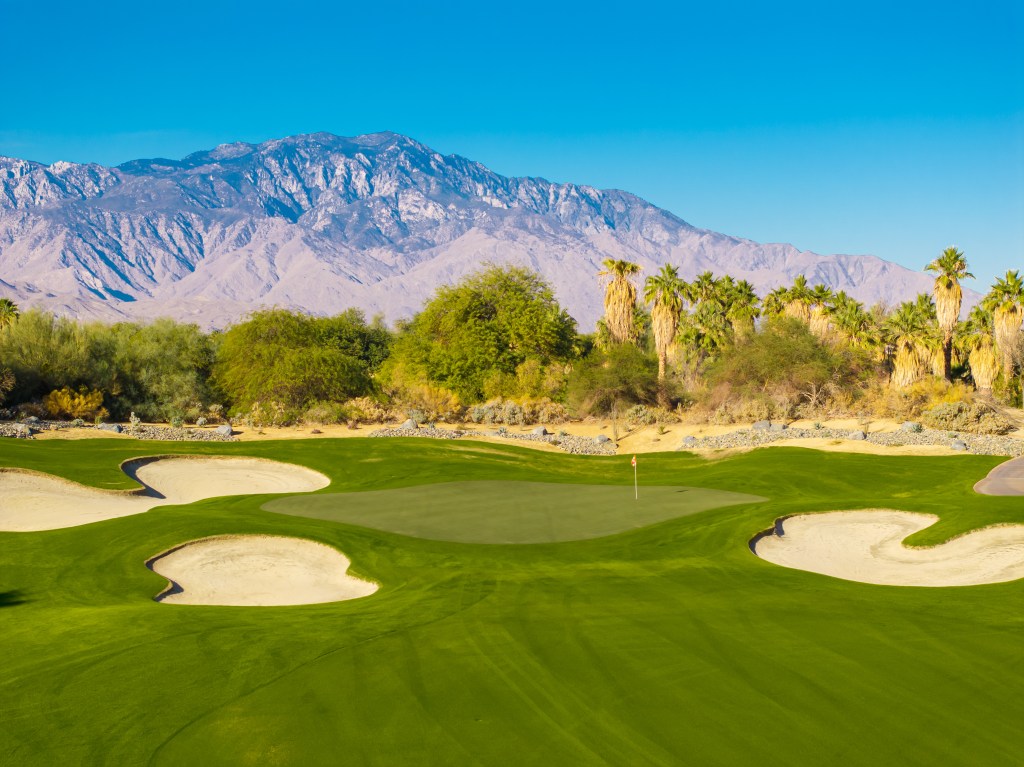
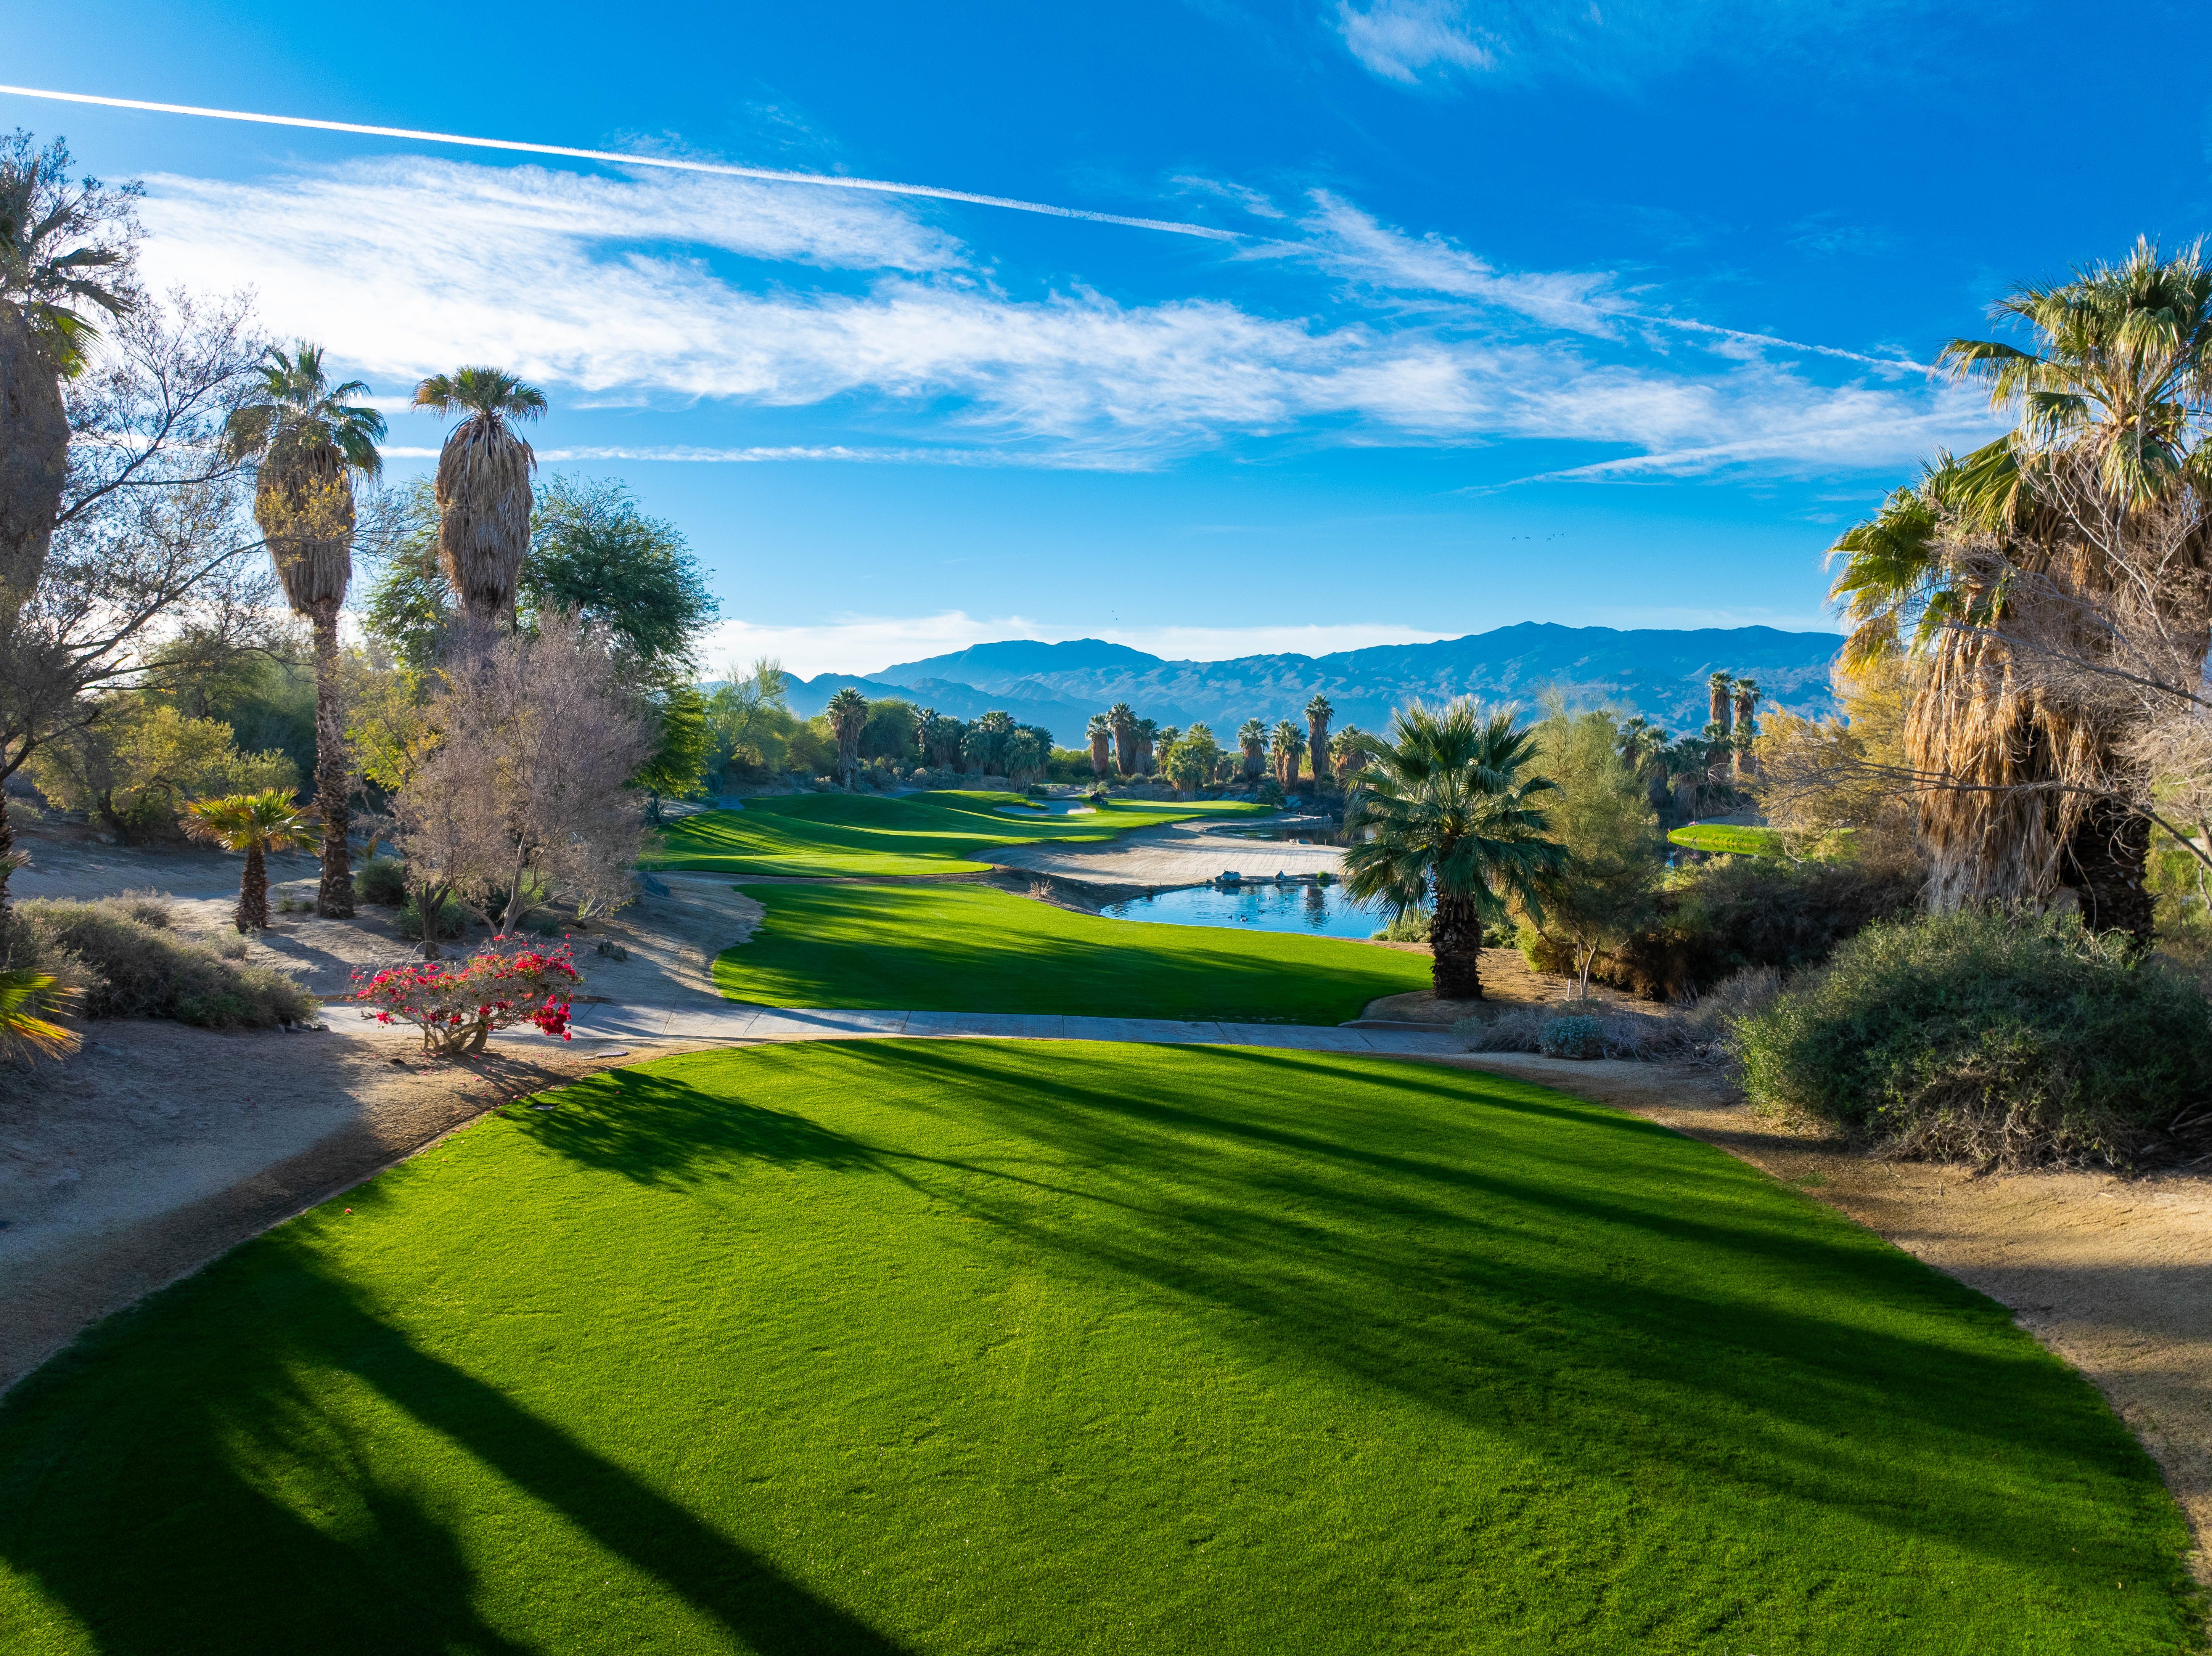
Experience the newly renovated Firecliff Course at Desert Willow Golf Resort—Palm Desert, California’s premier golf destination. Recently enhanced with new Mini Verde Bermudagrass greens, reshaped and leveled tee boxes, and refreshed fairways, Firecliff now offers an even more refined and consistent playing experience.
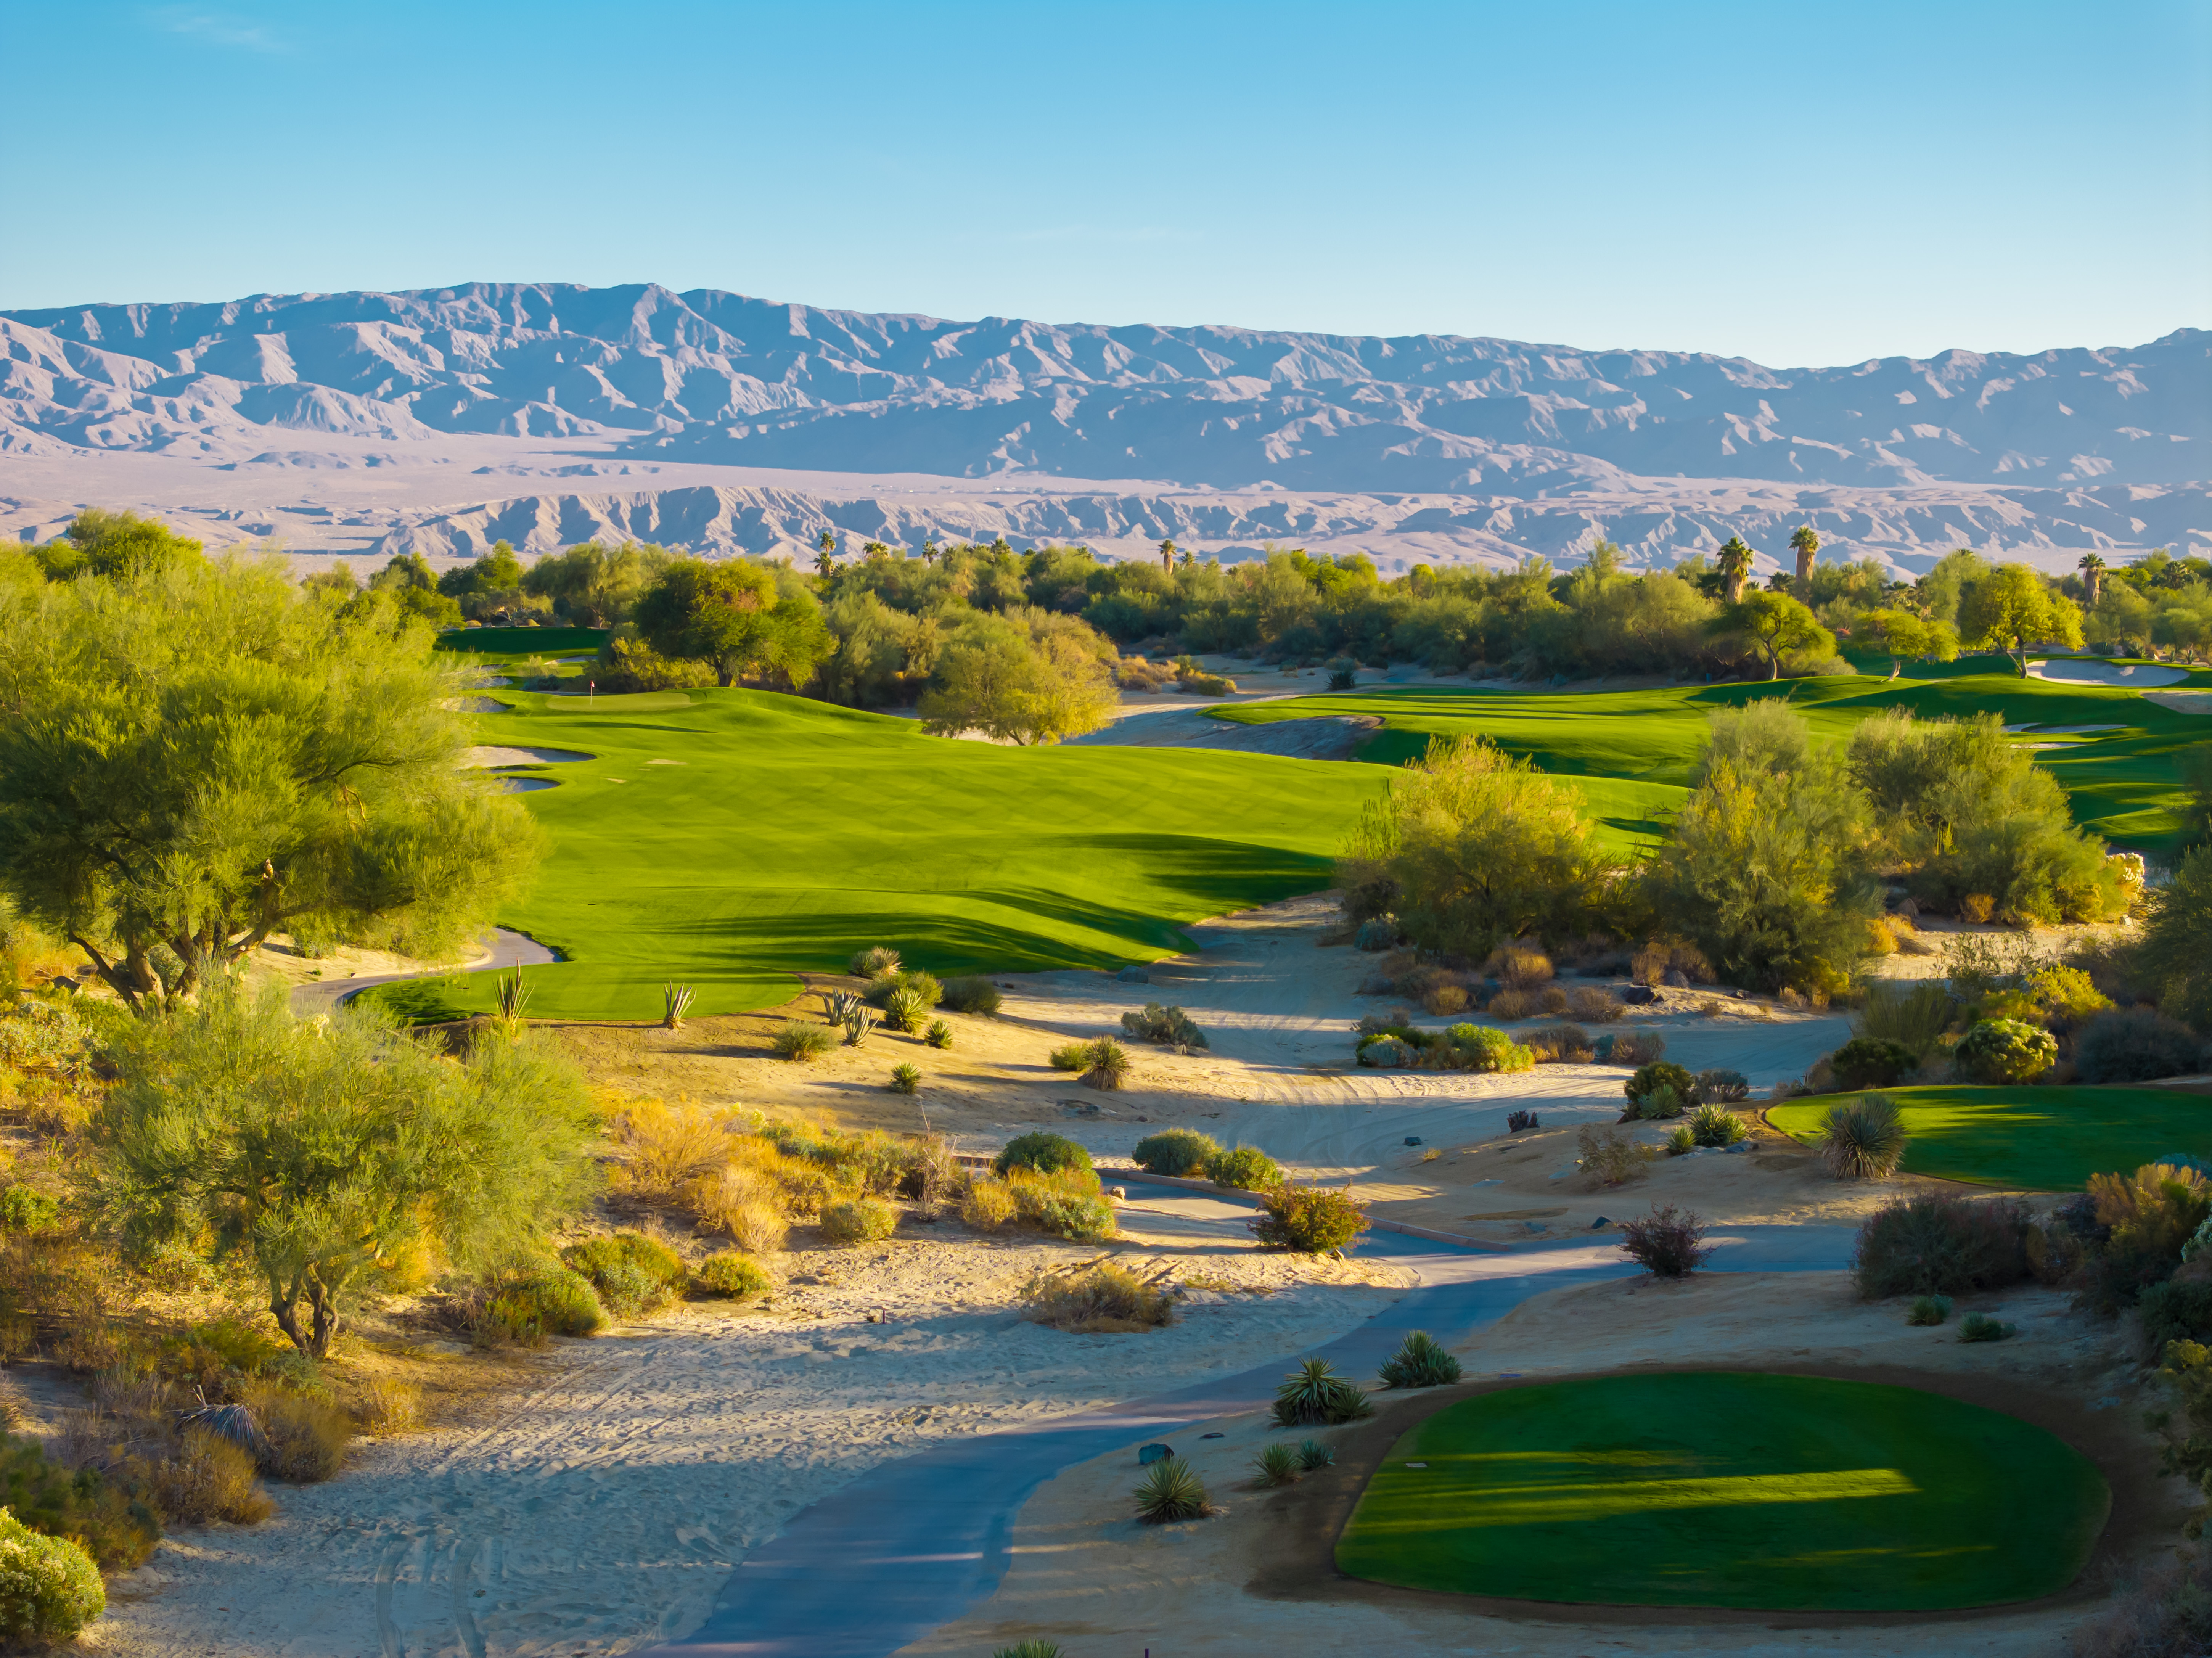
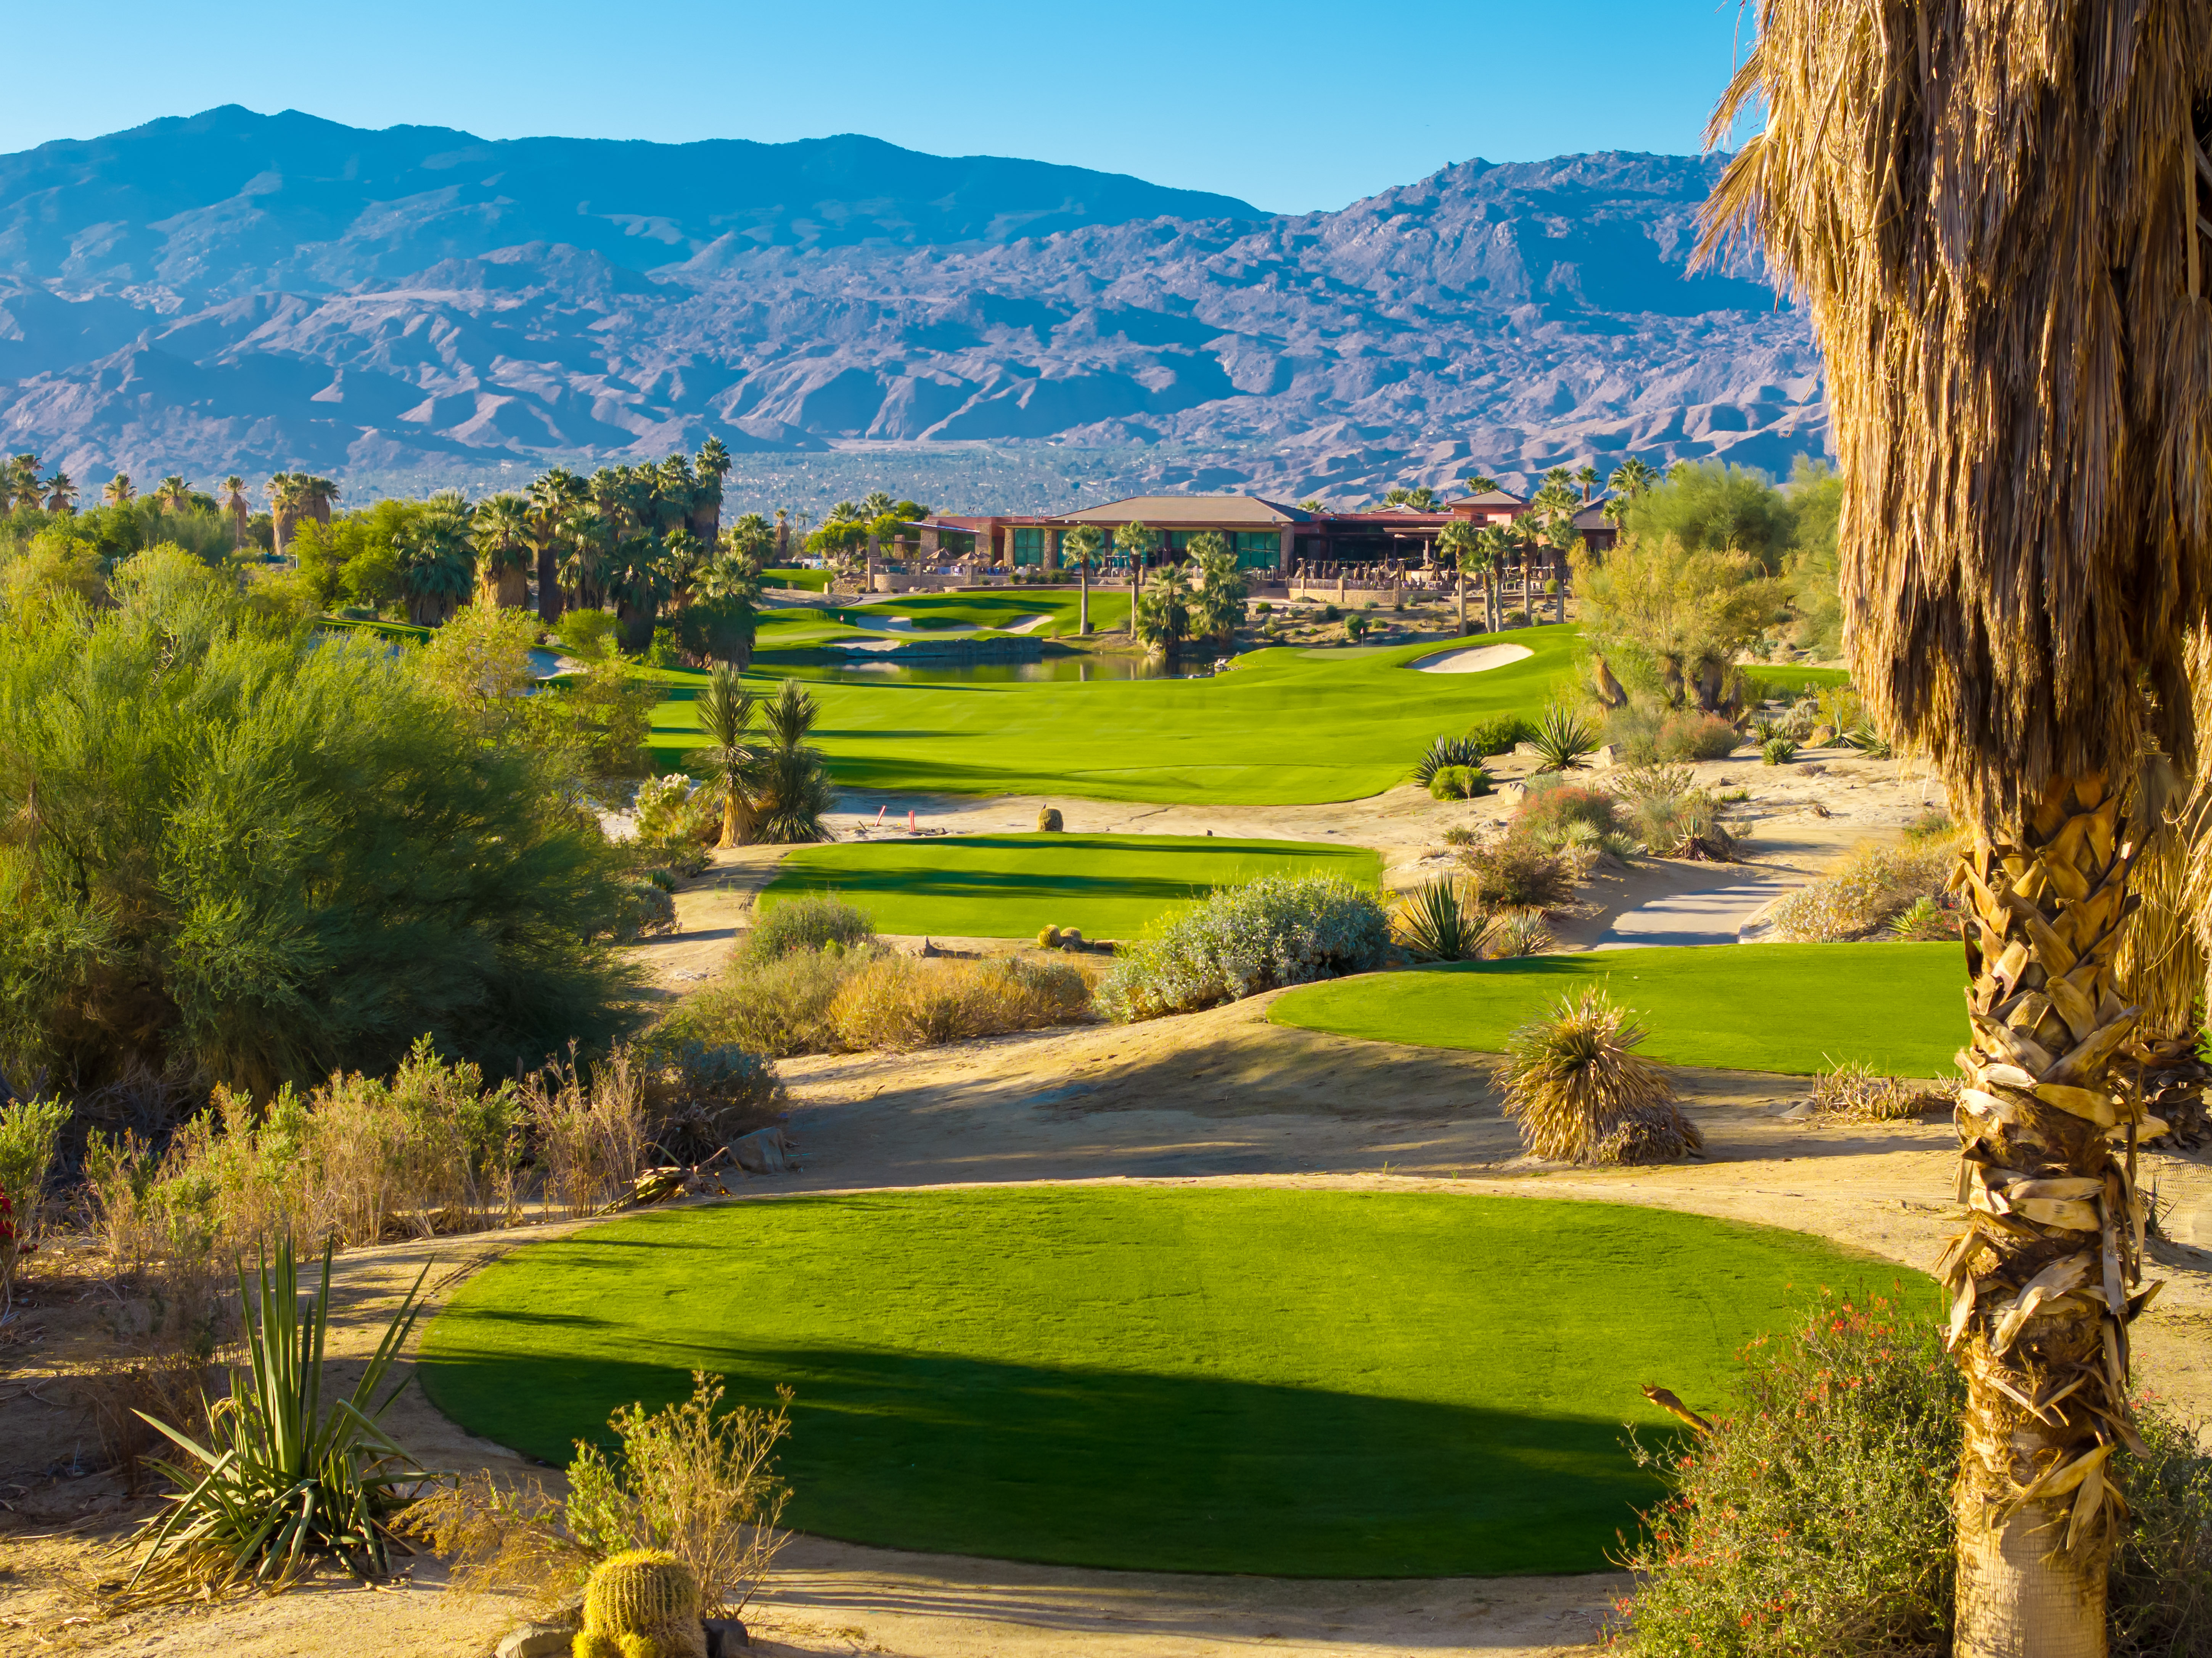
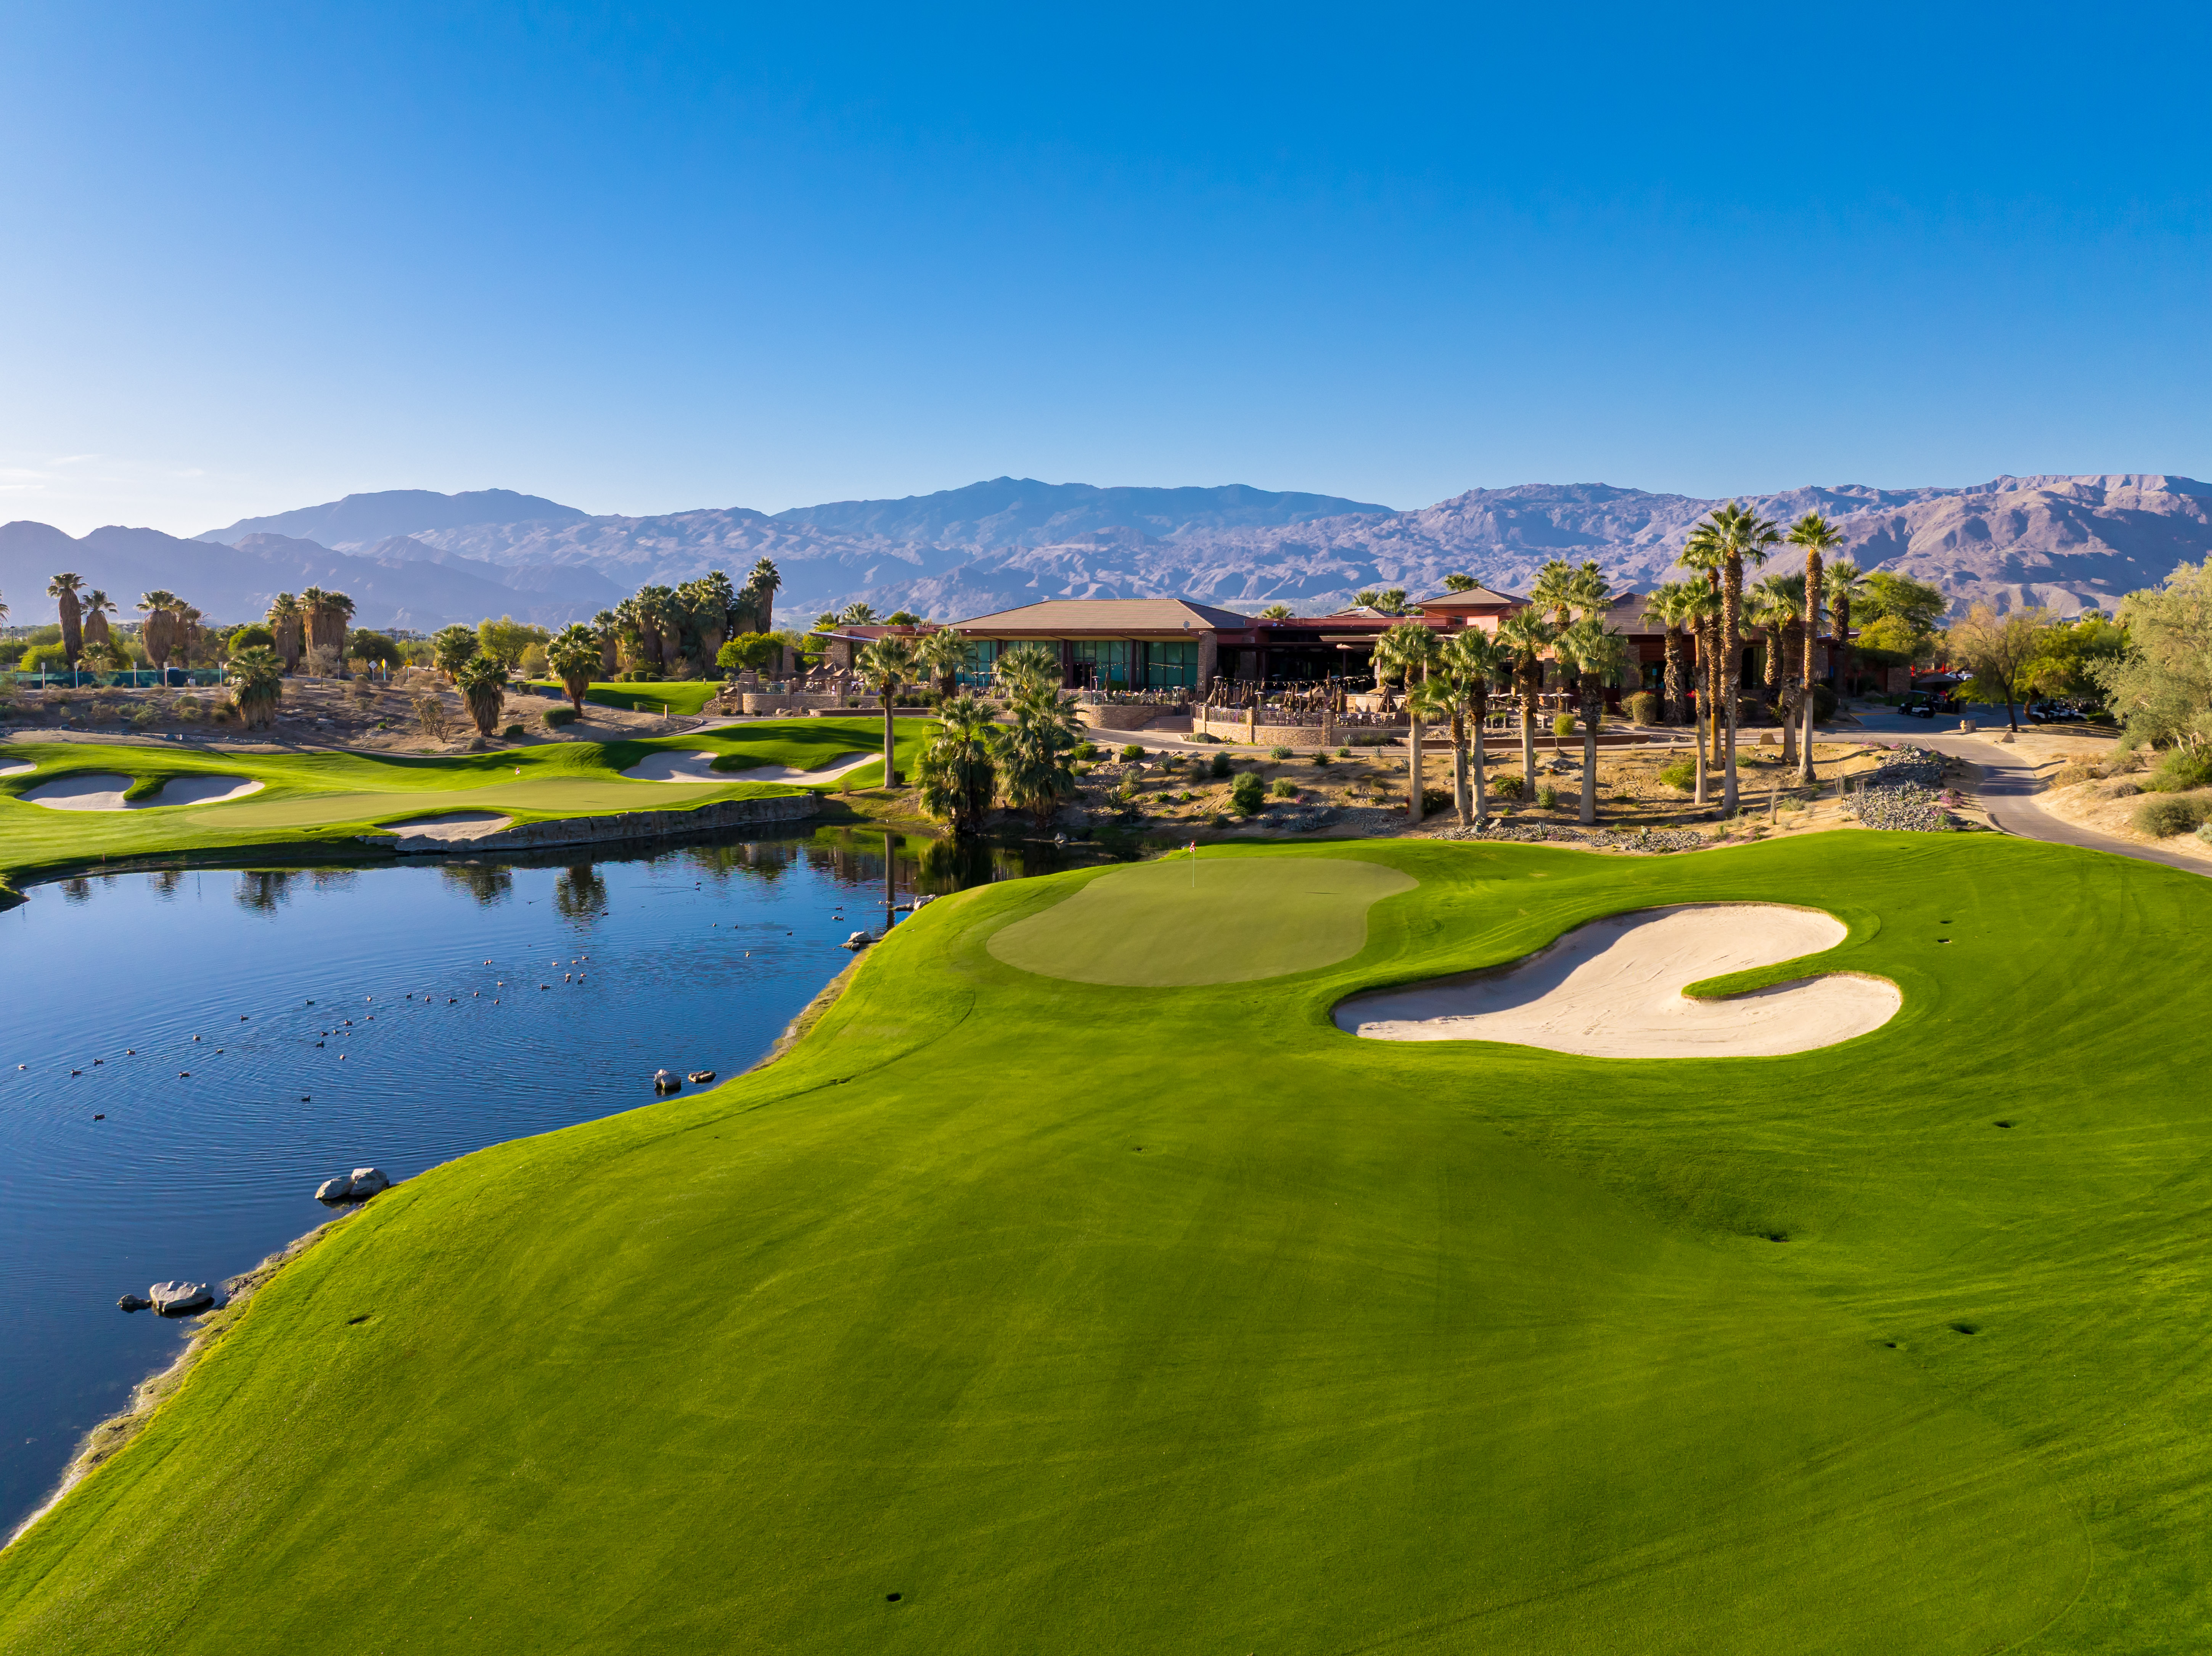
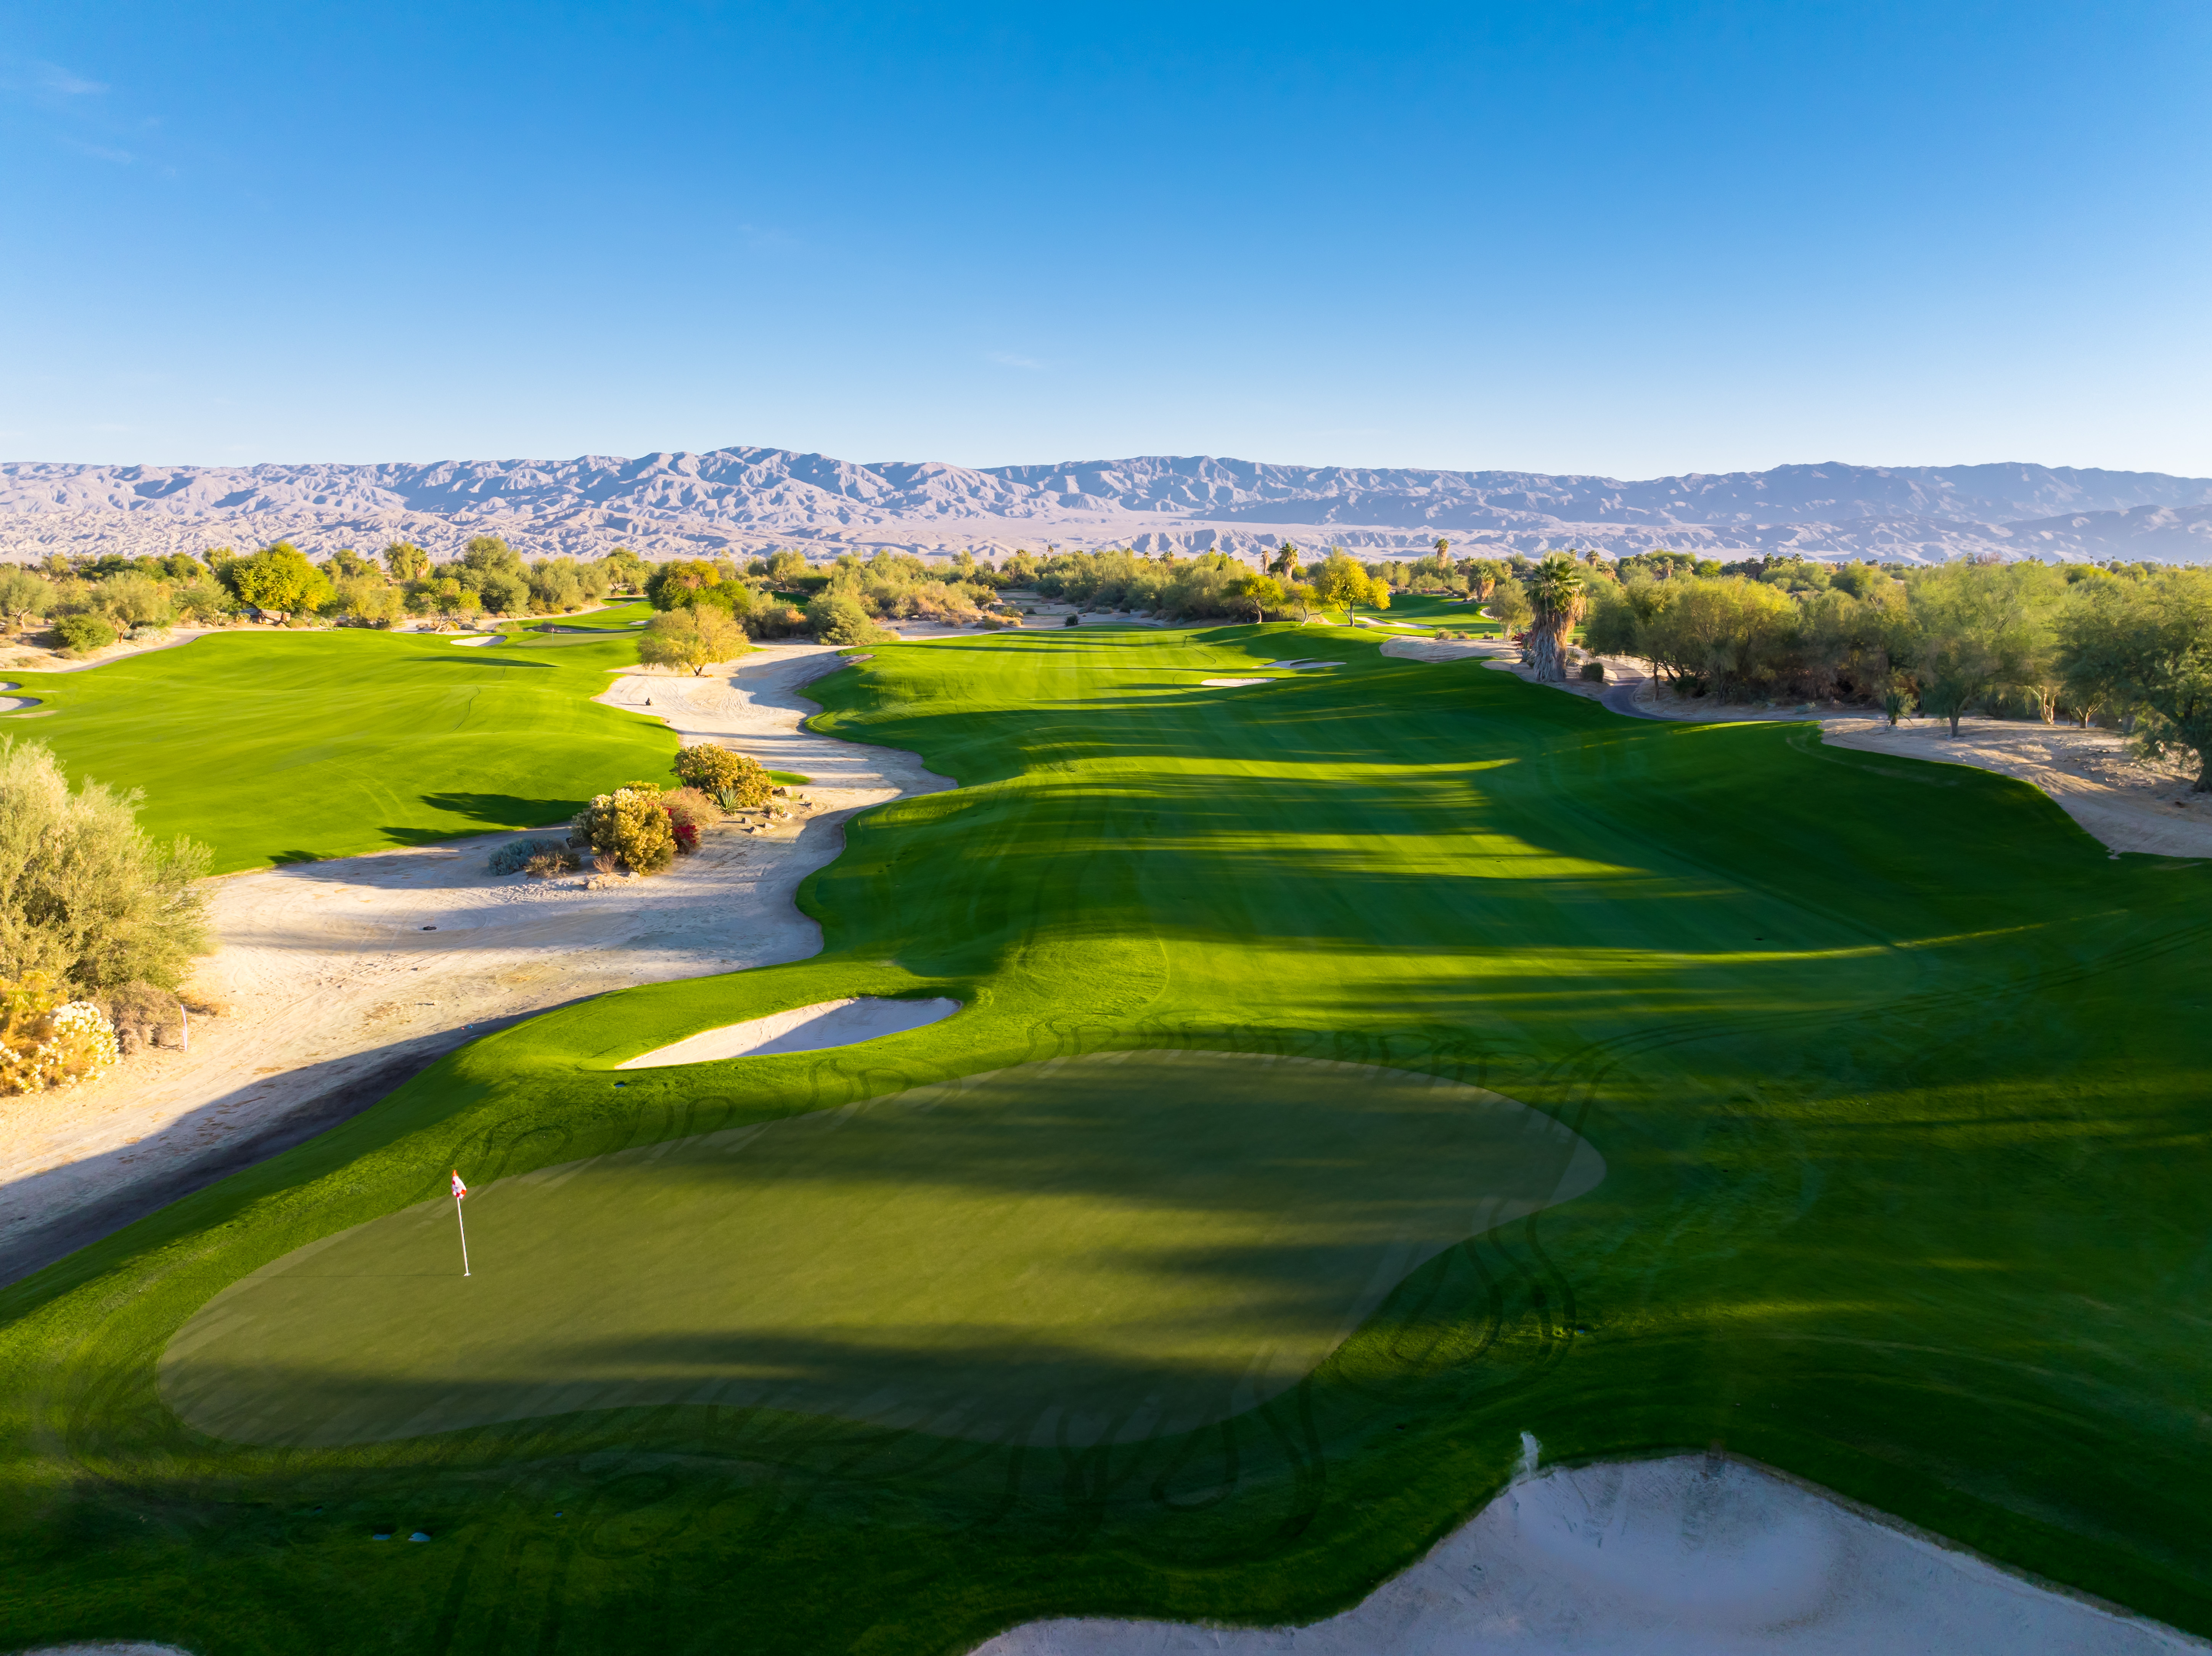
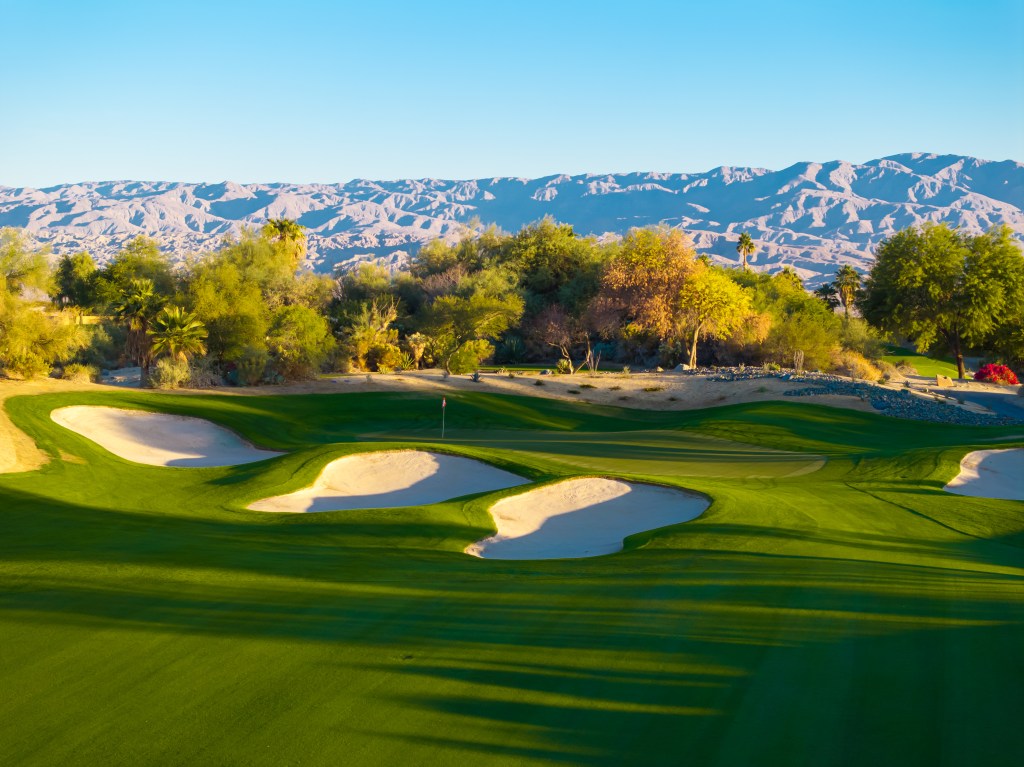
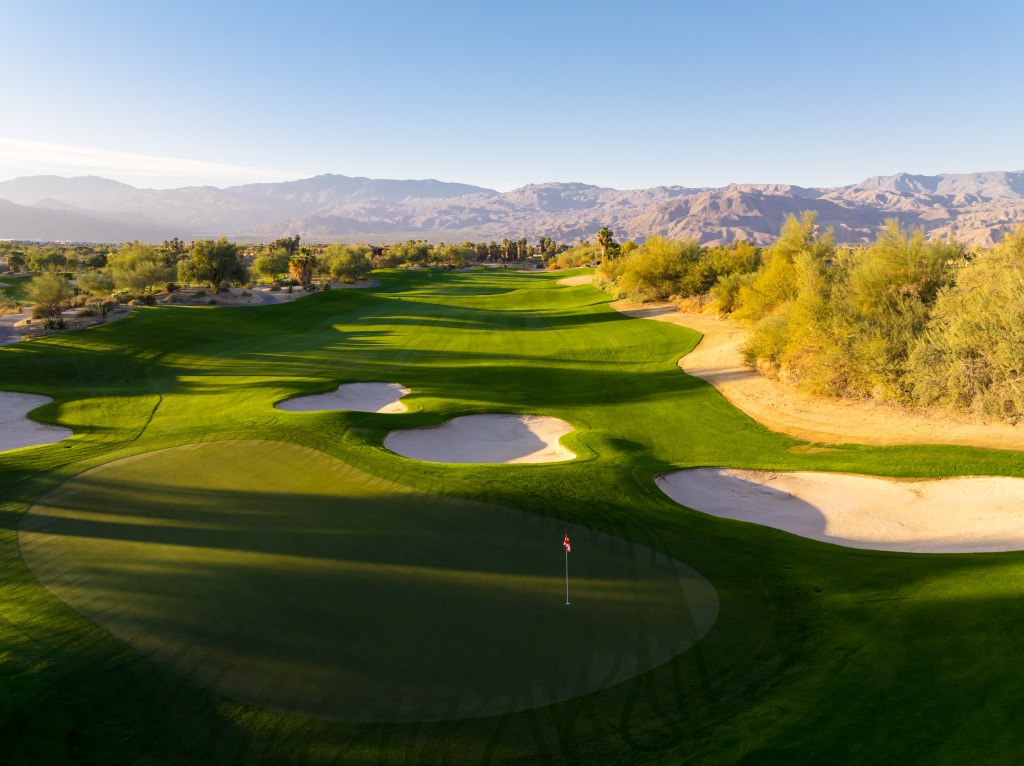
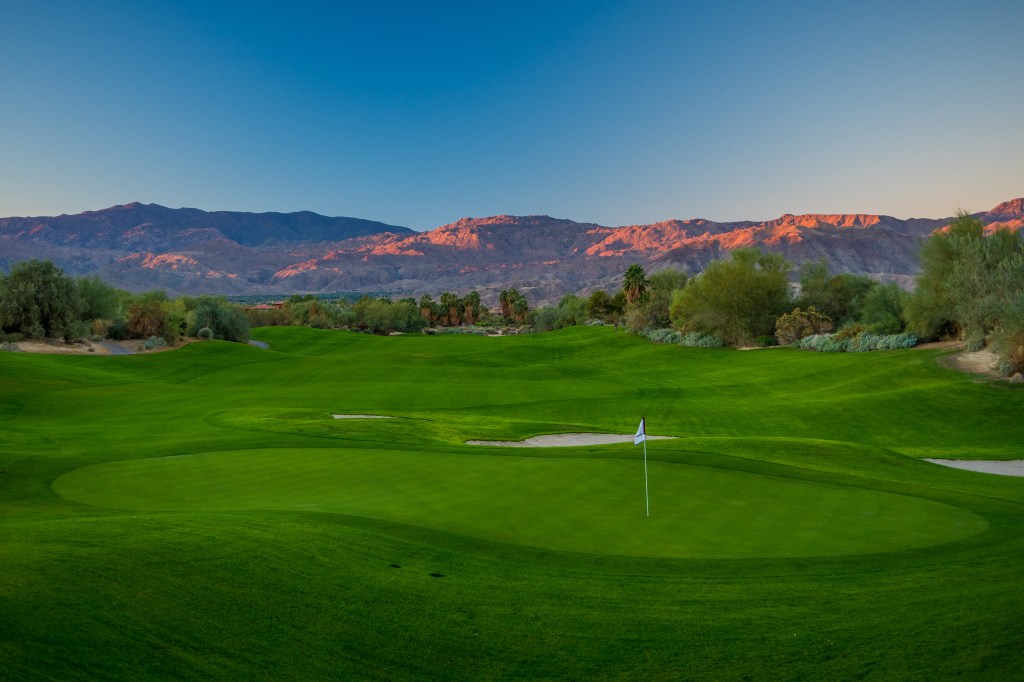
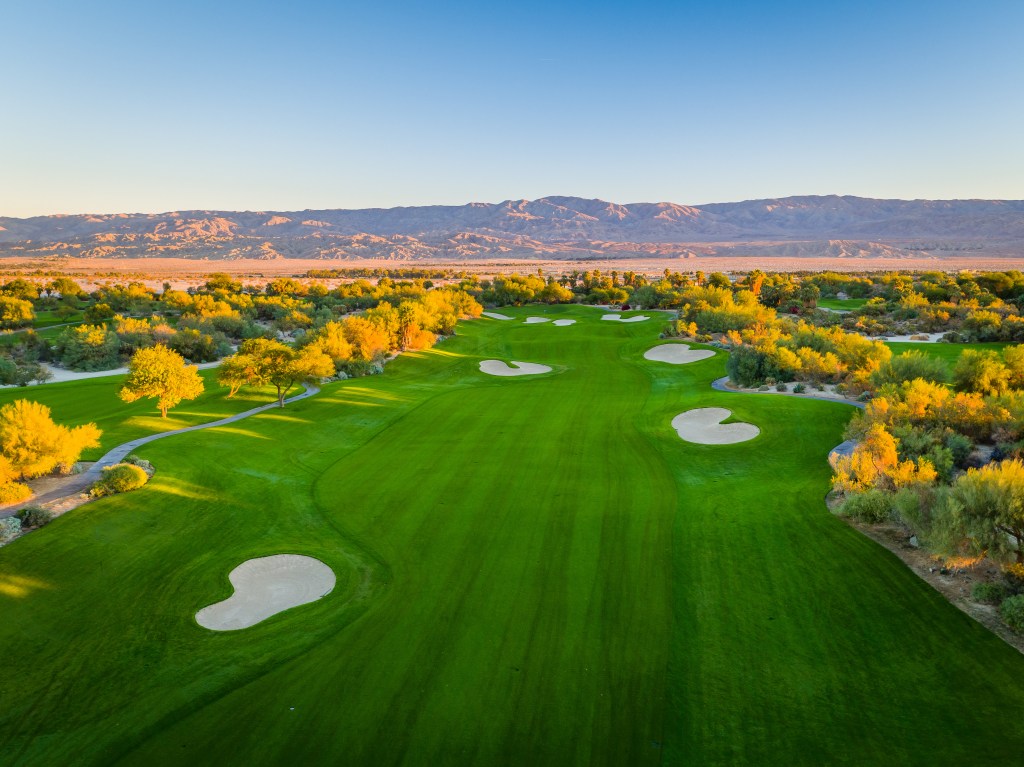
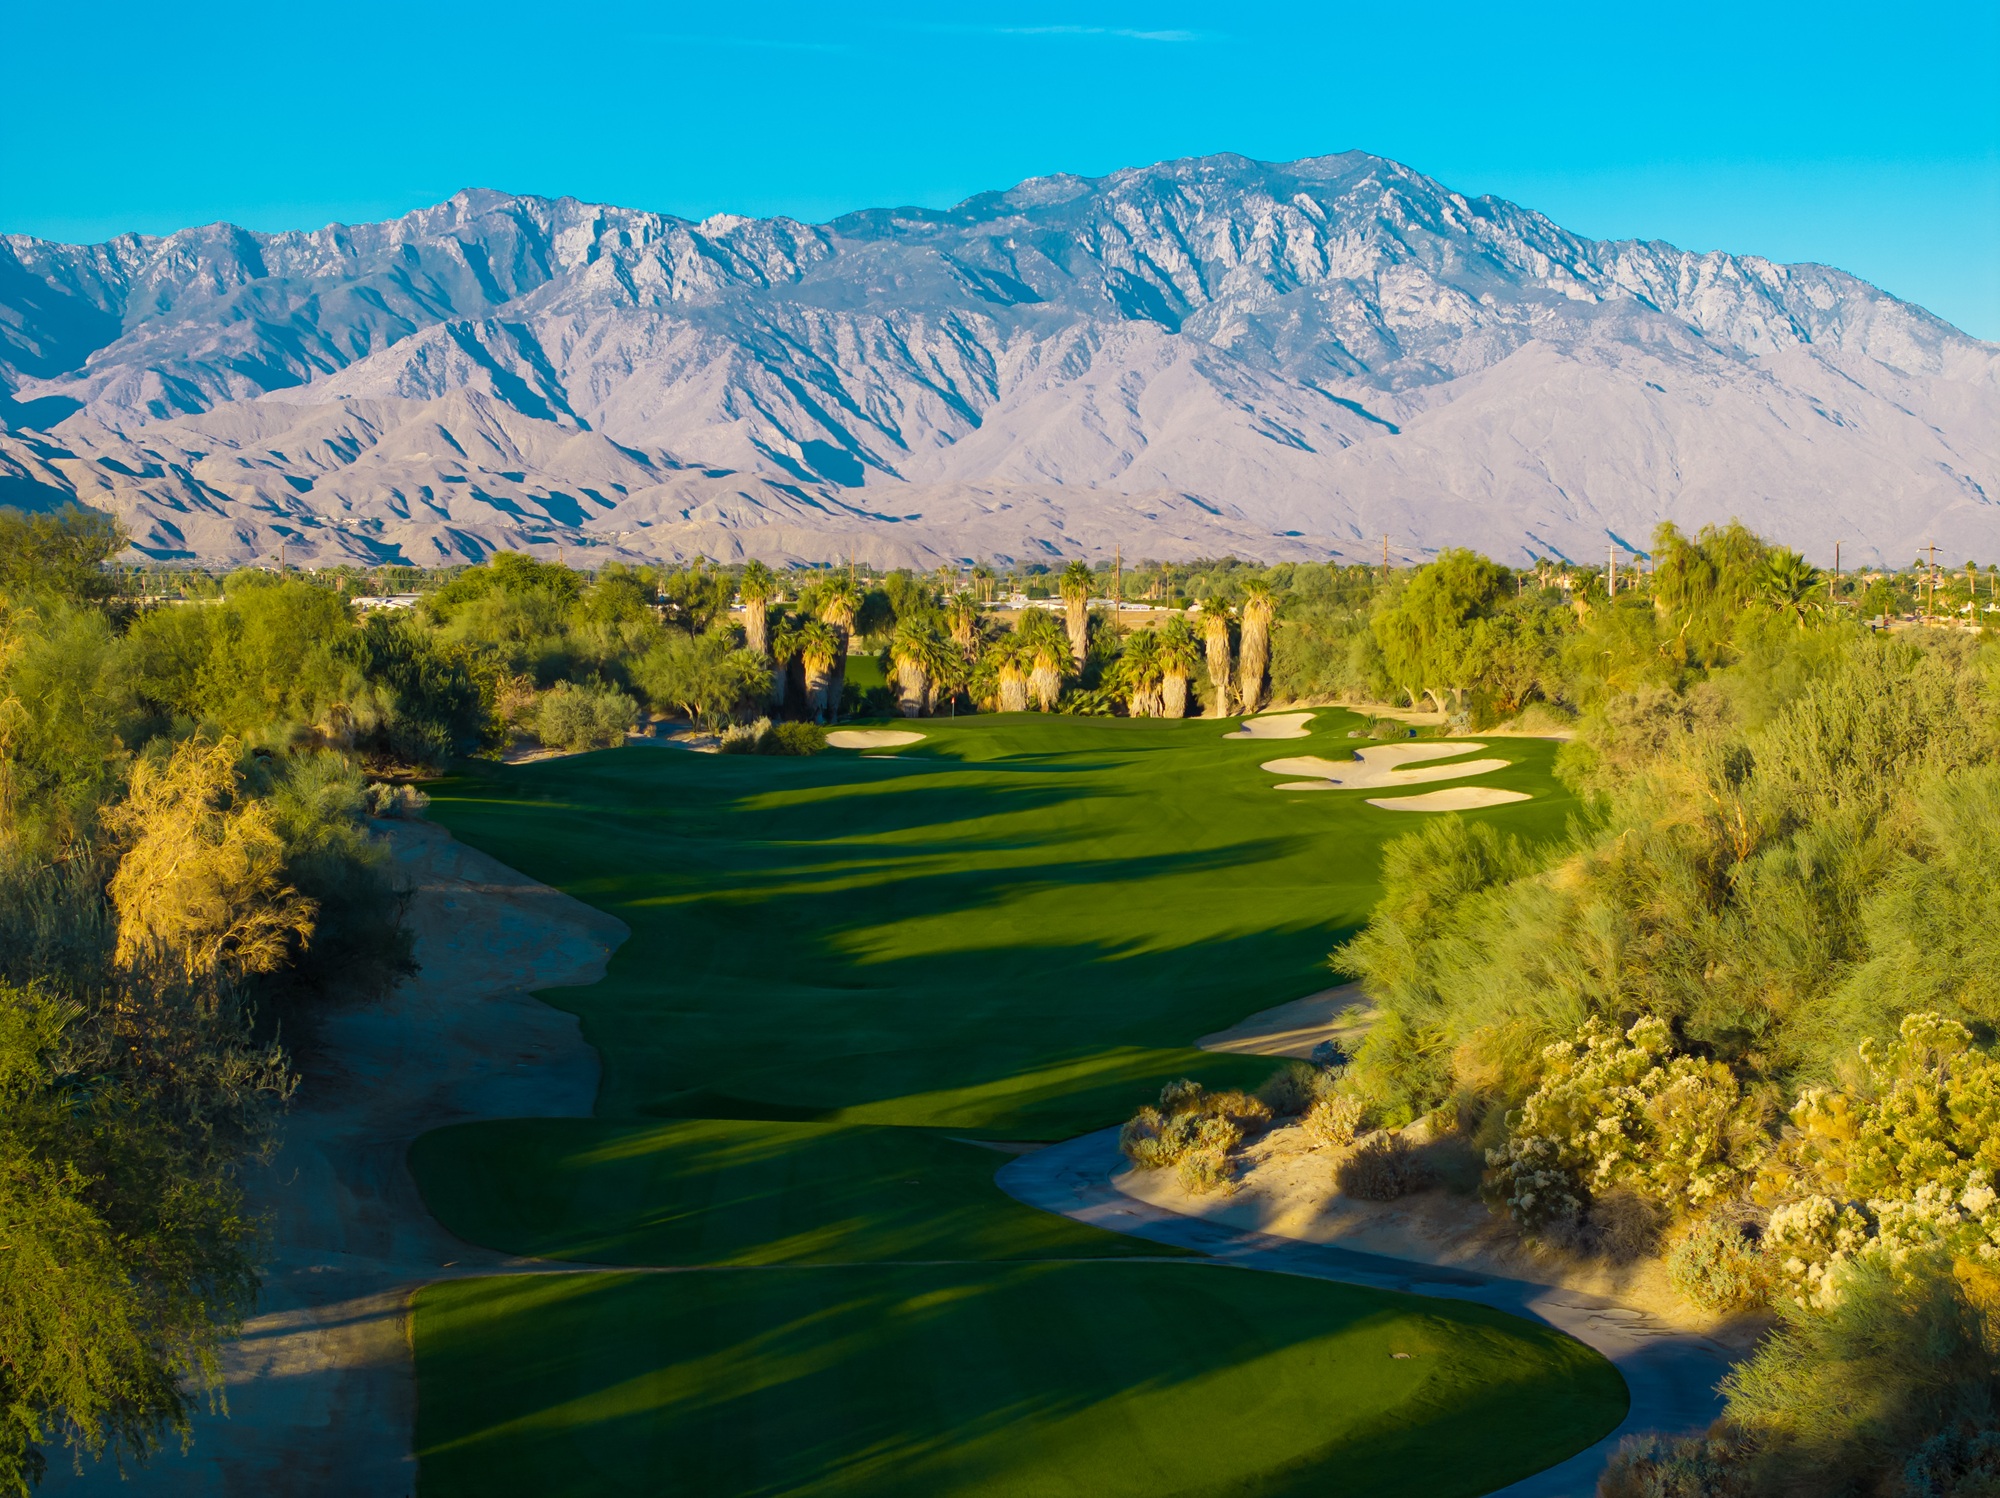
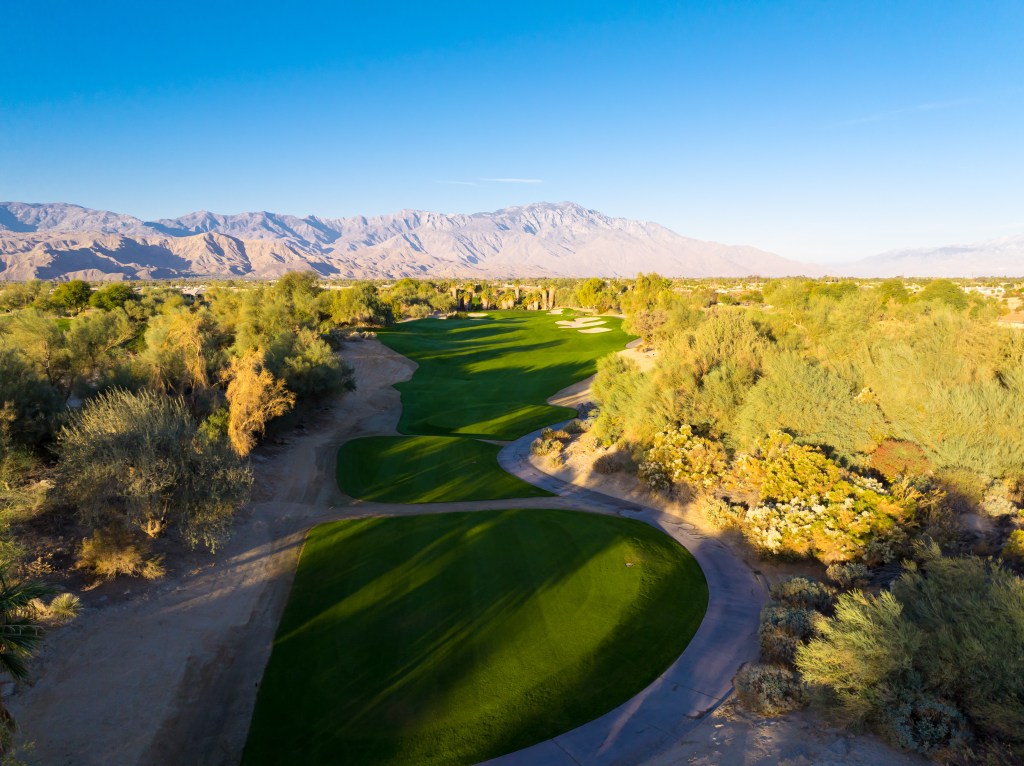
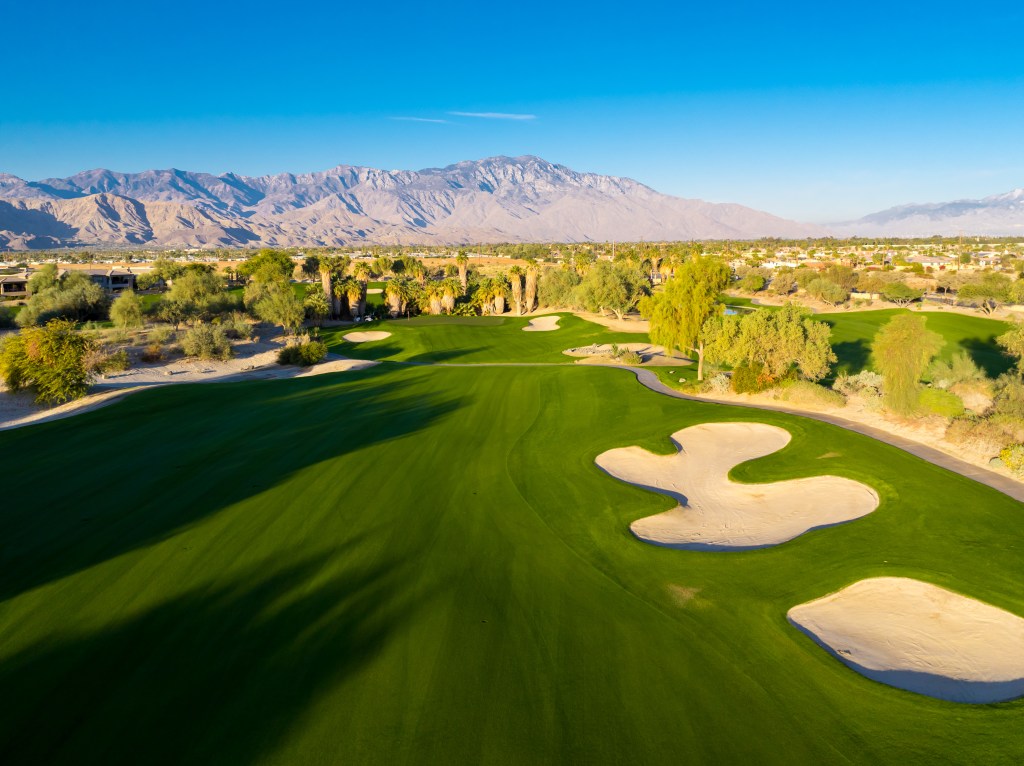
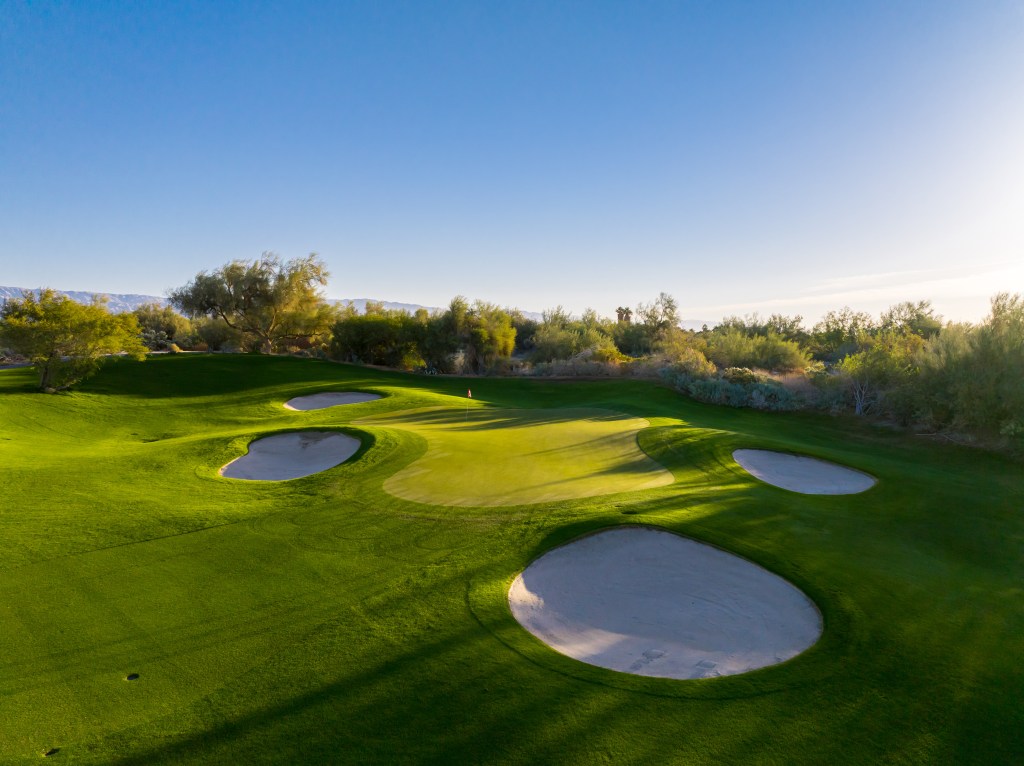
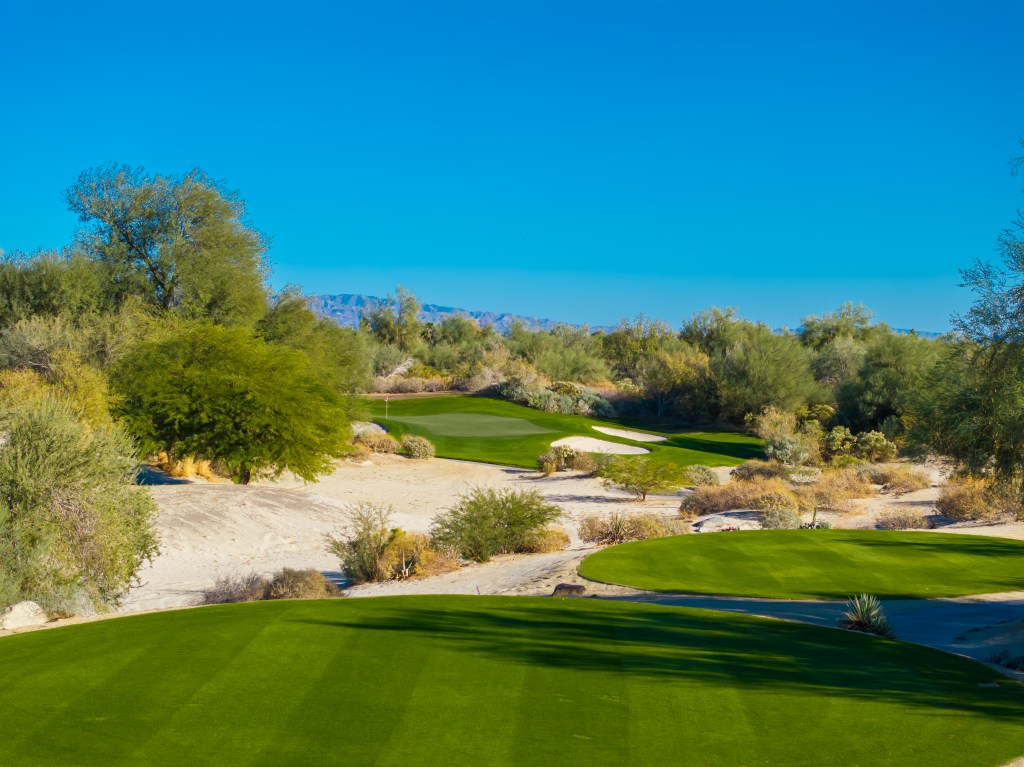
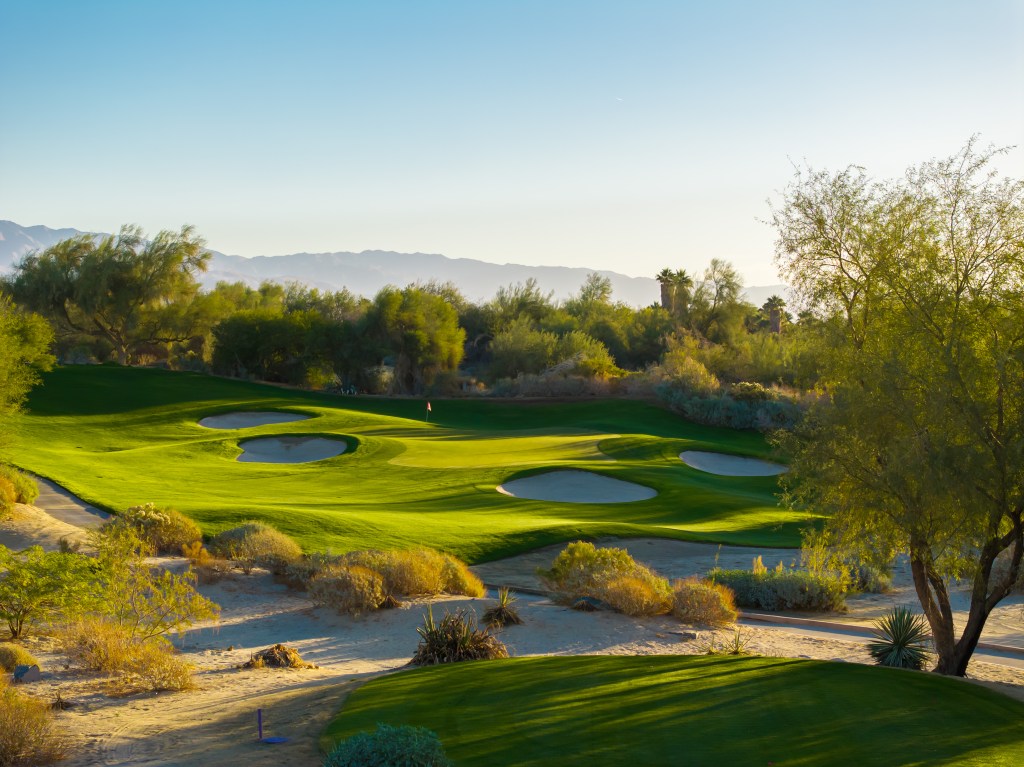
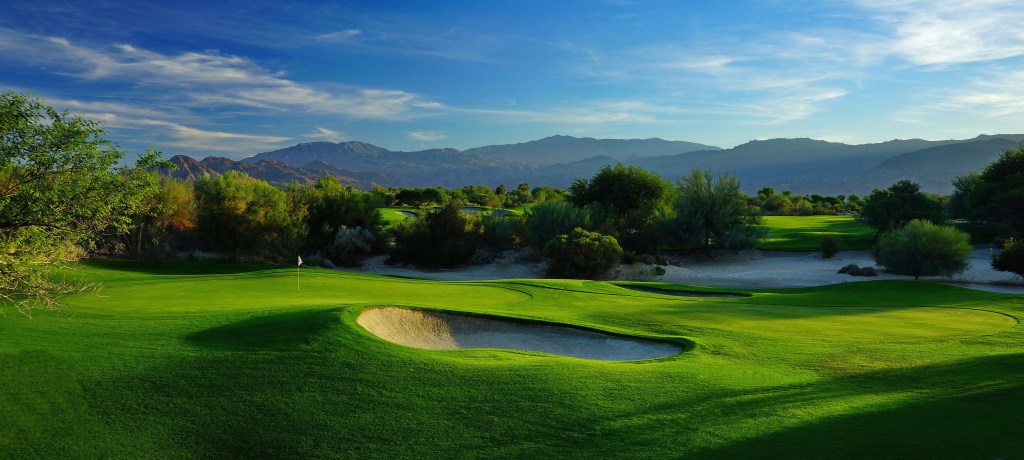
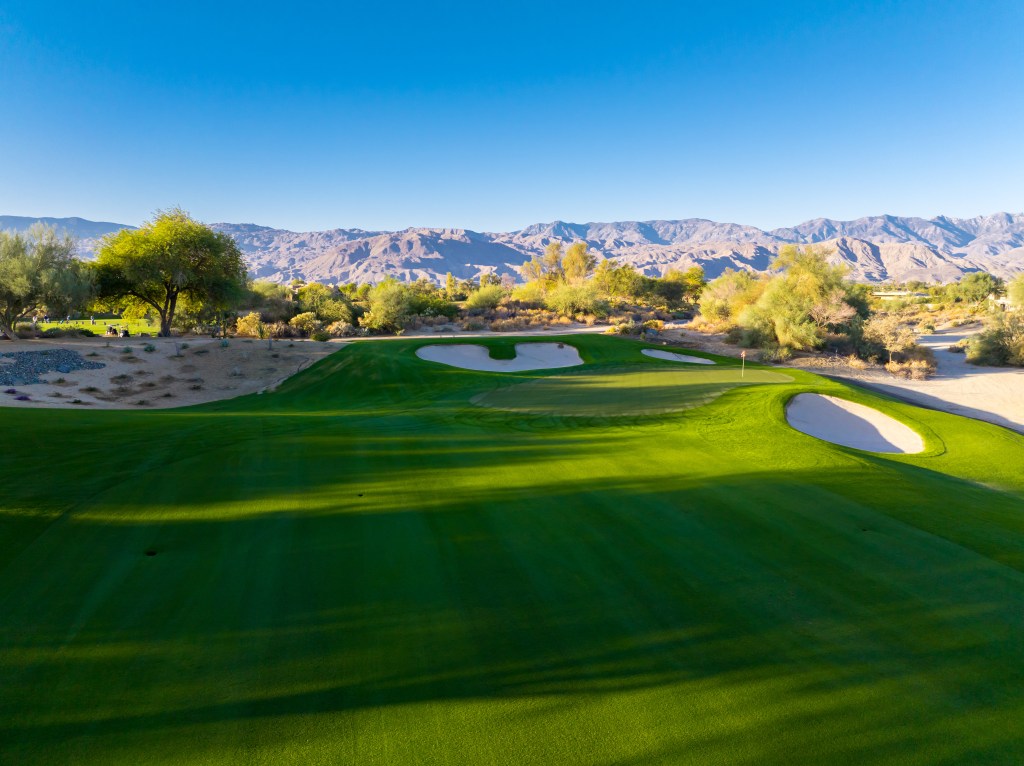
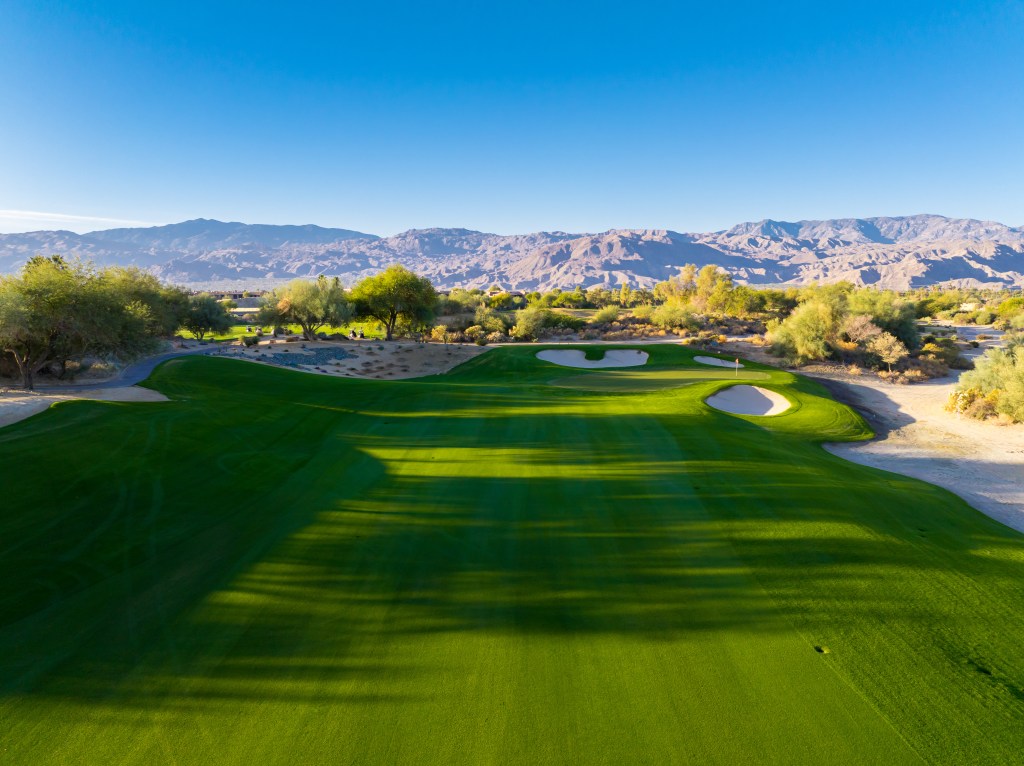
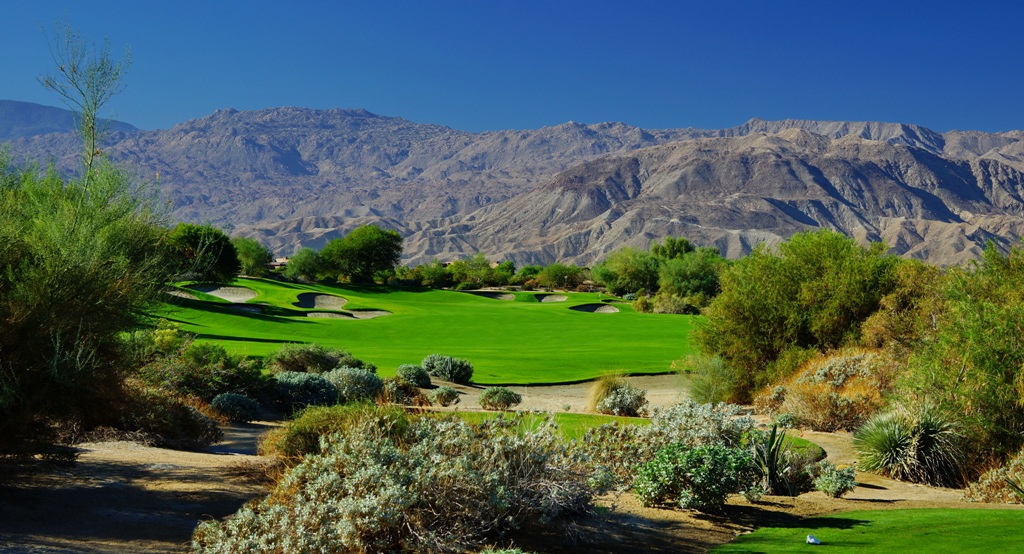
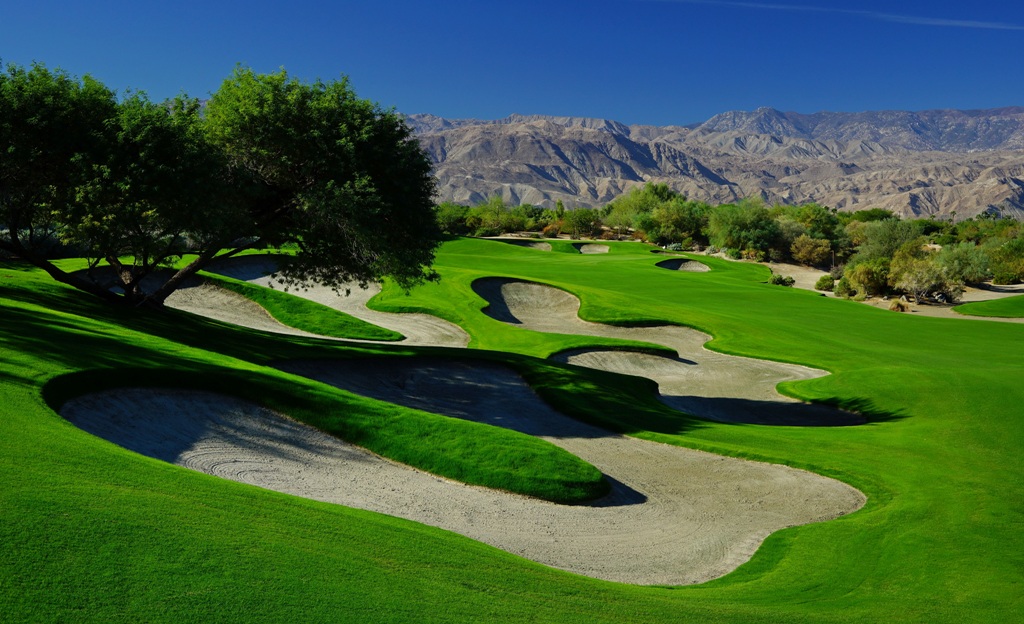
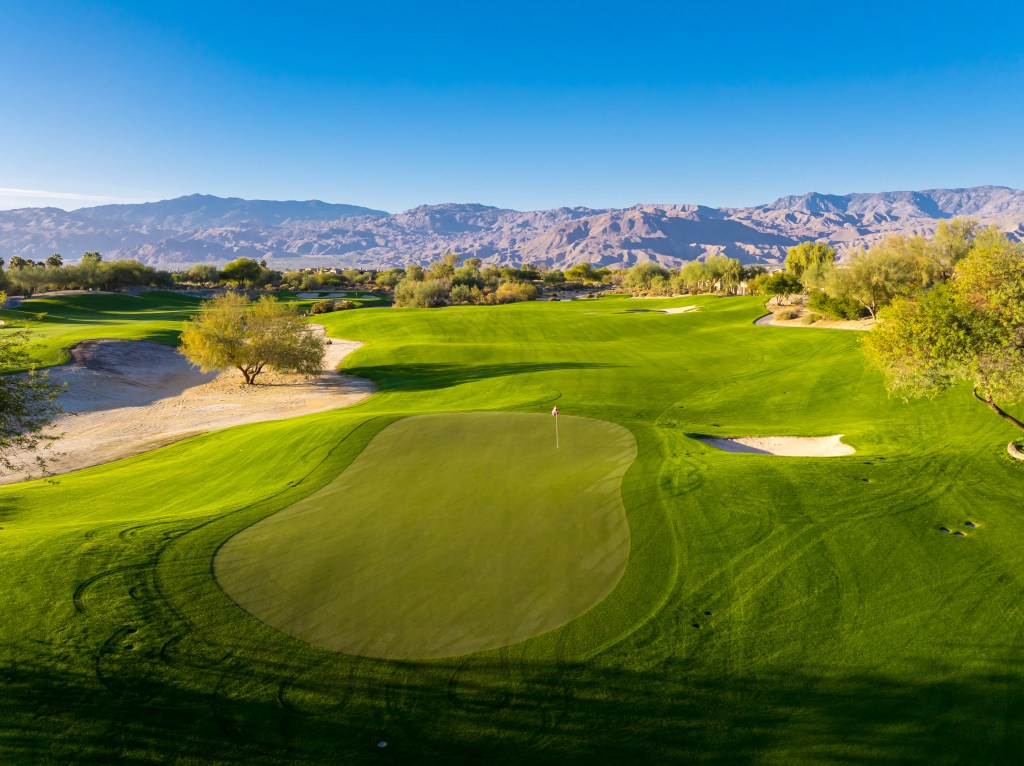
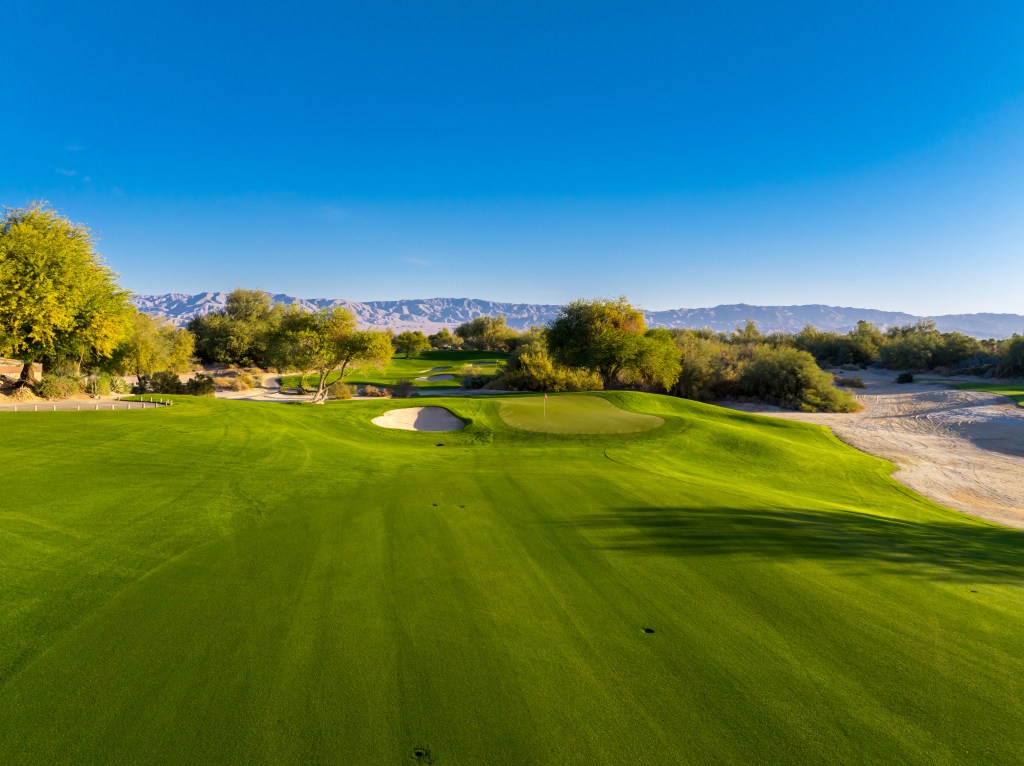
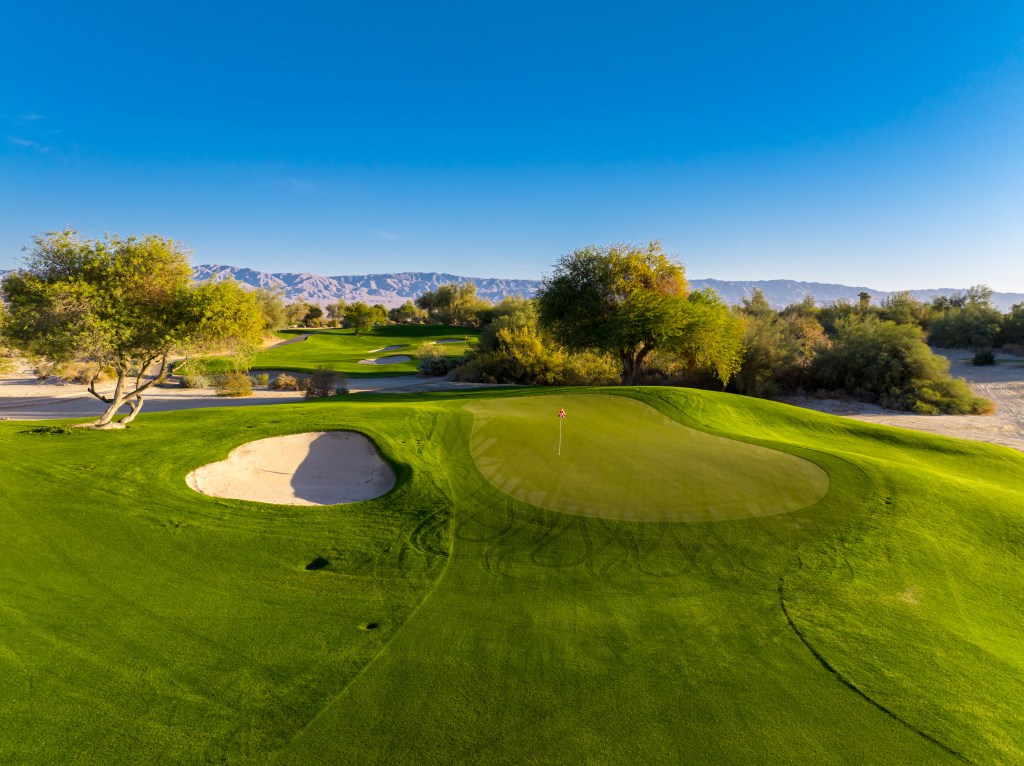
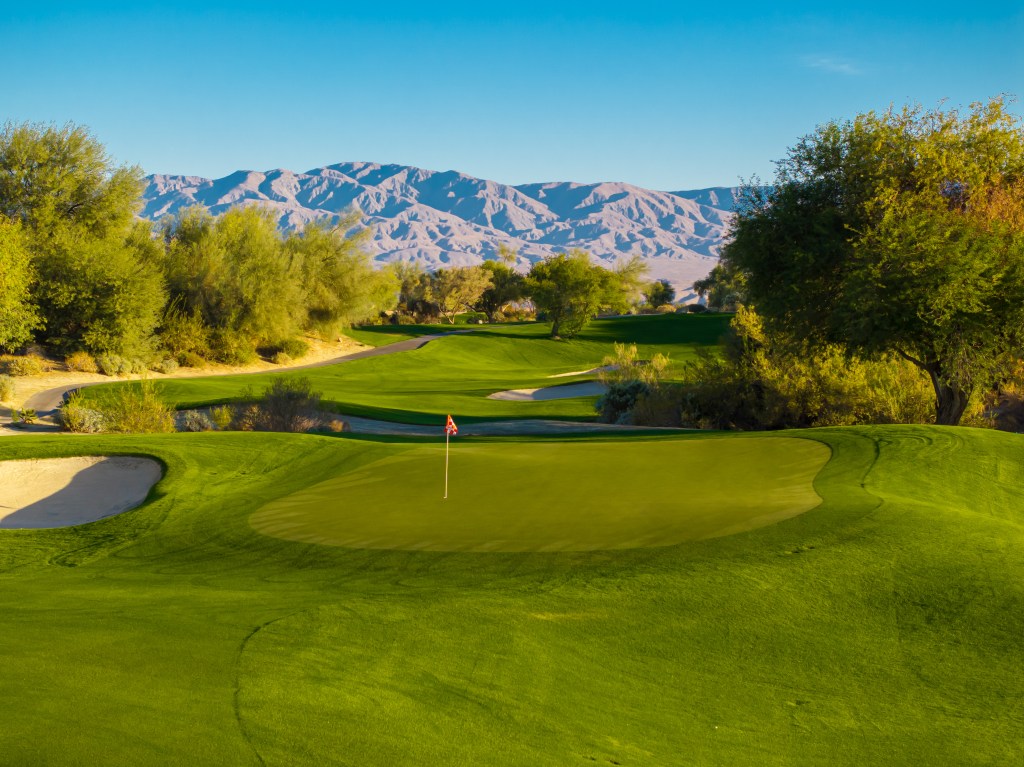
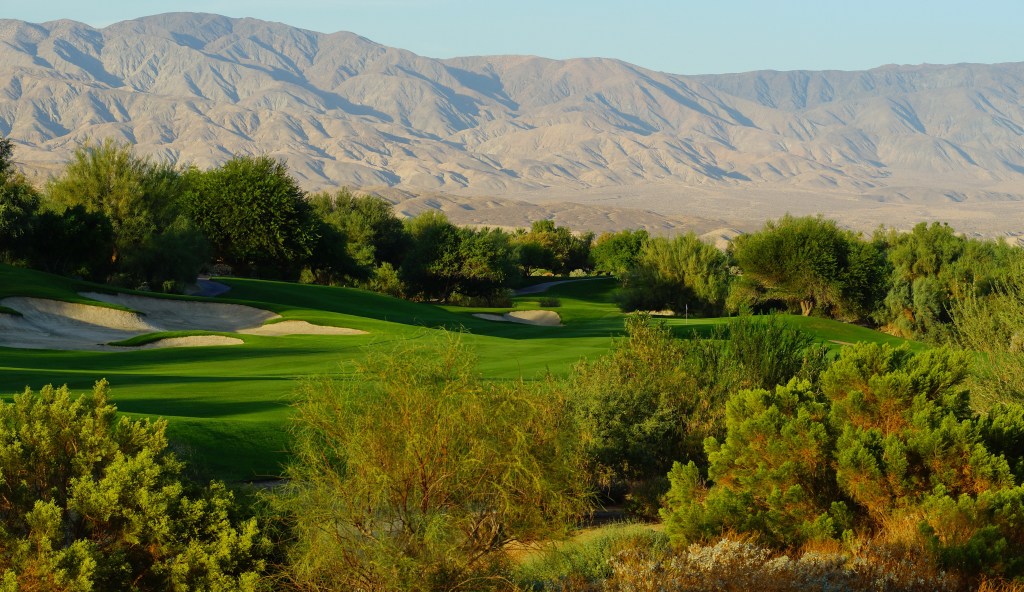
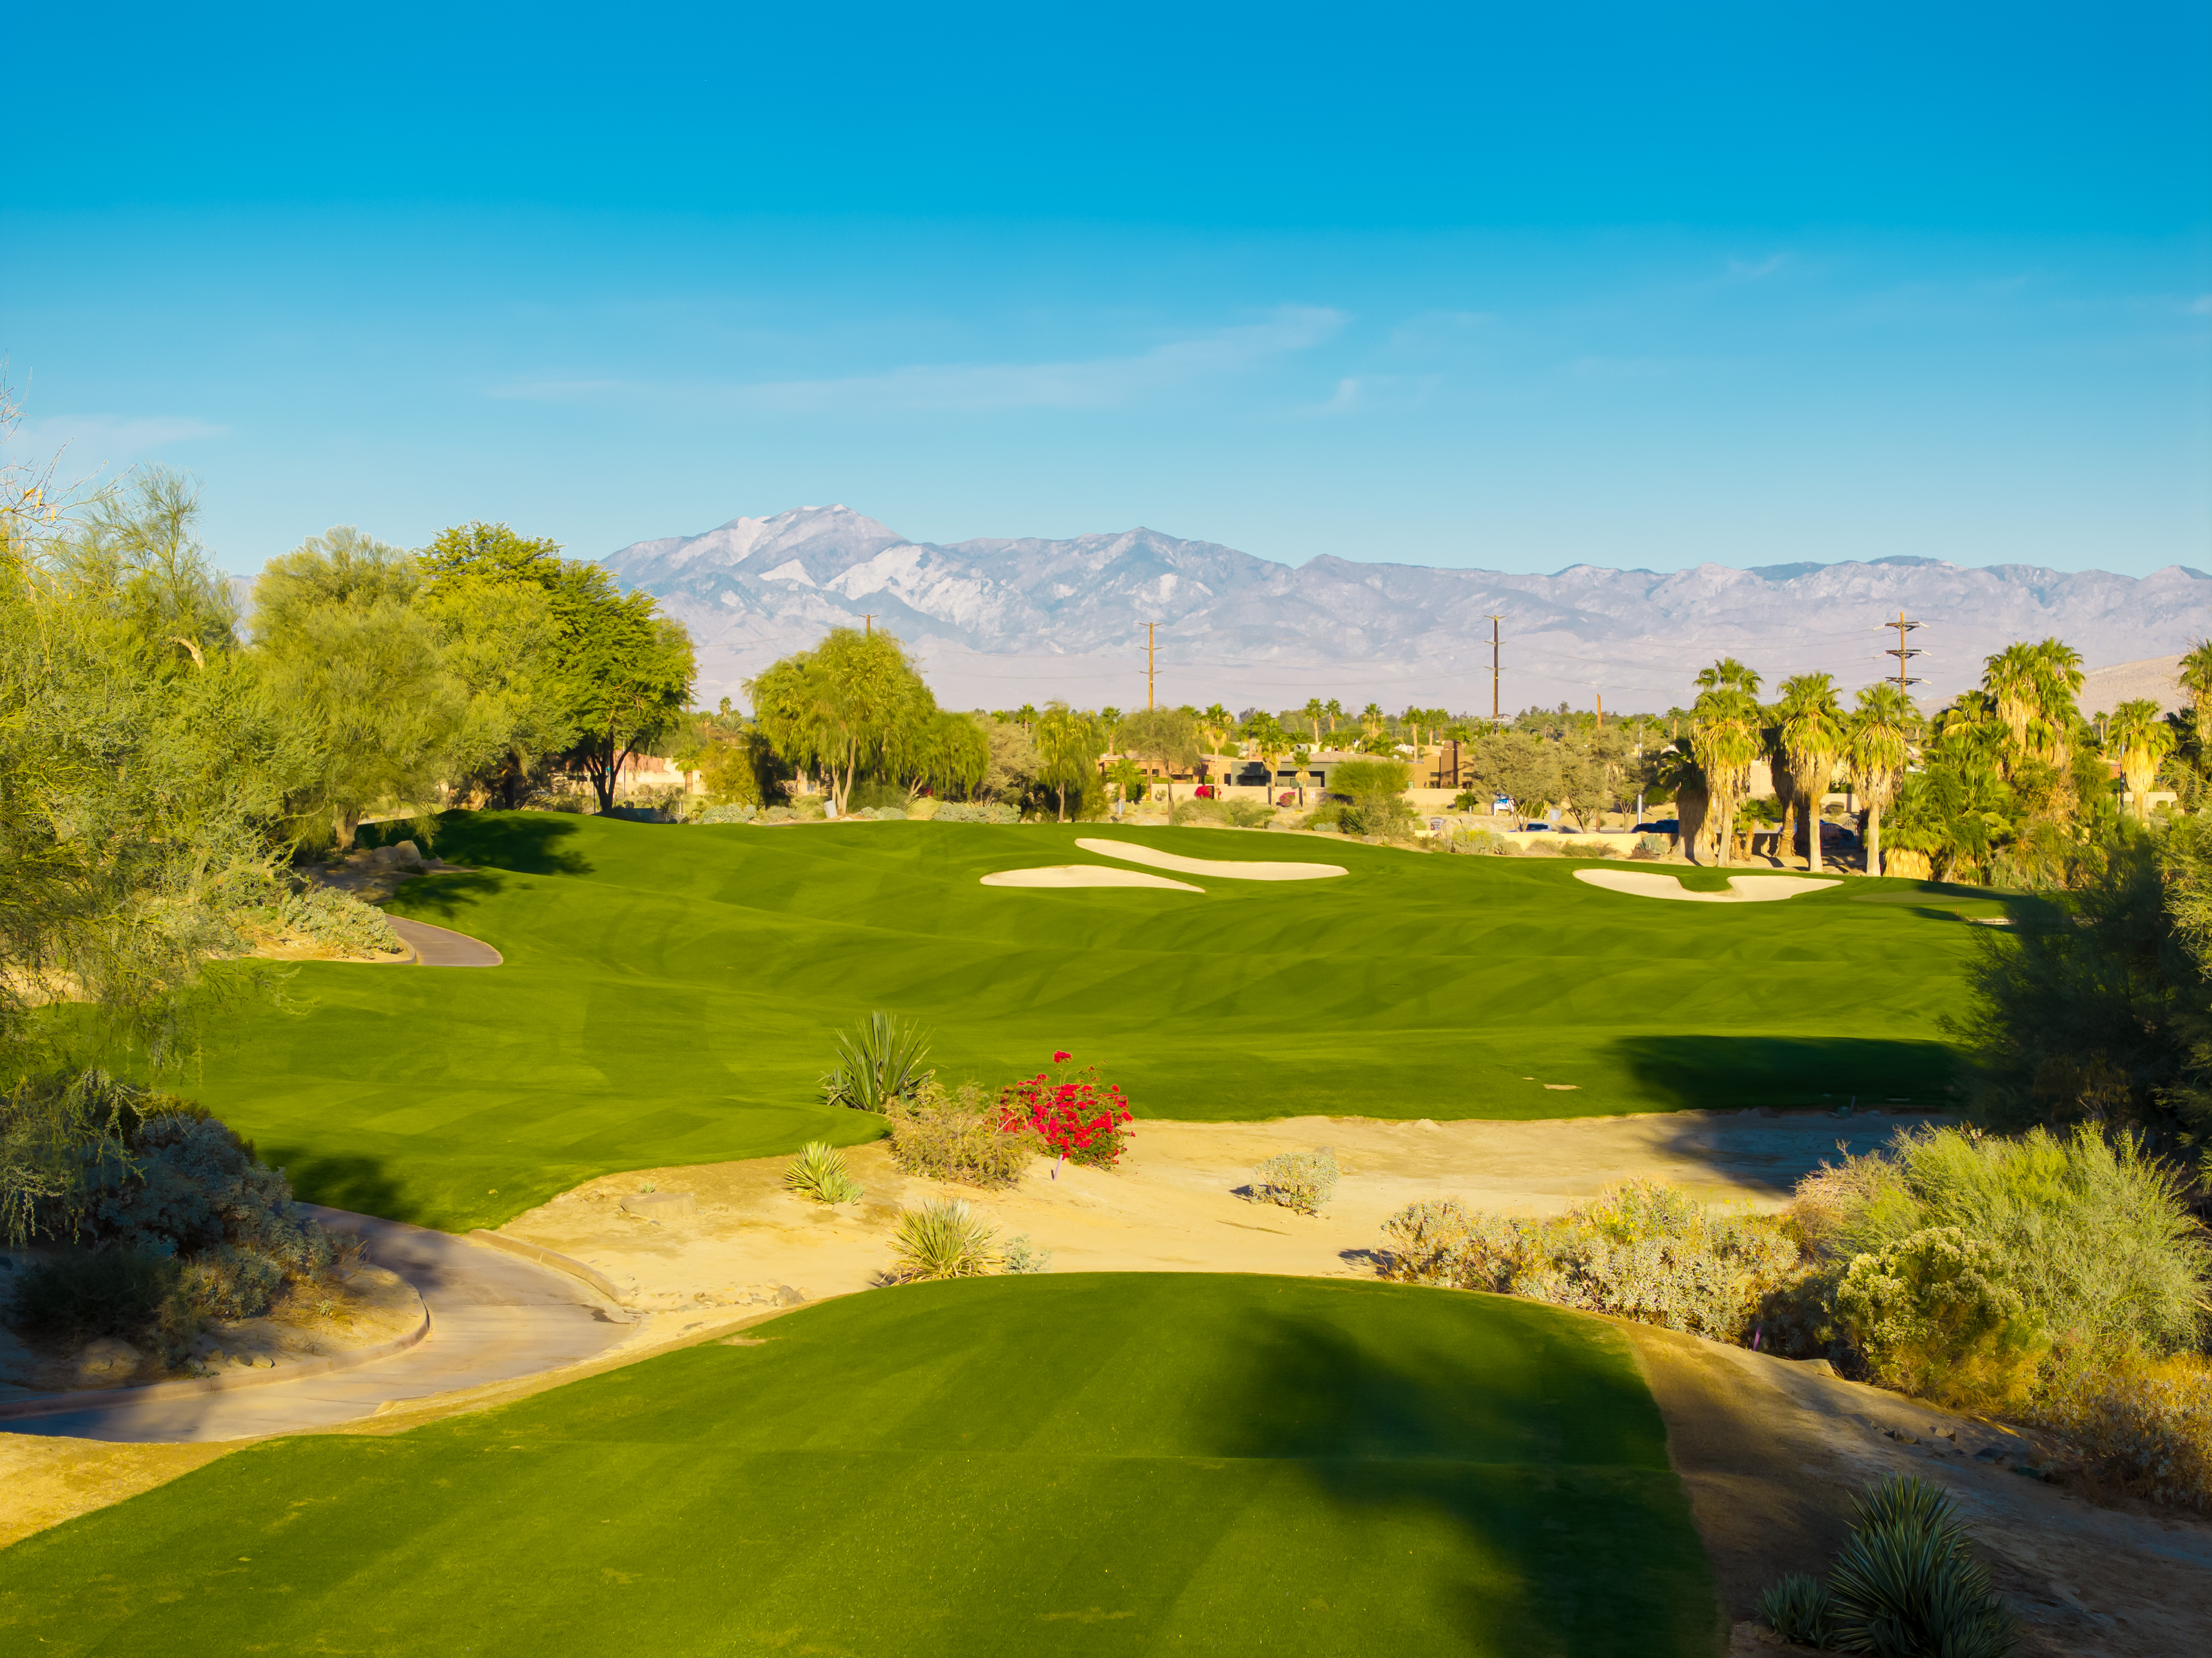
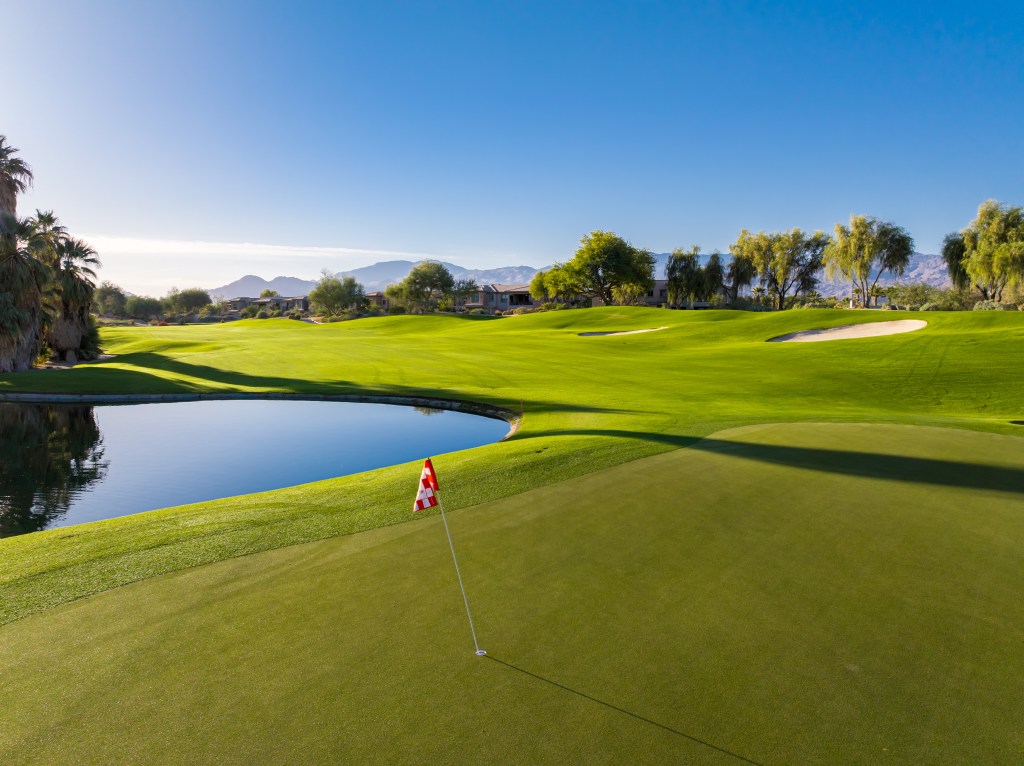
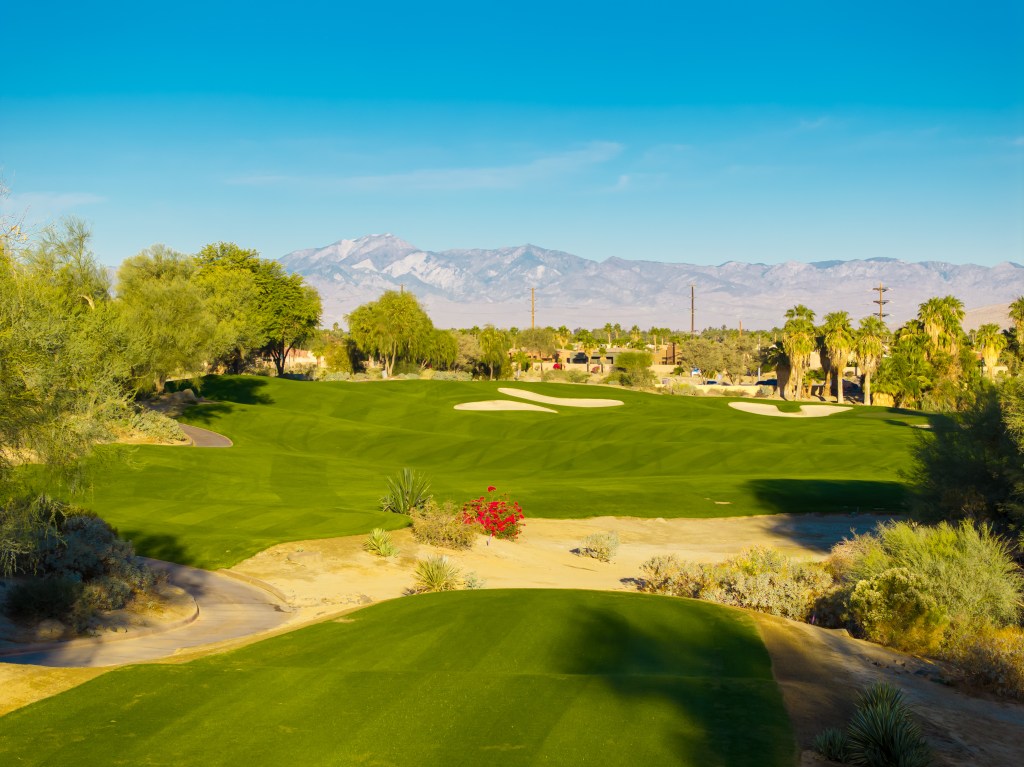
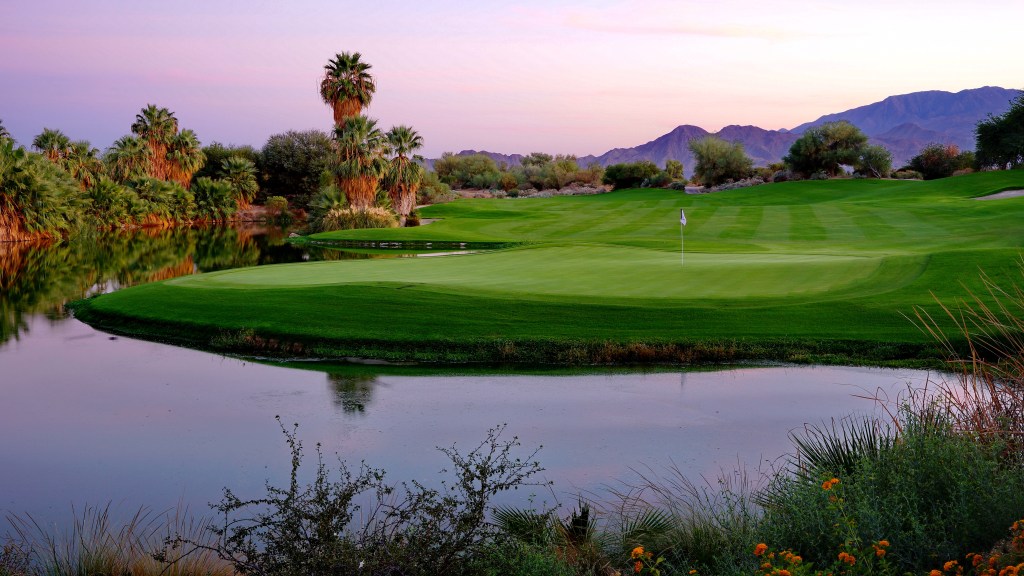
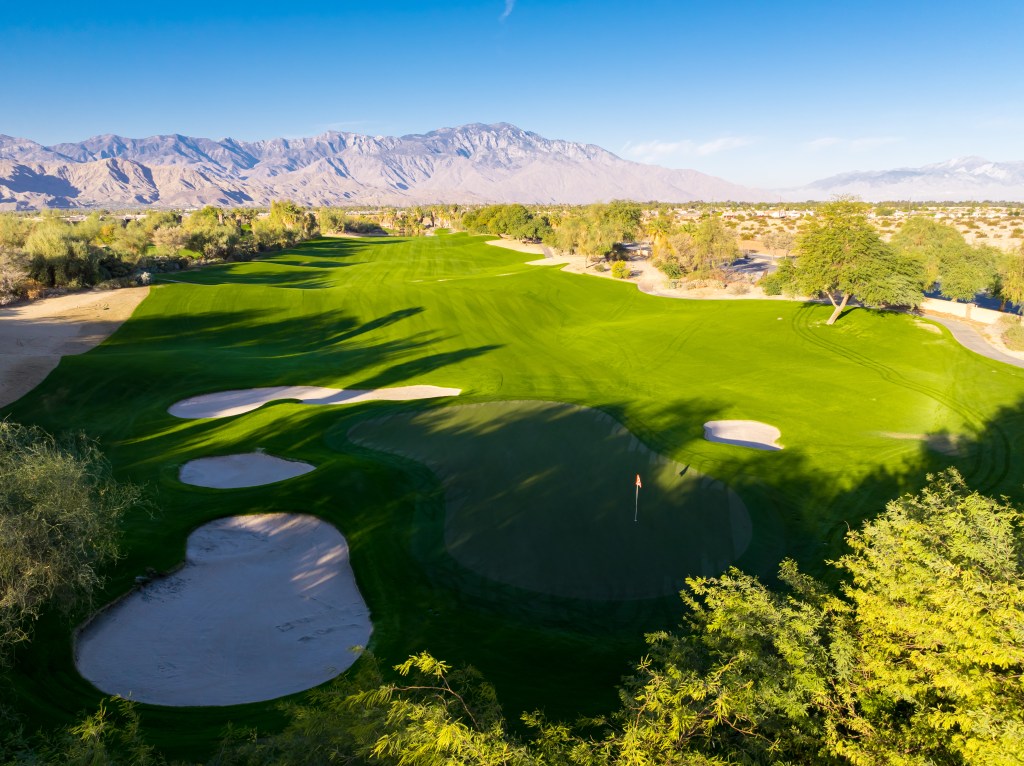
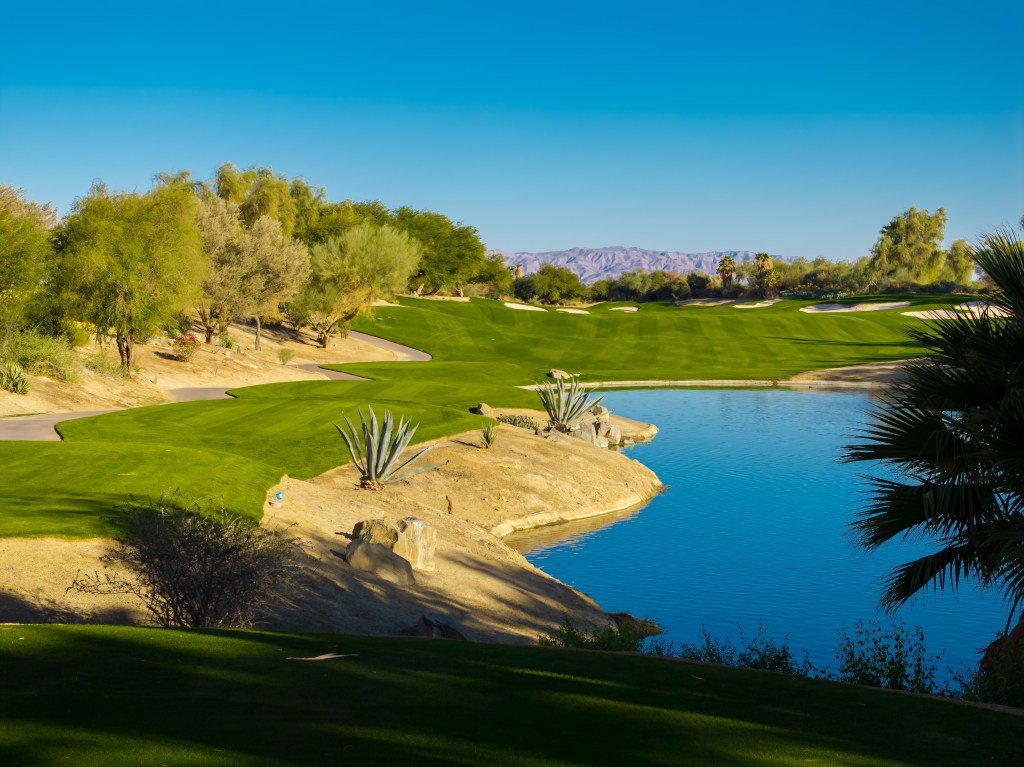
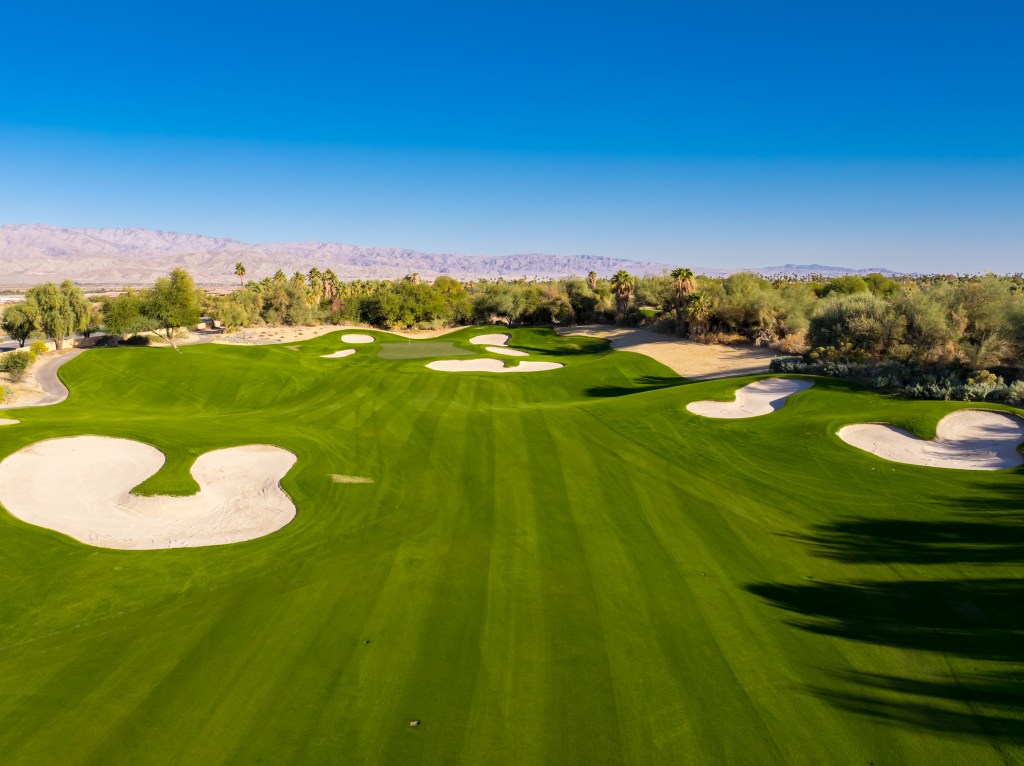
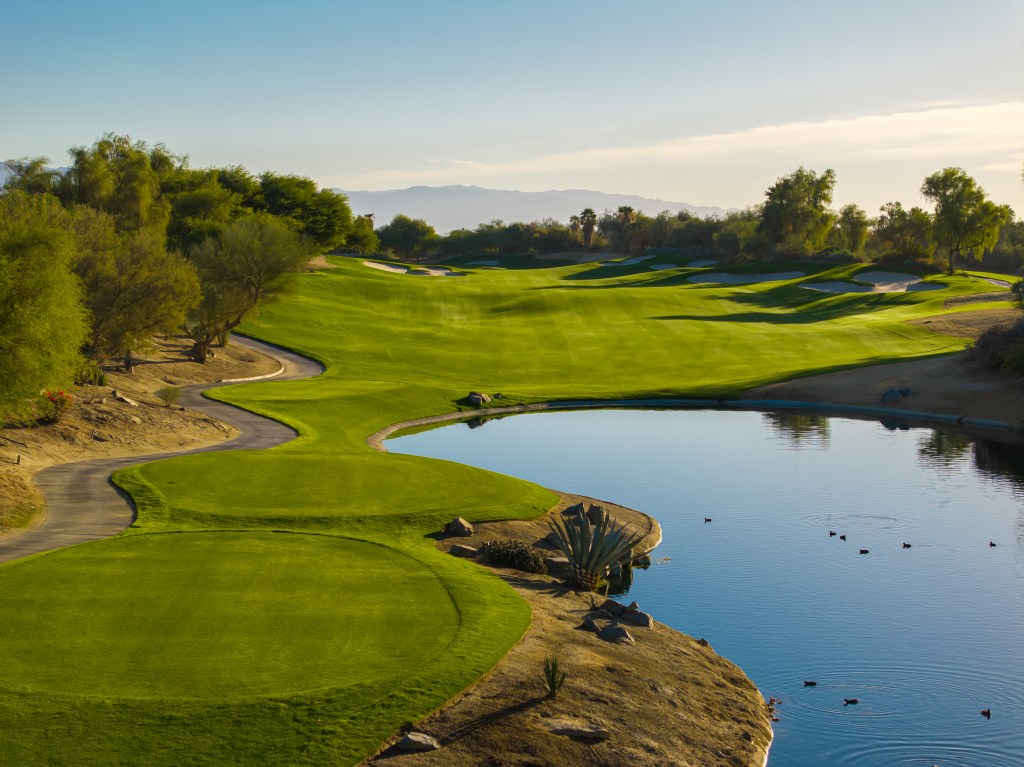
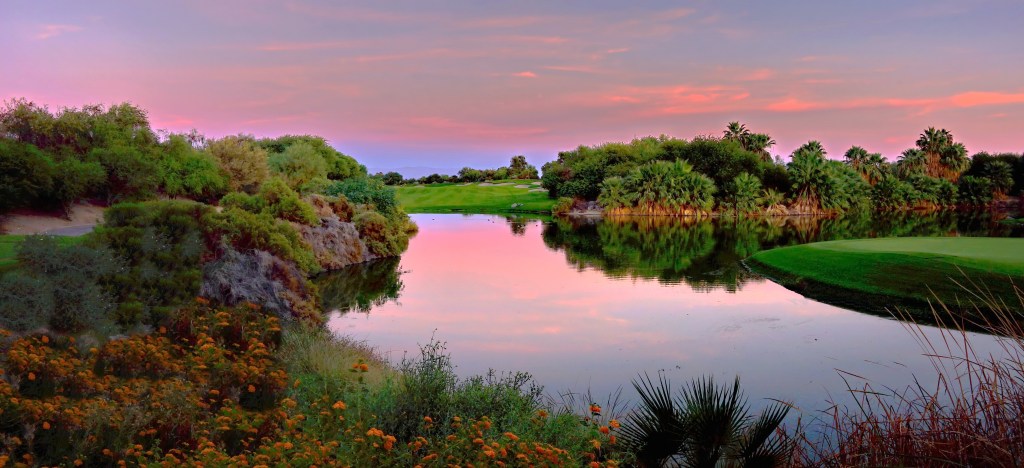
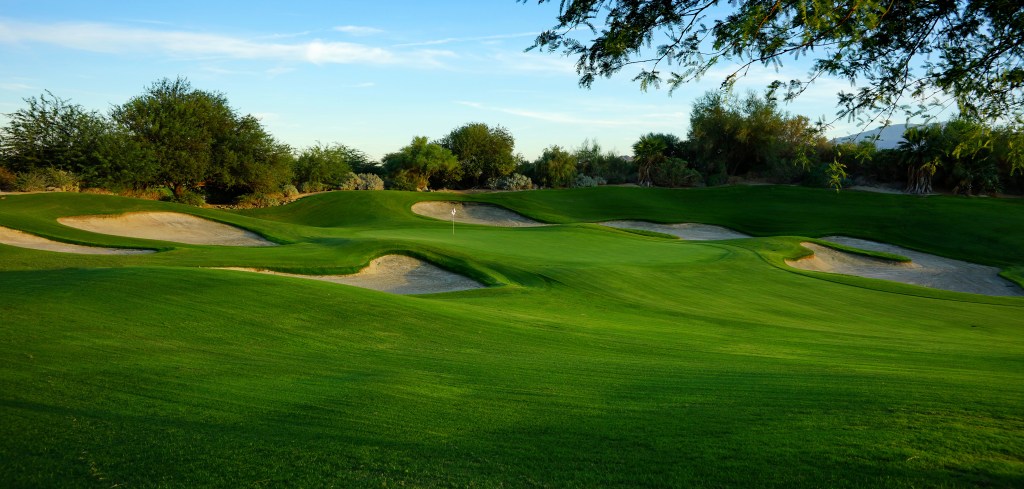
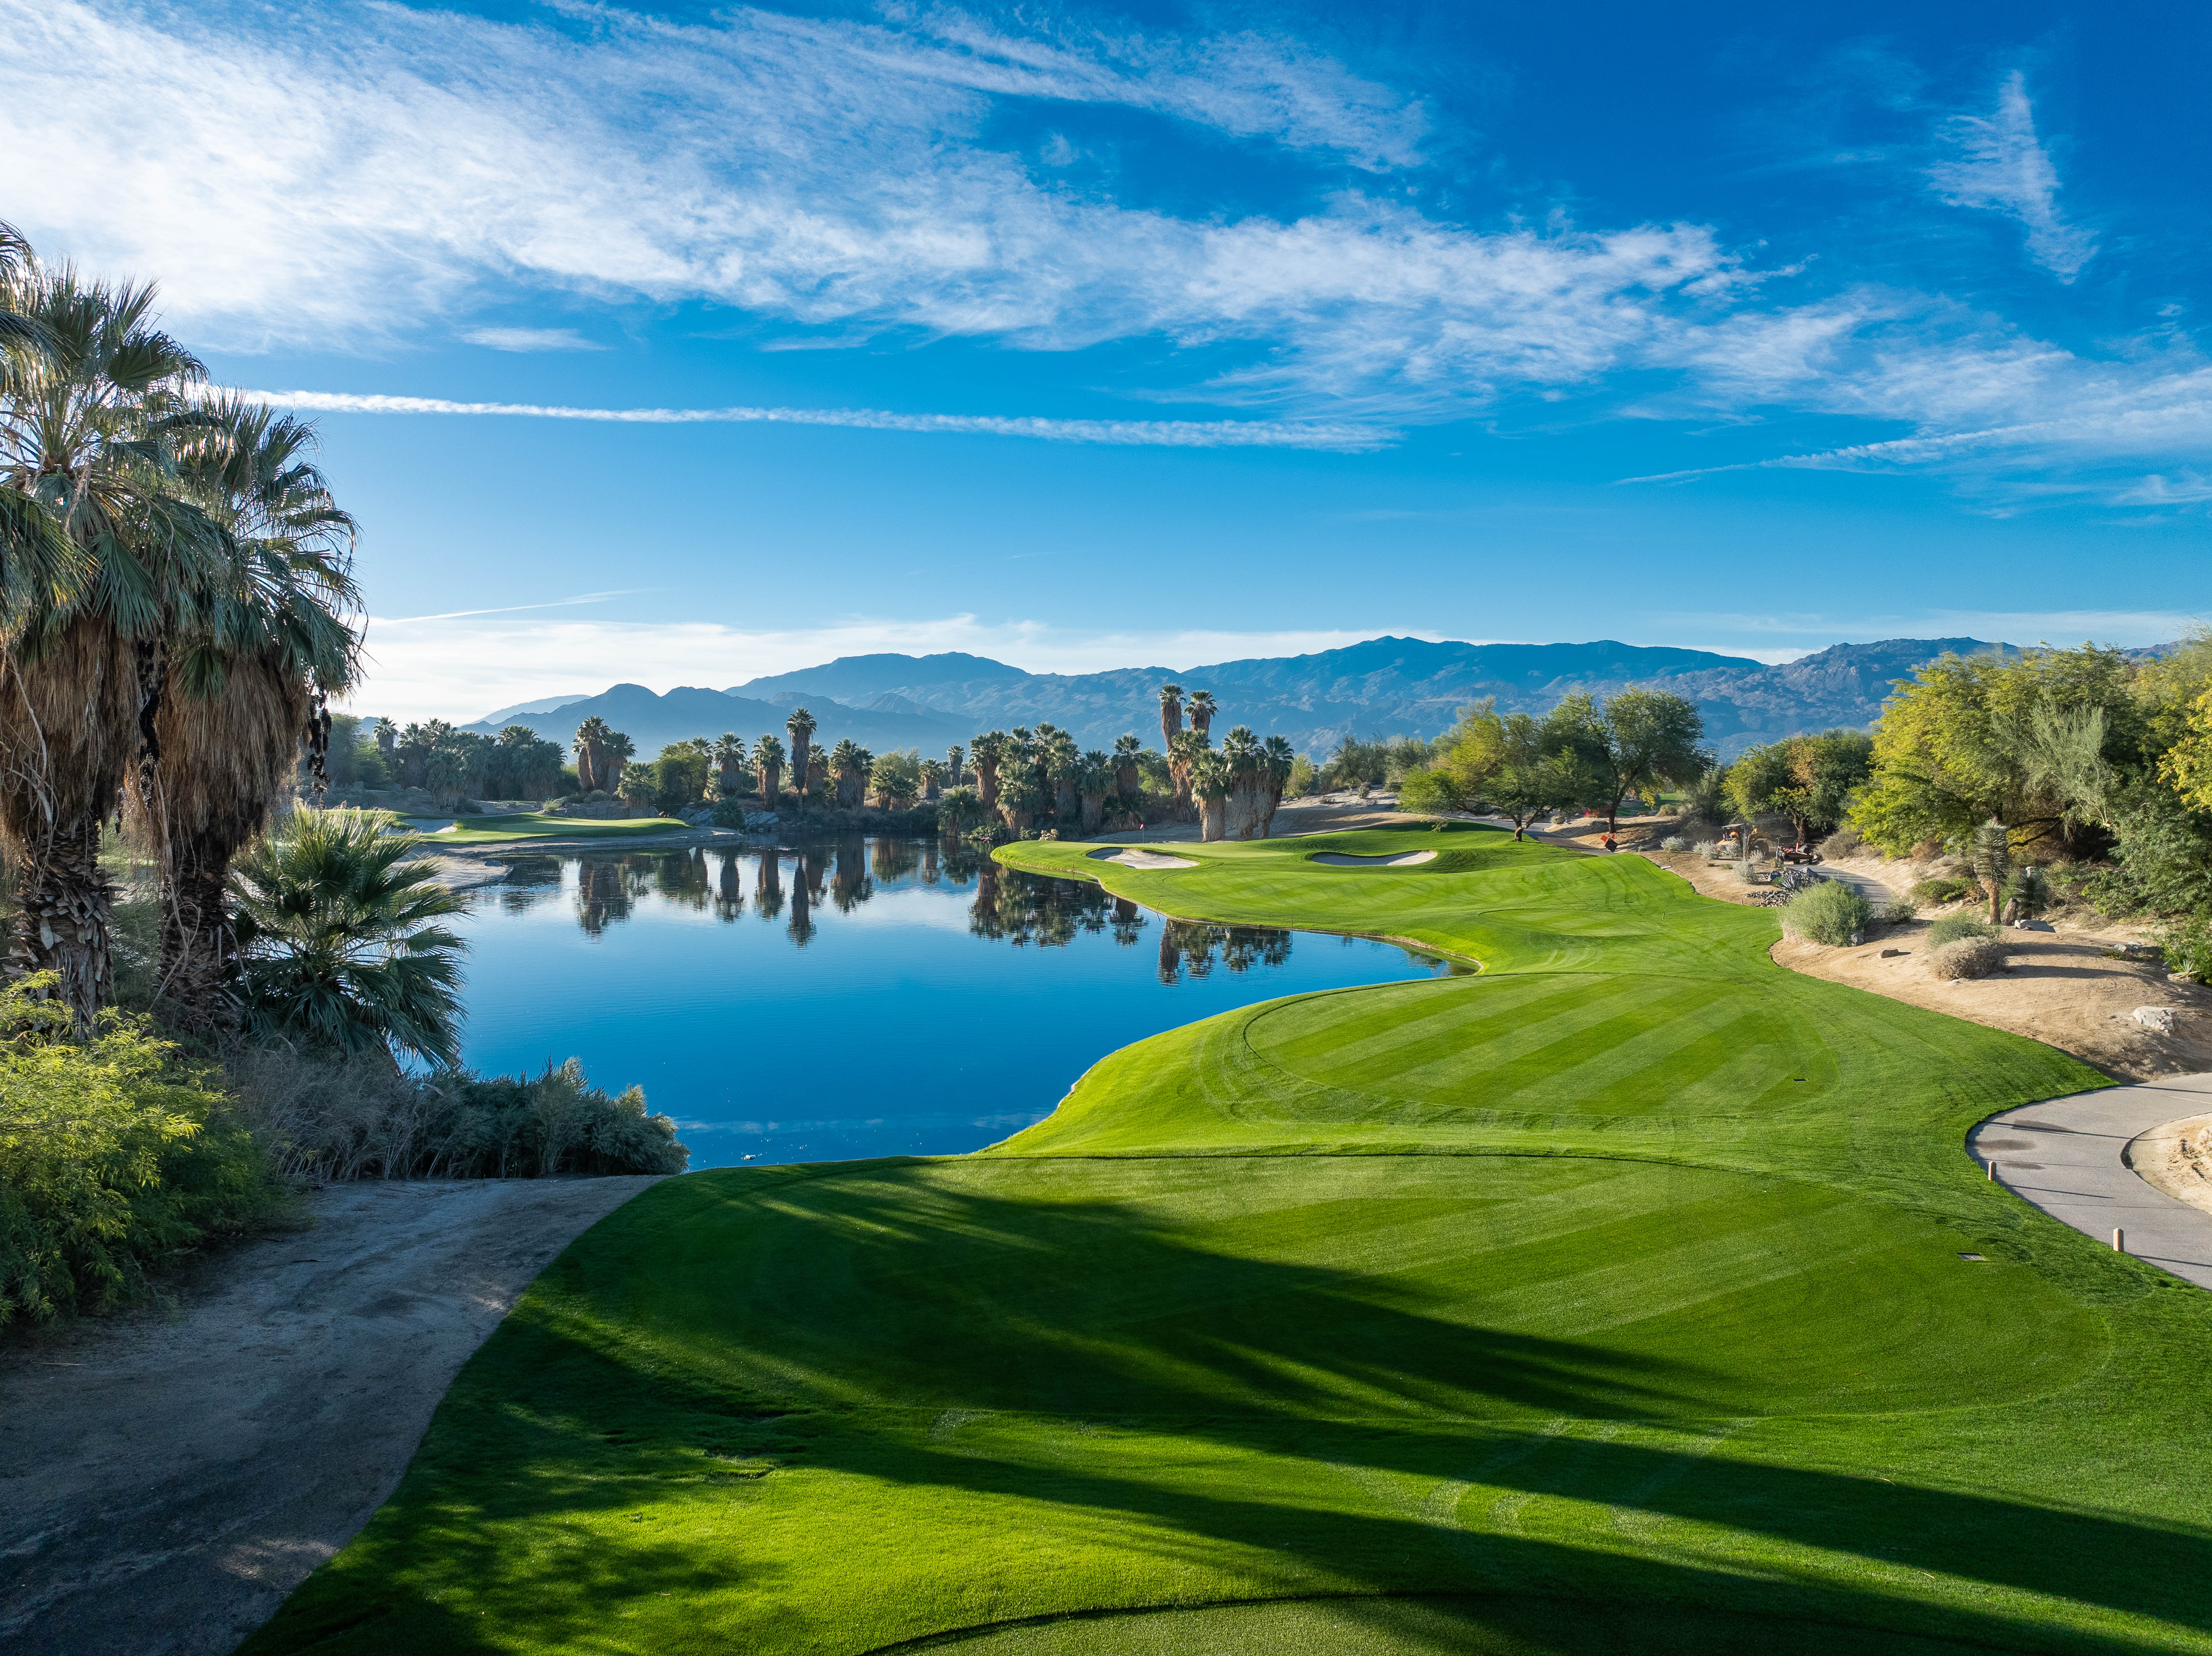
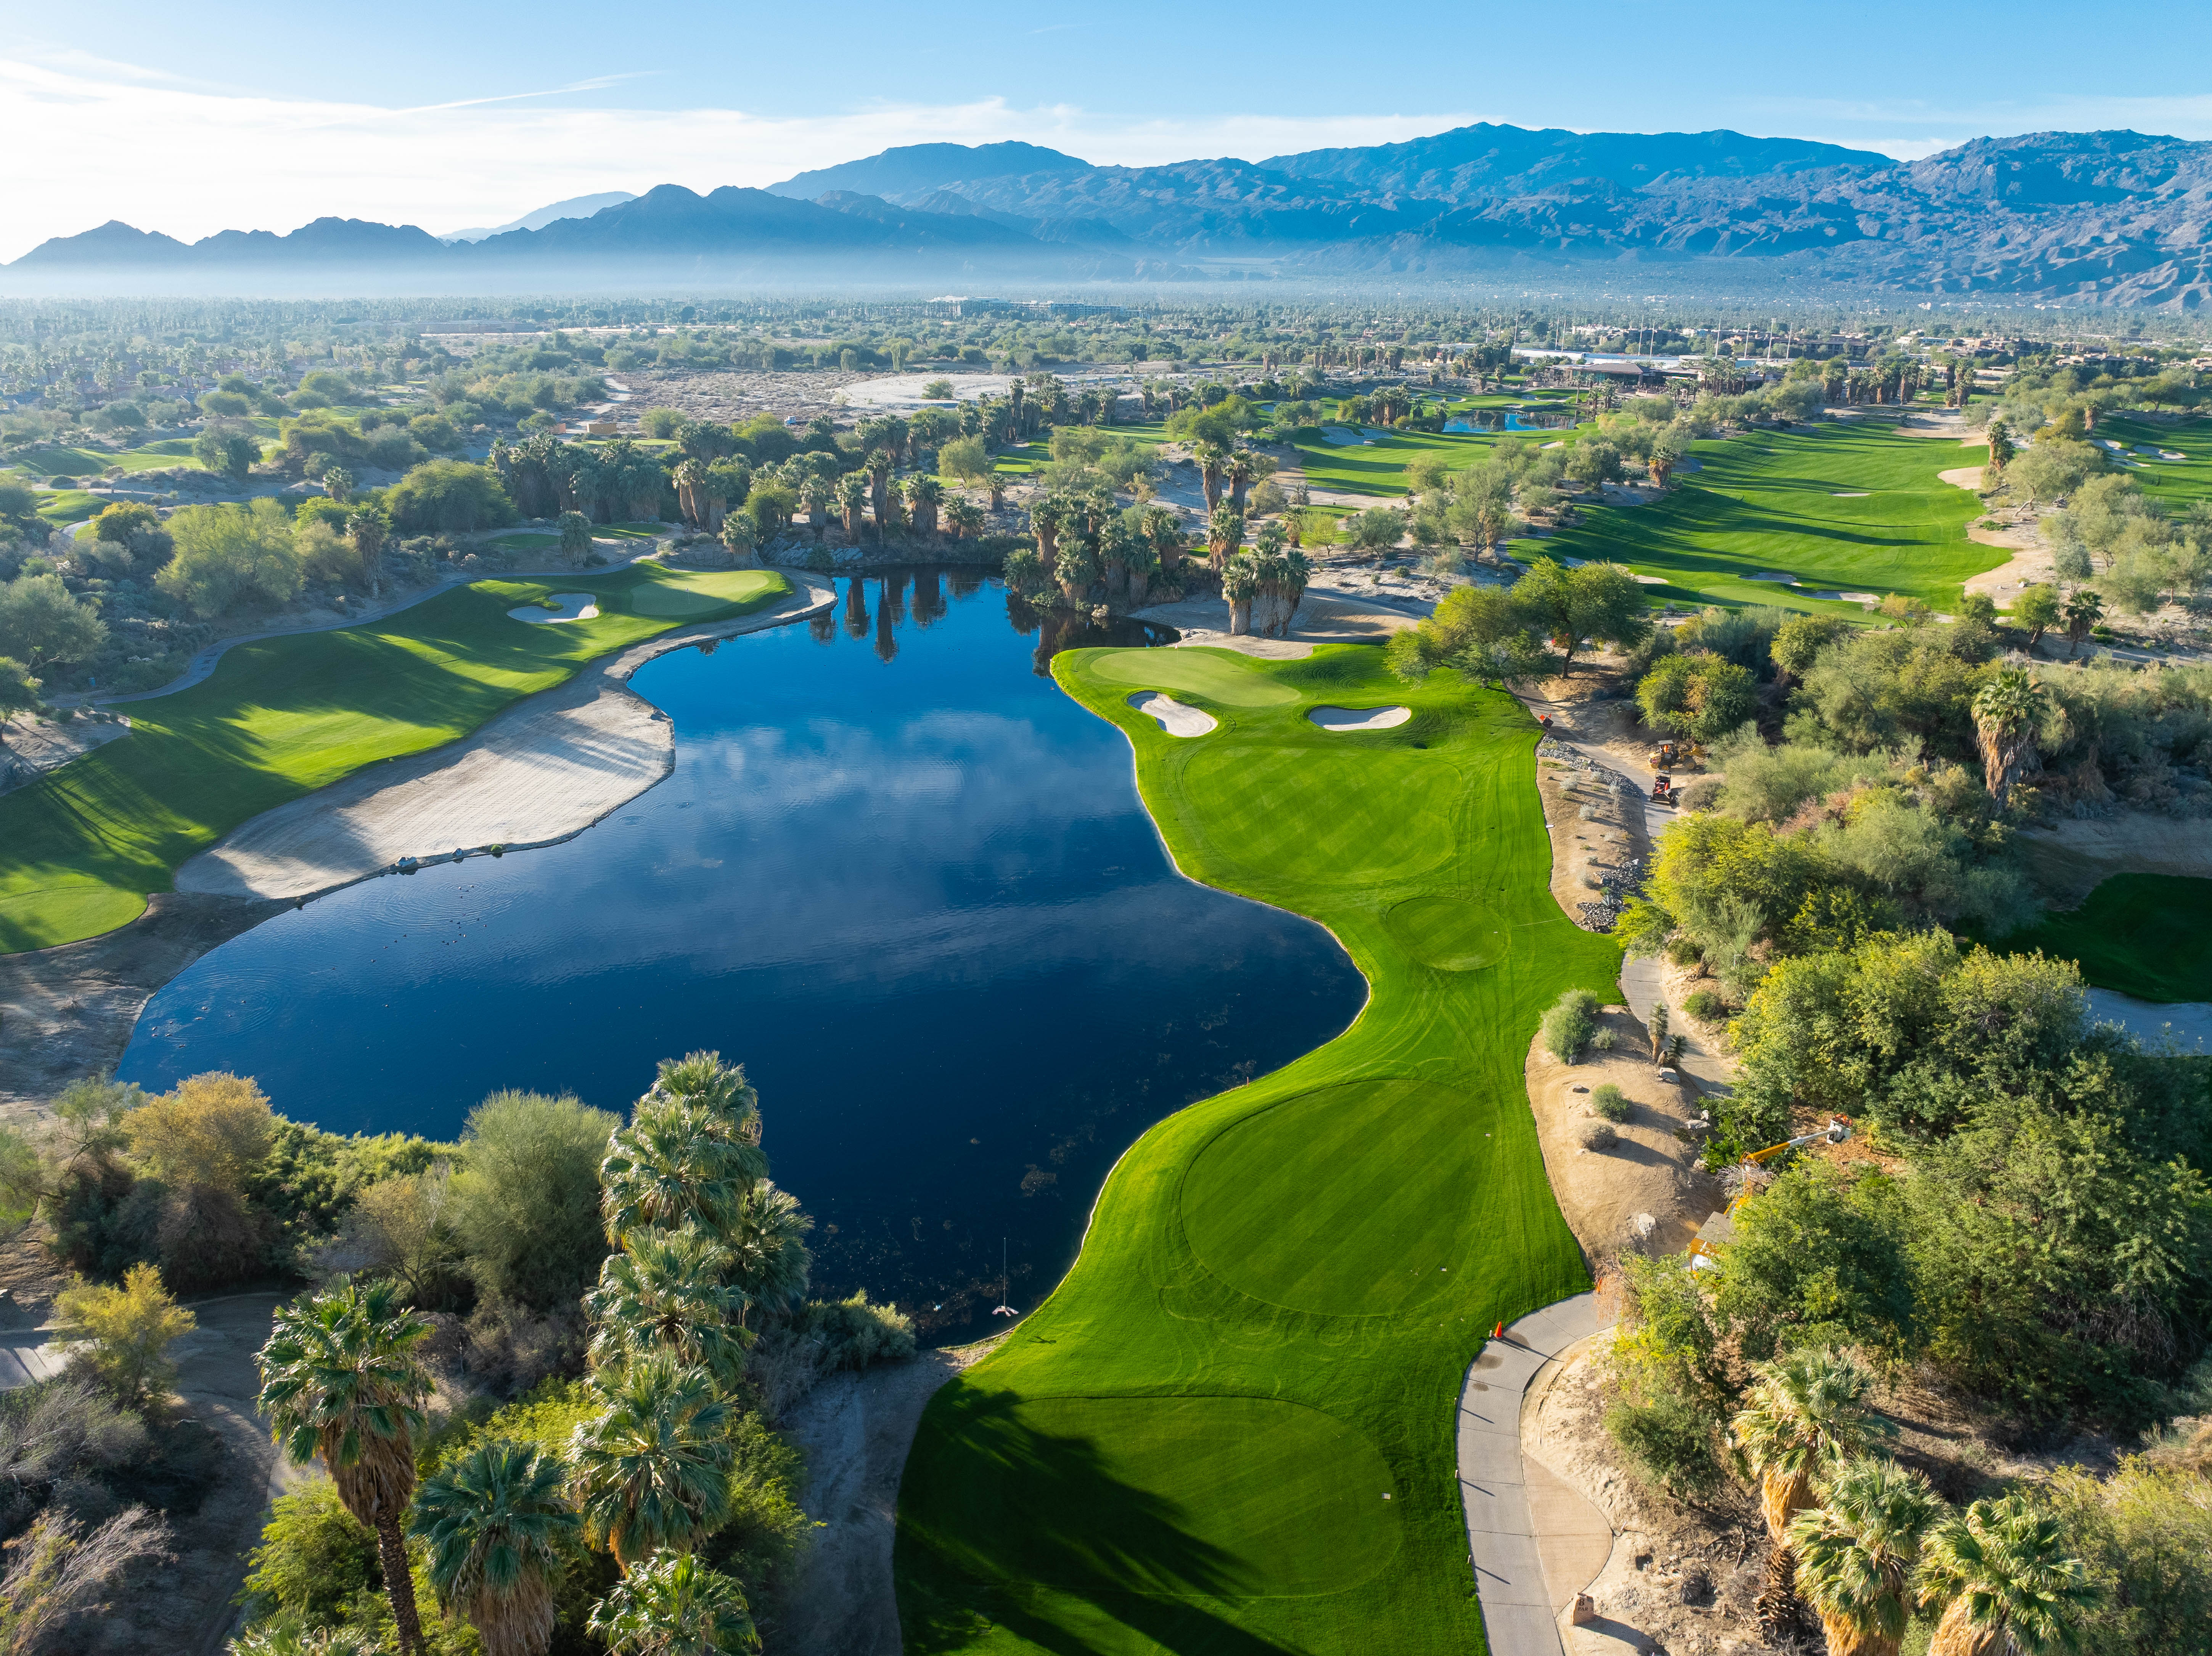
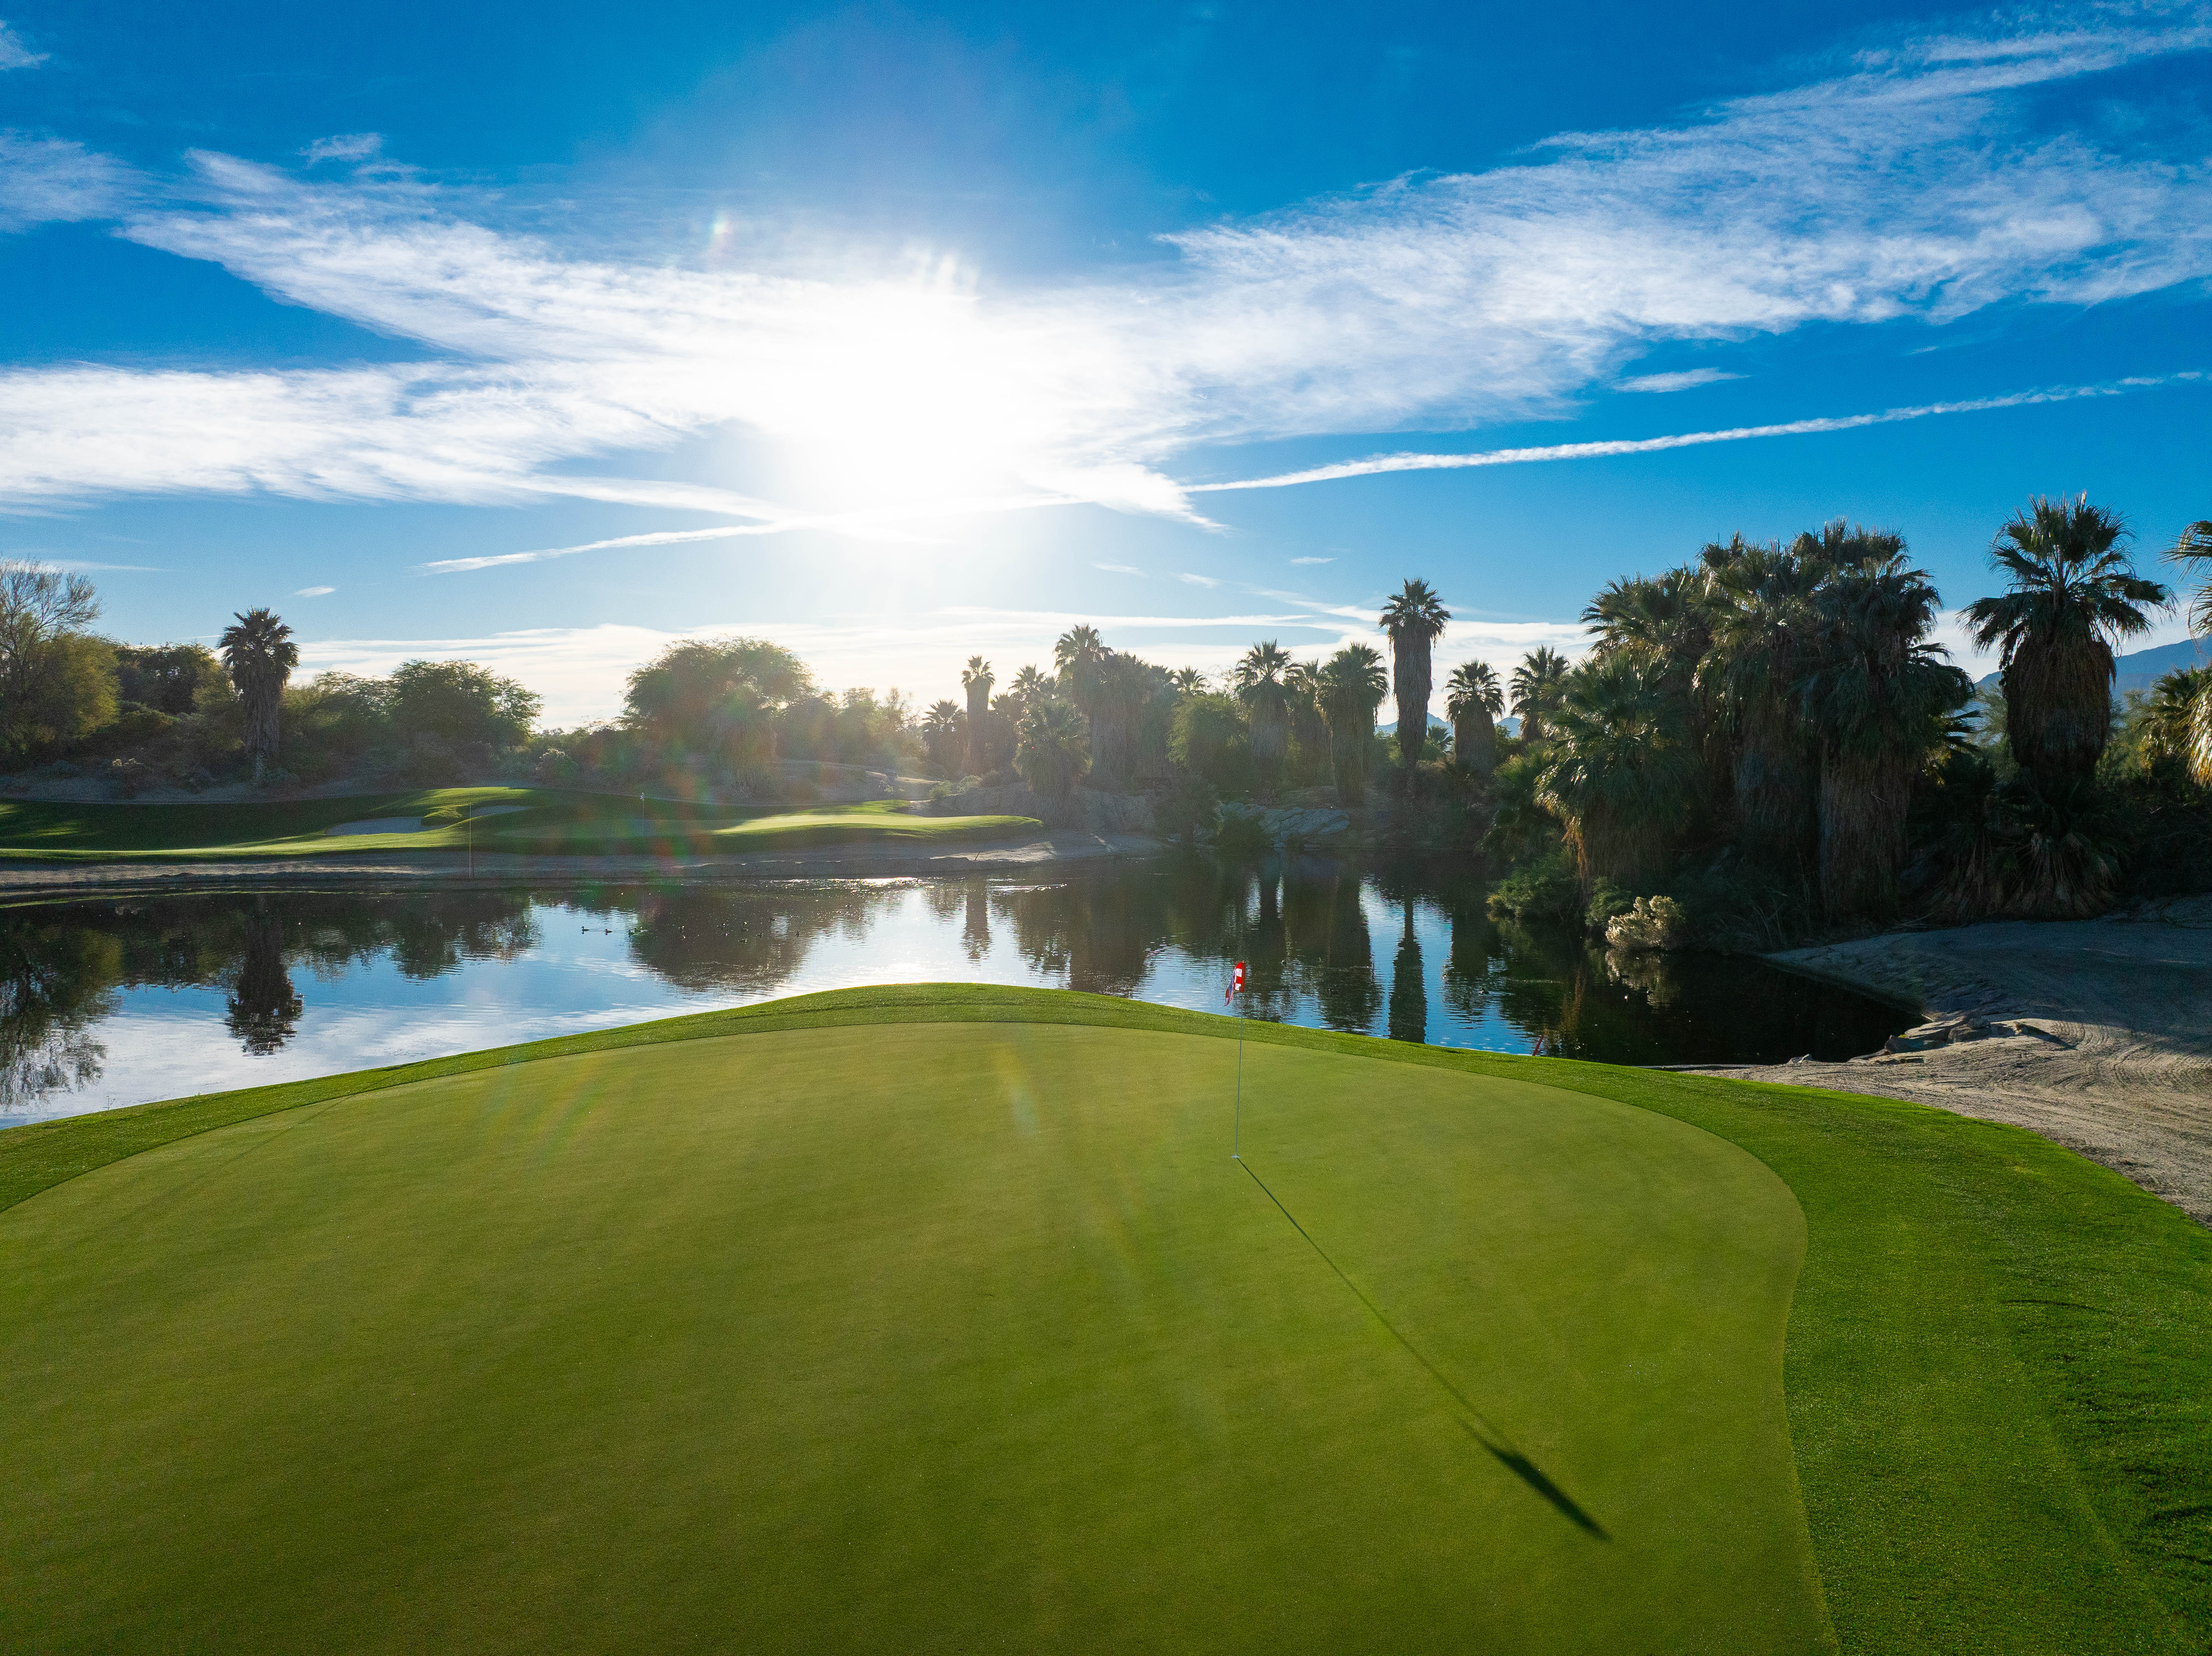
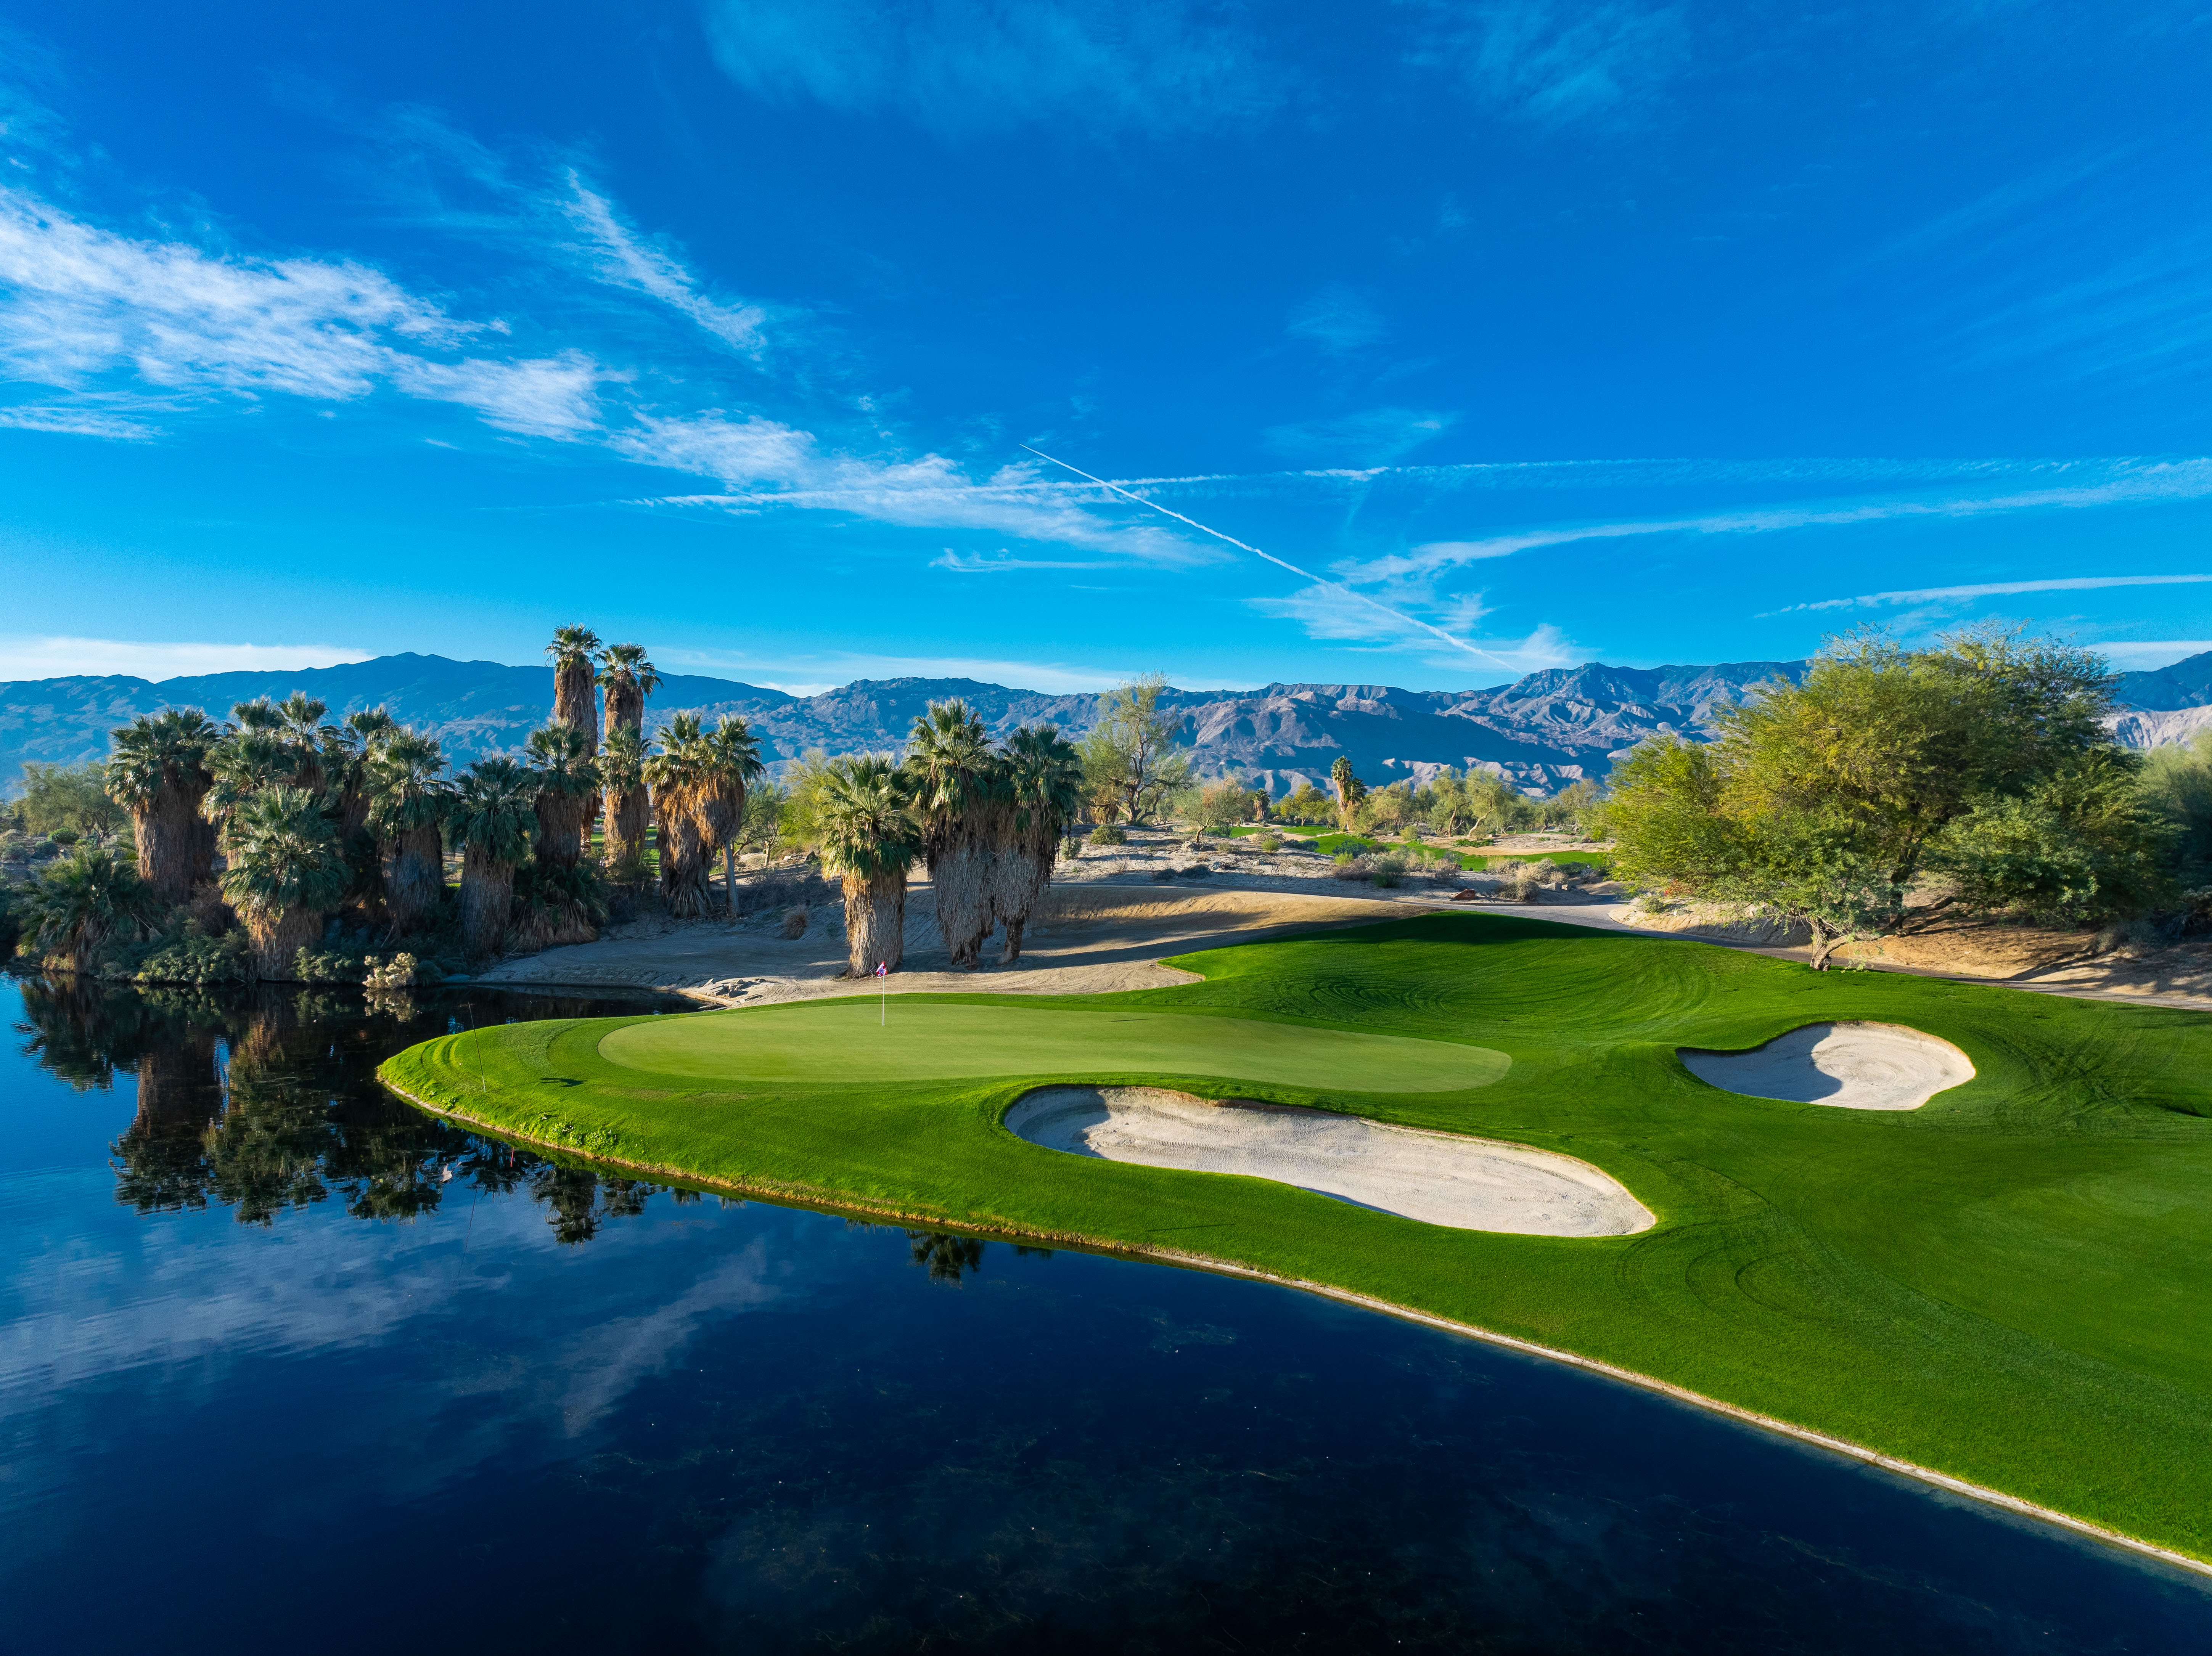
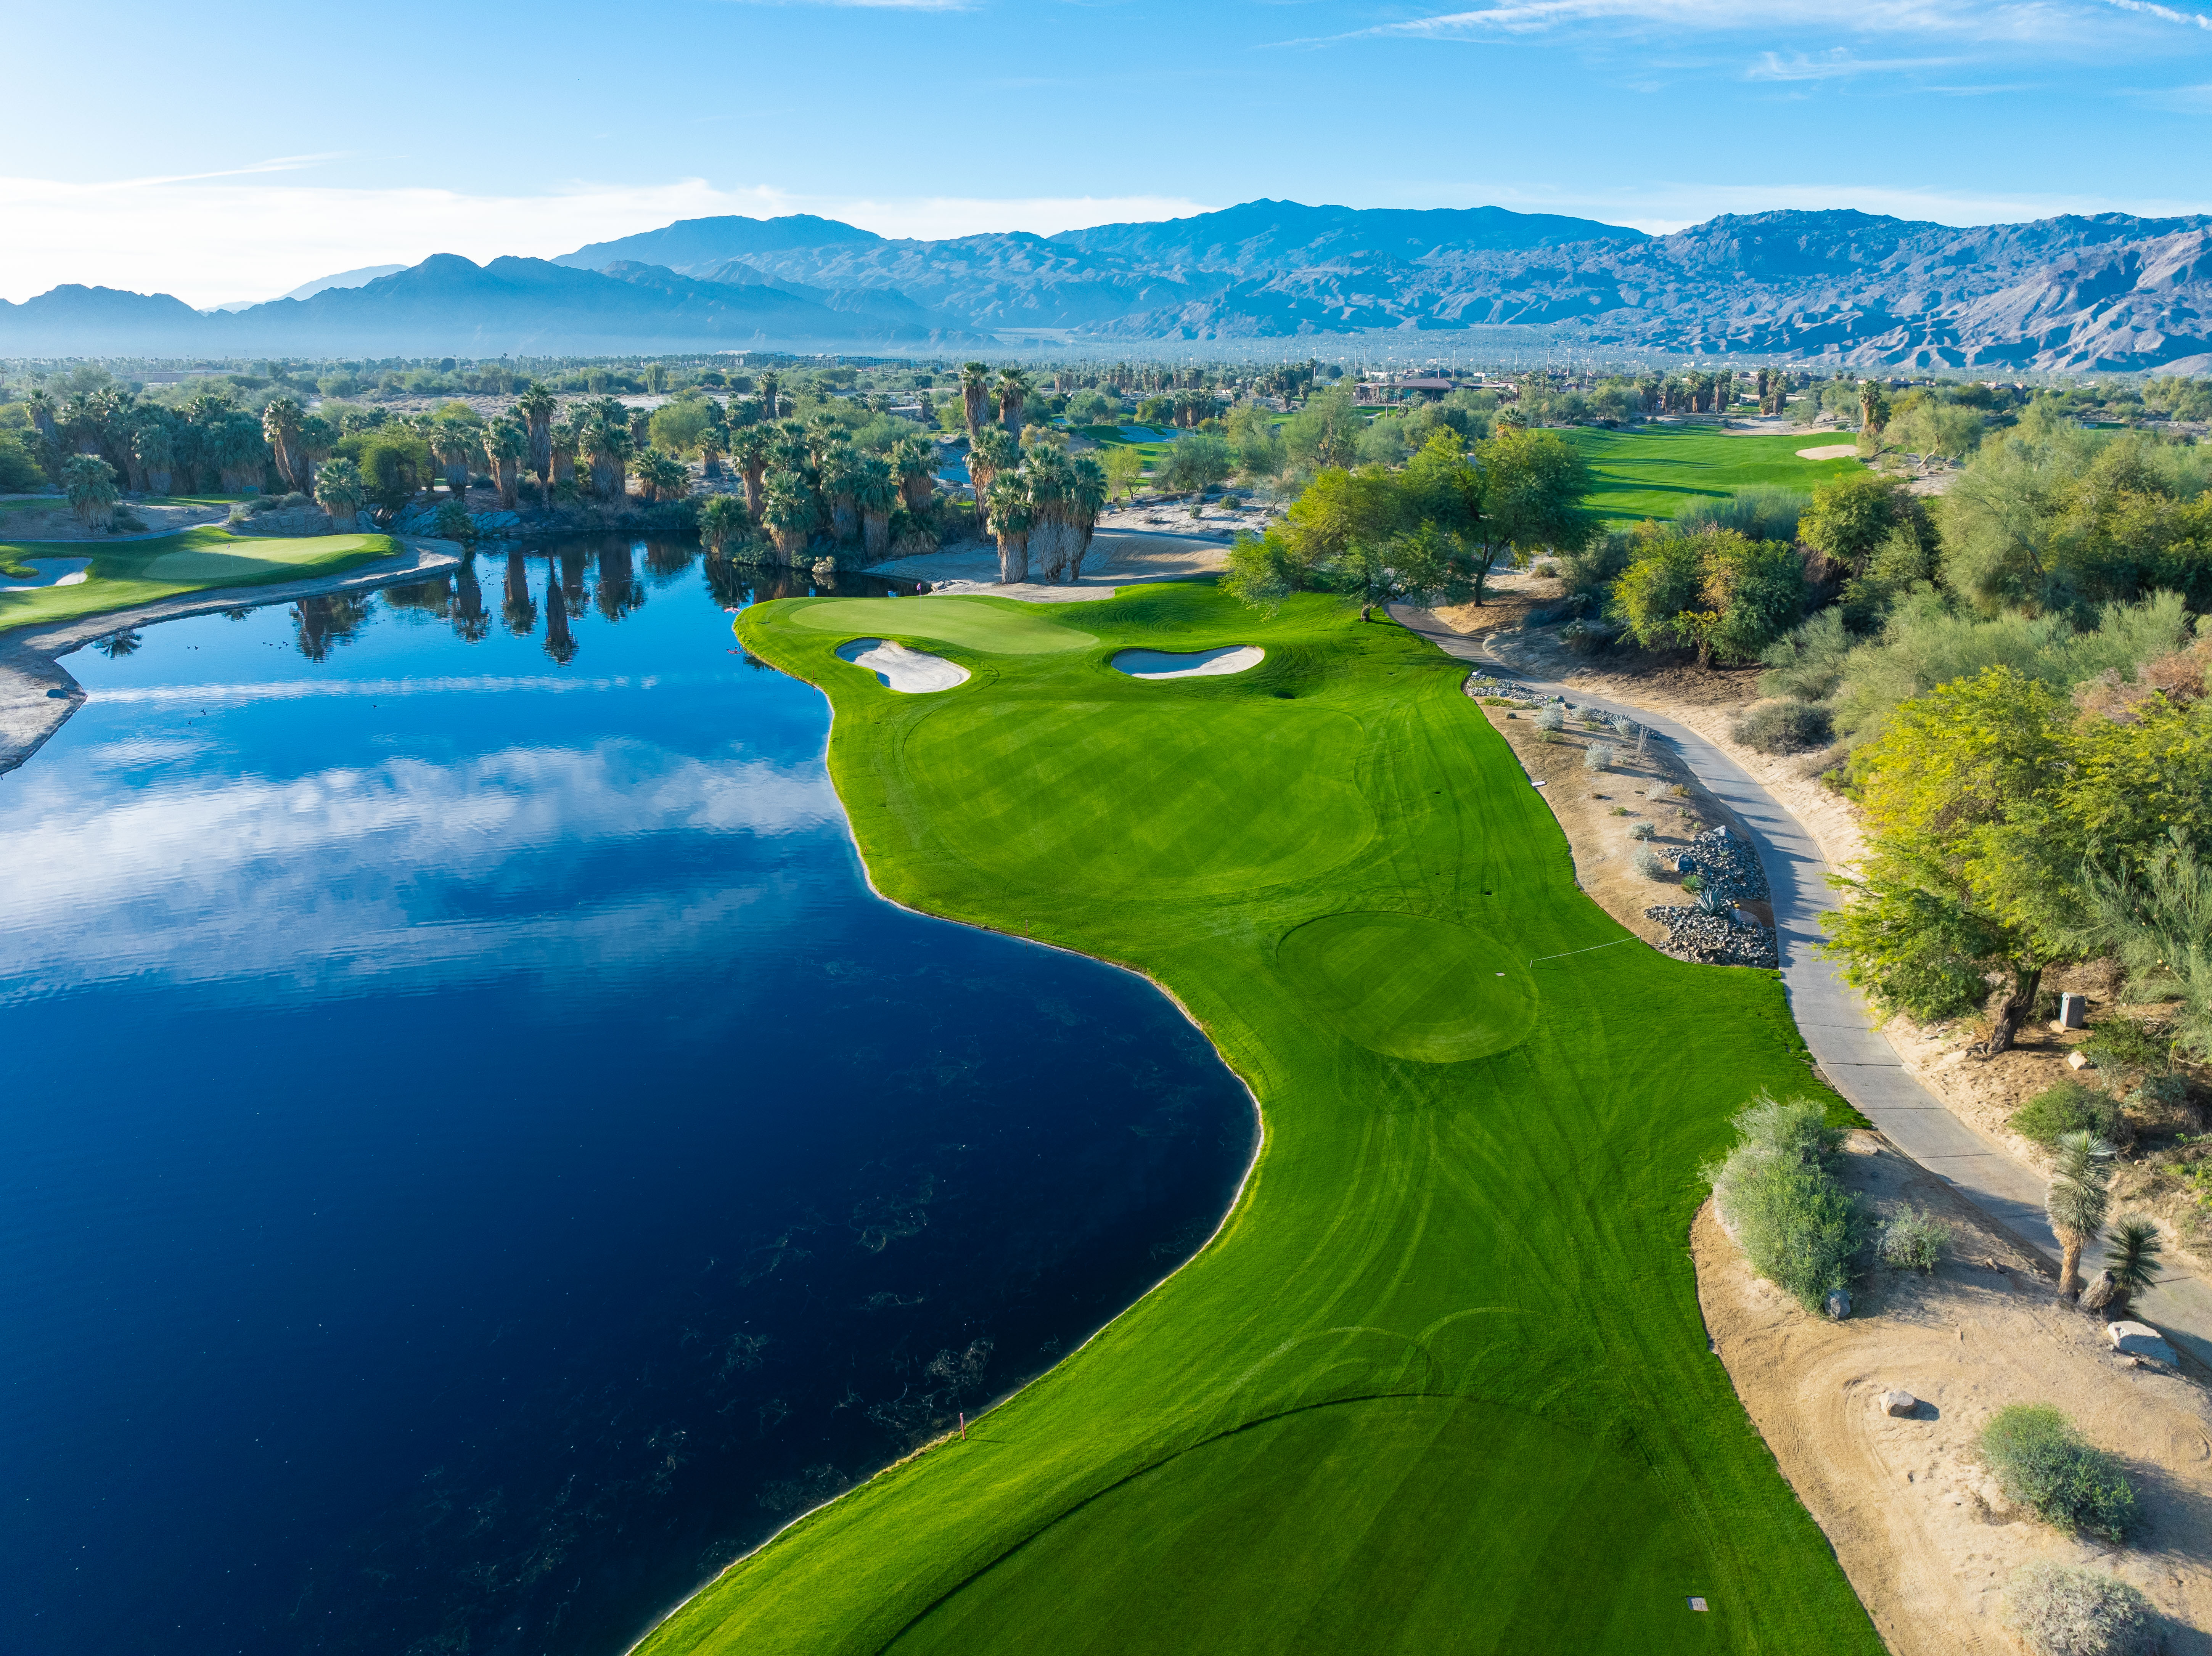
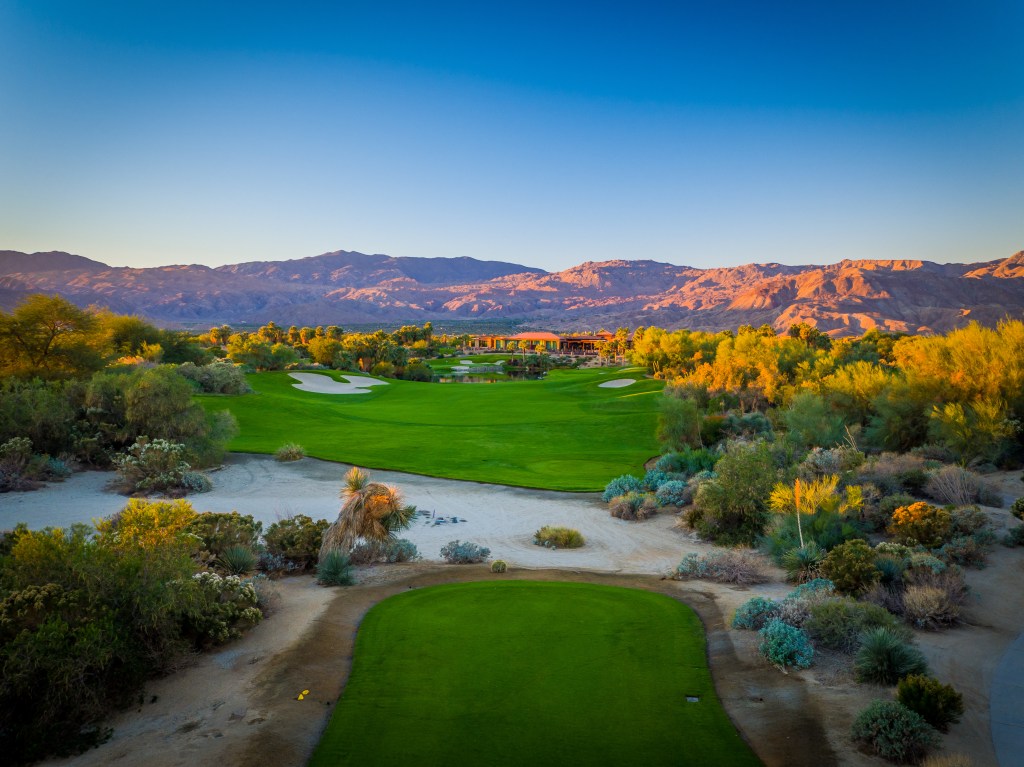
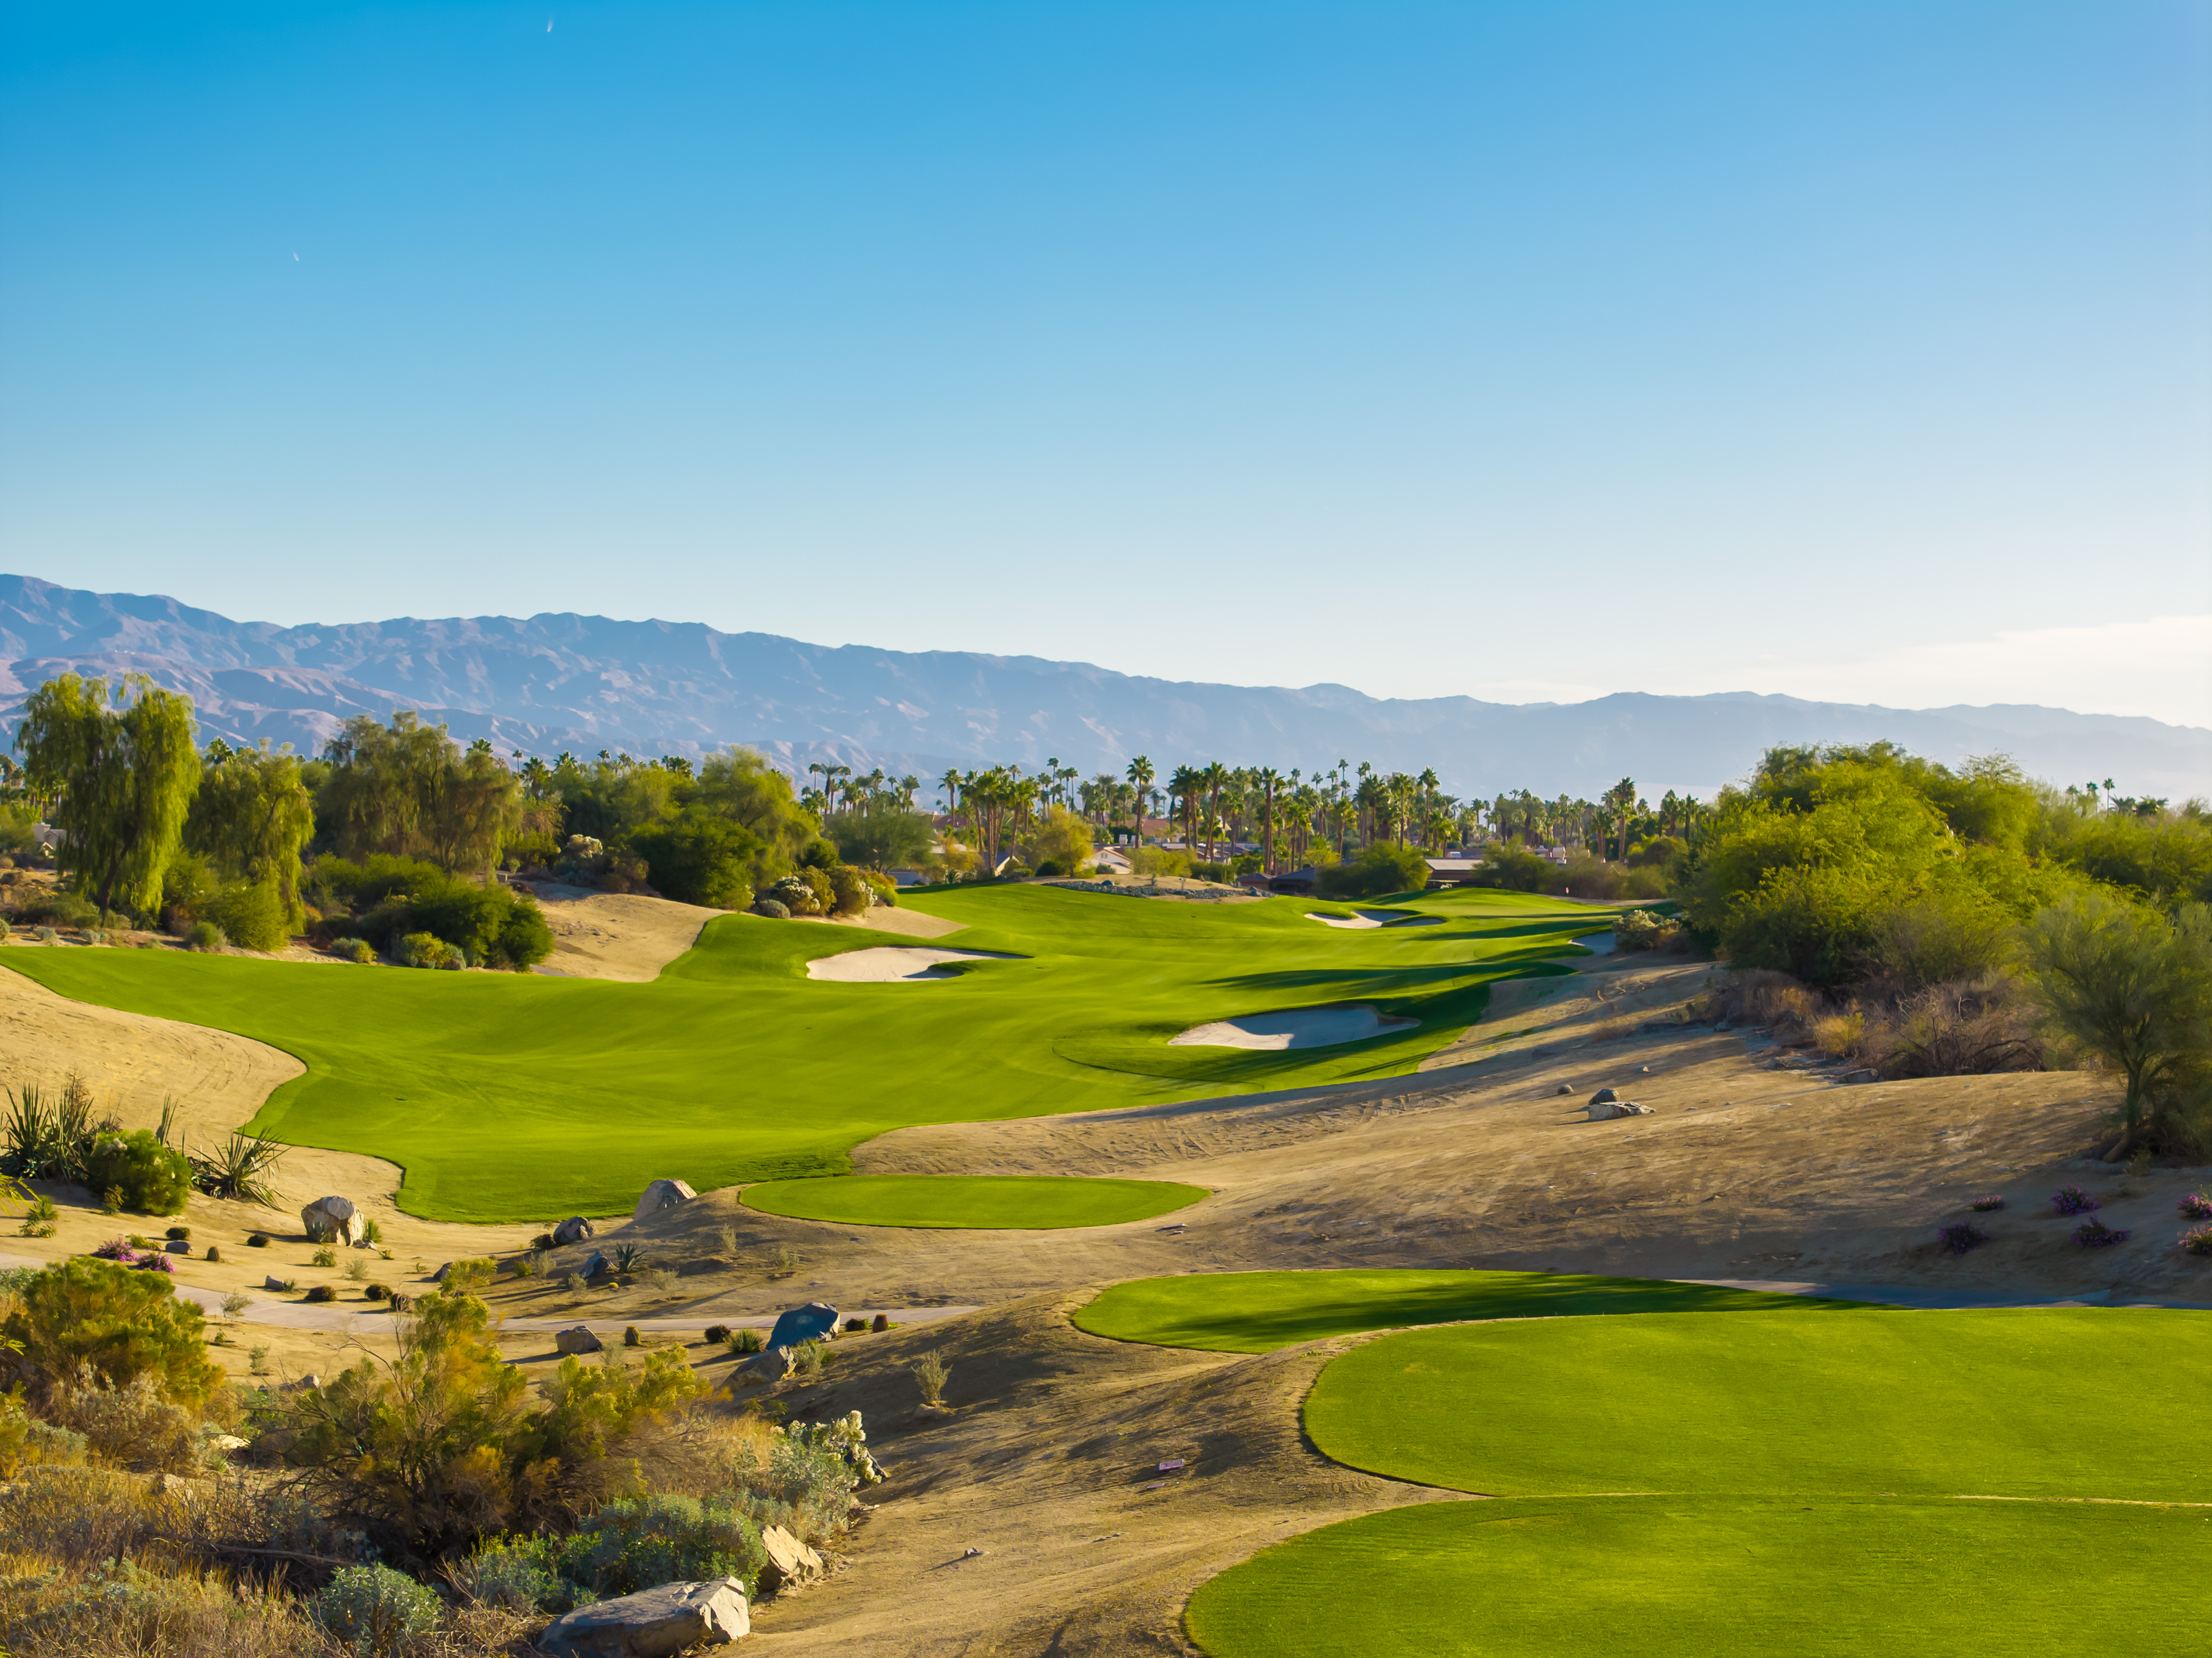
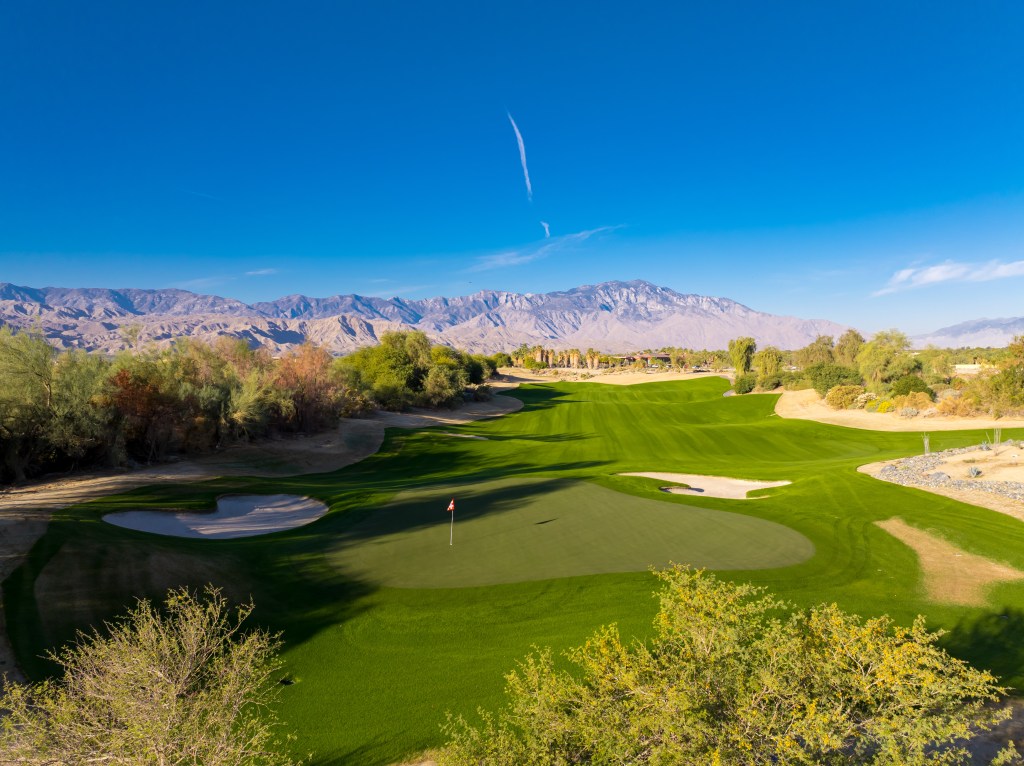
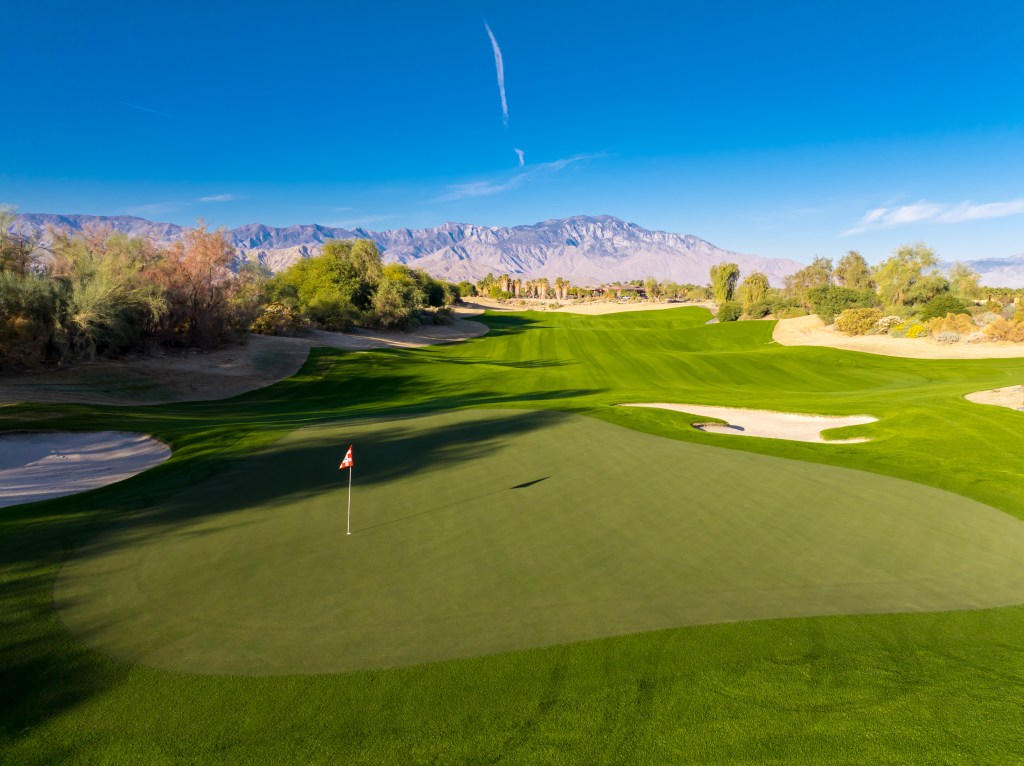
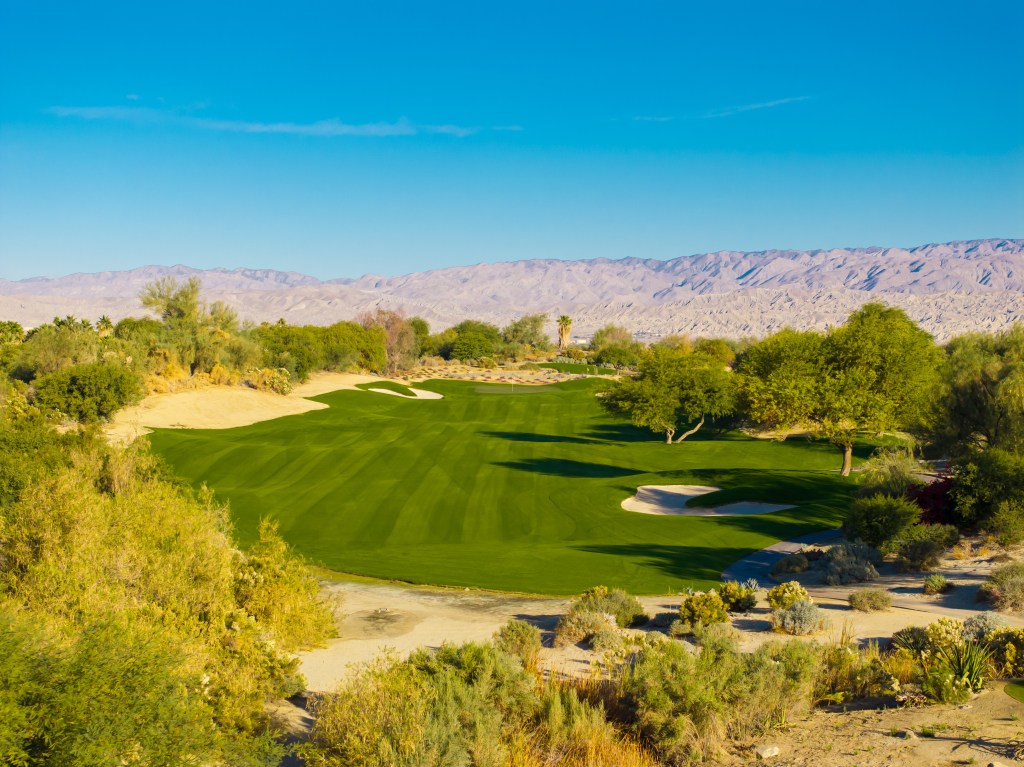
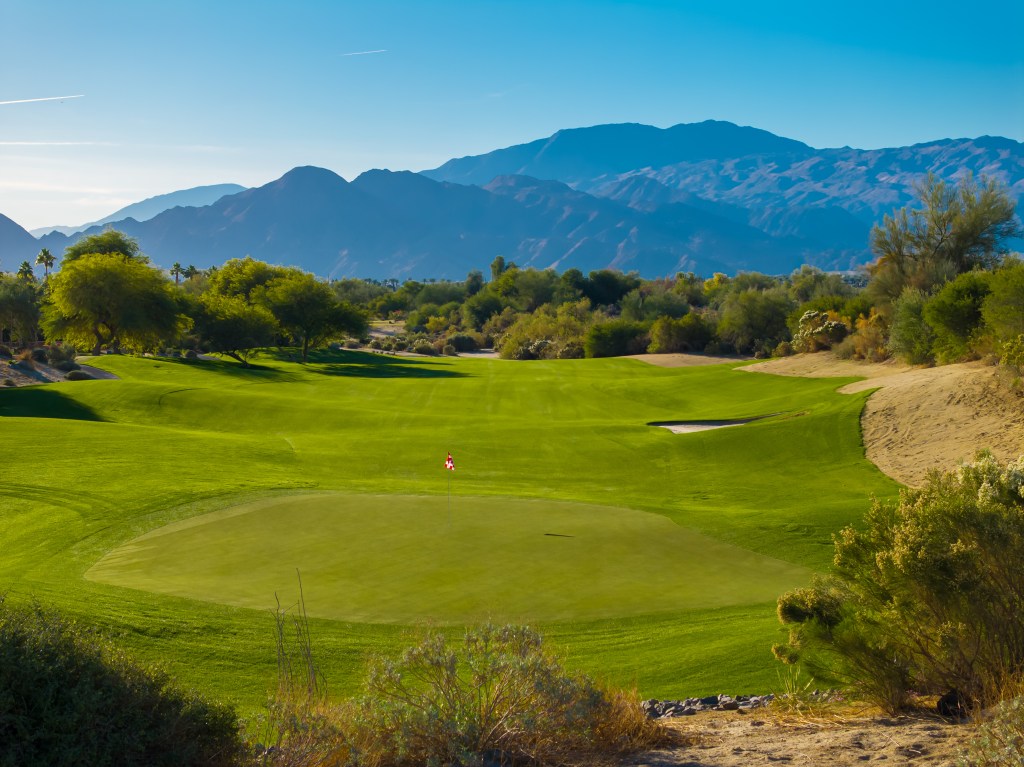
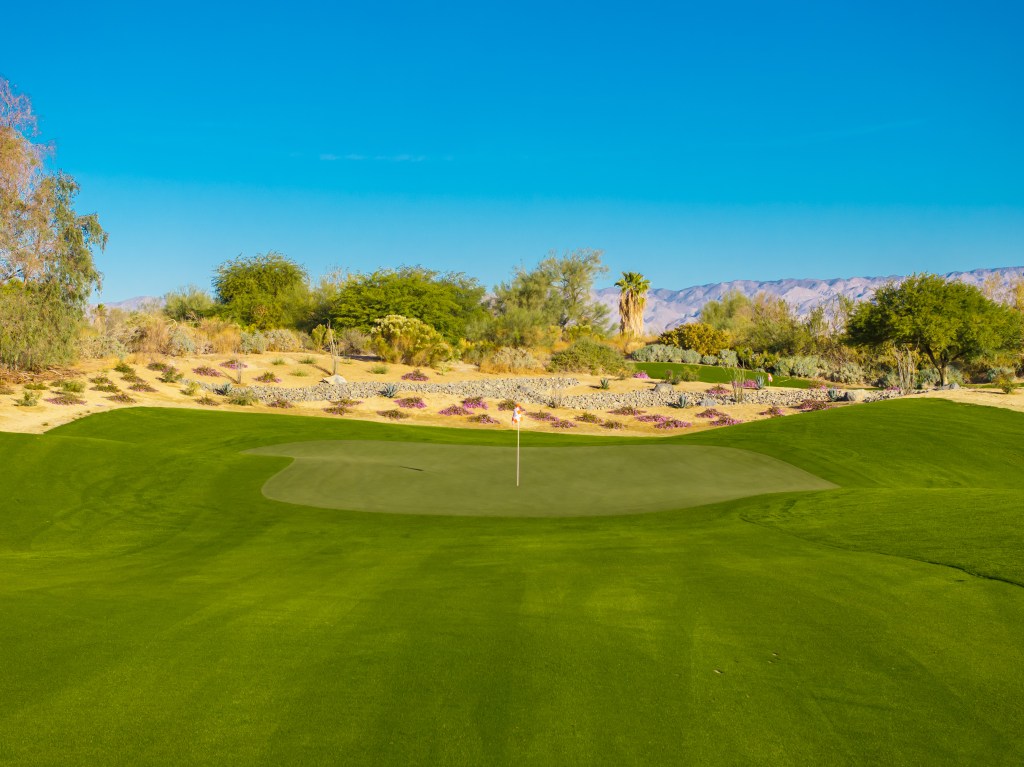
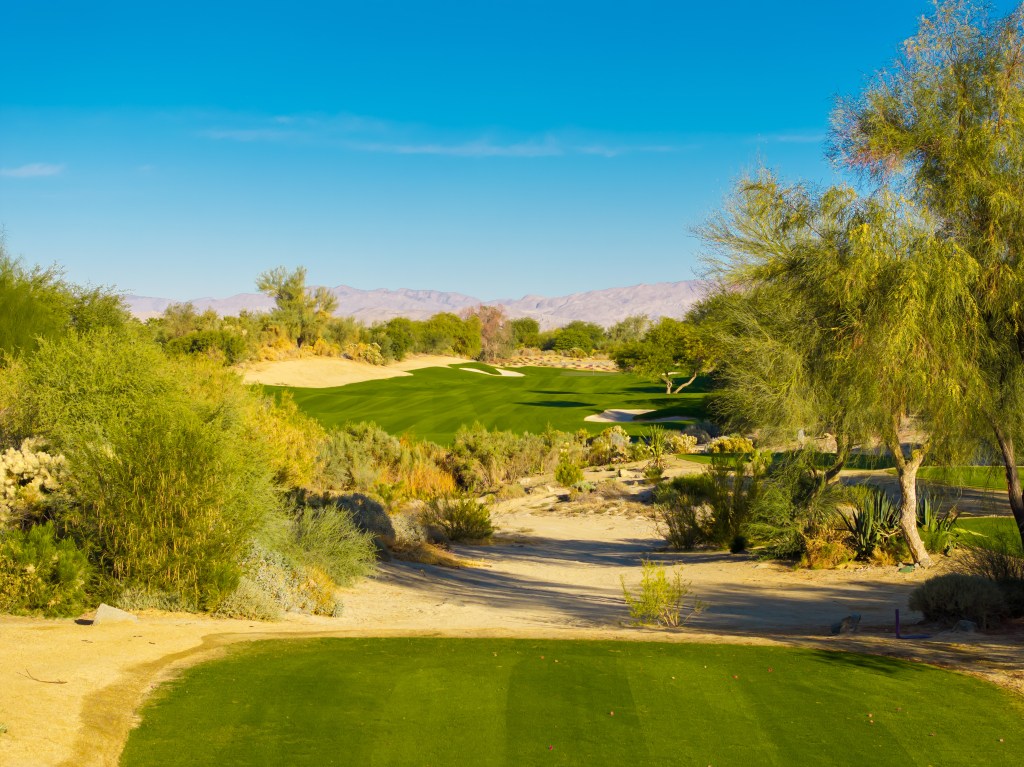
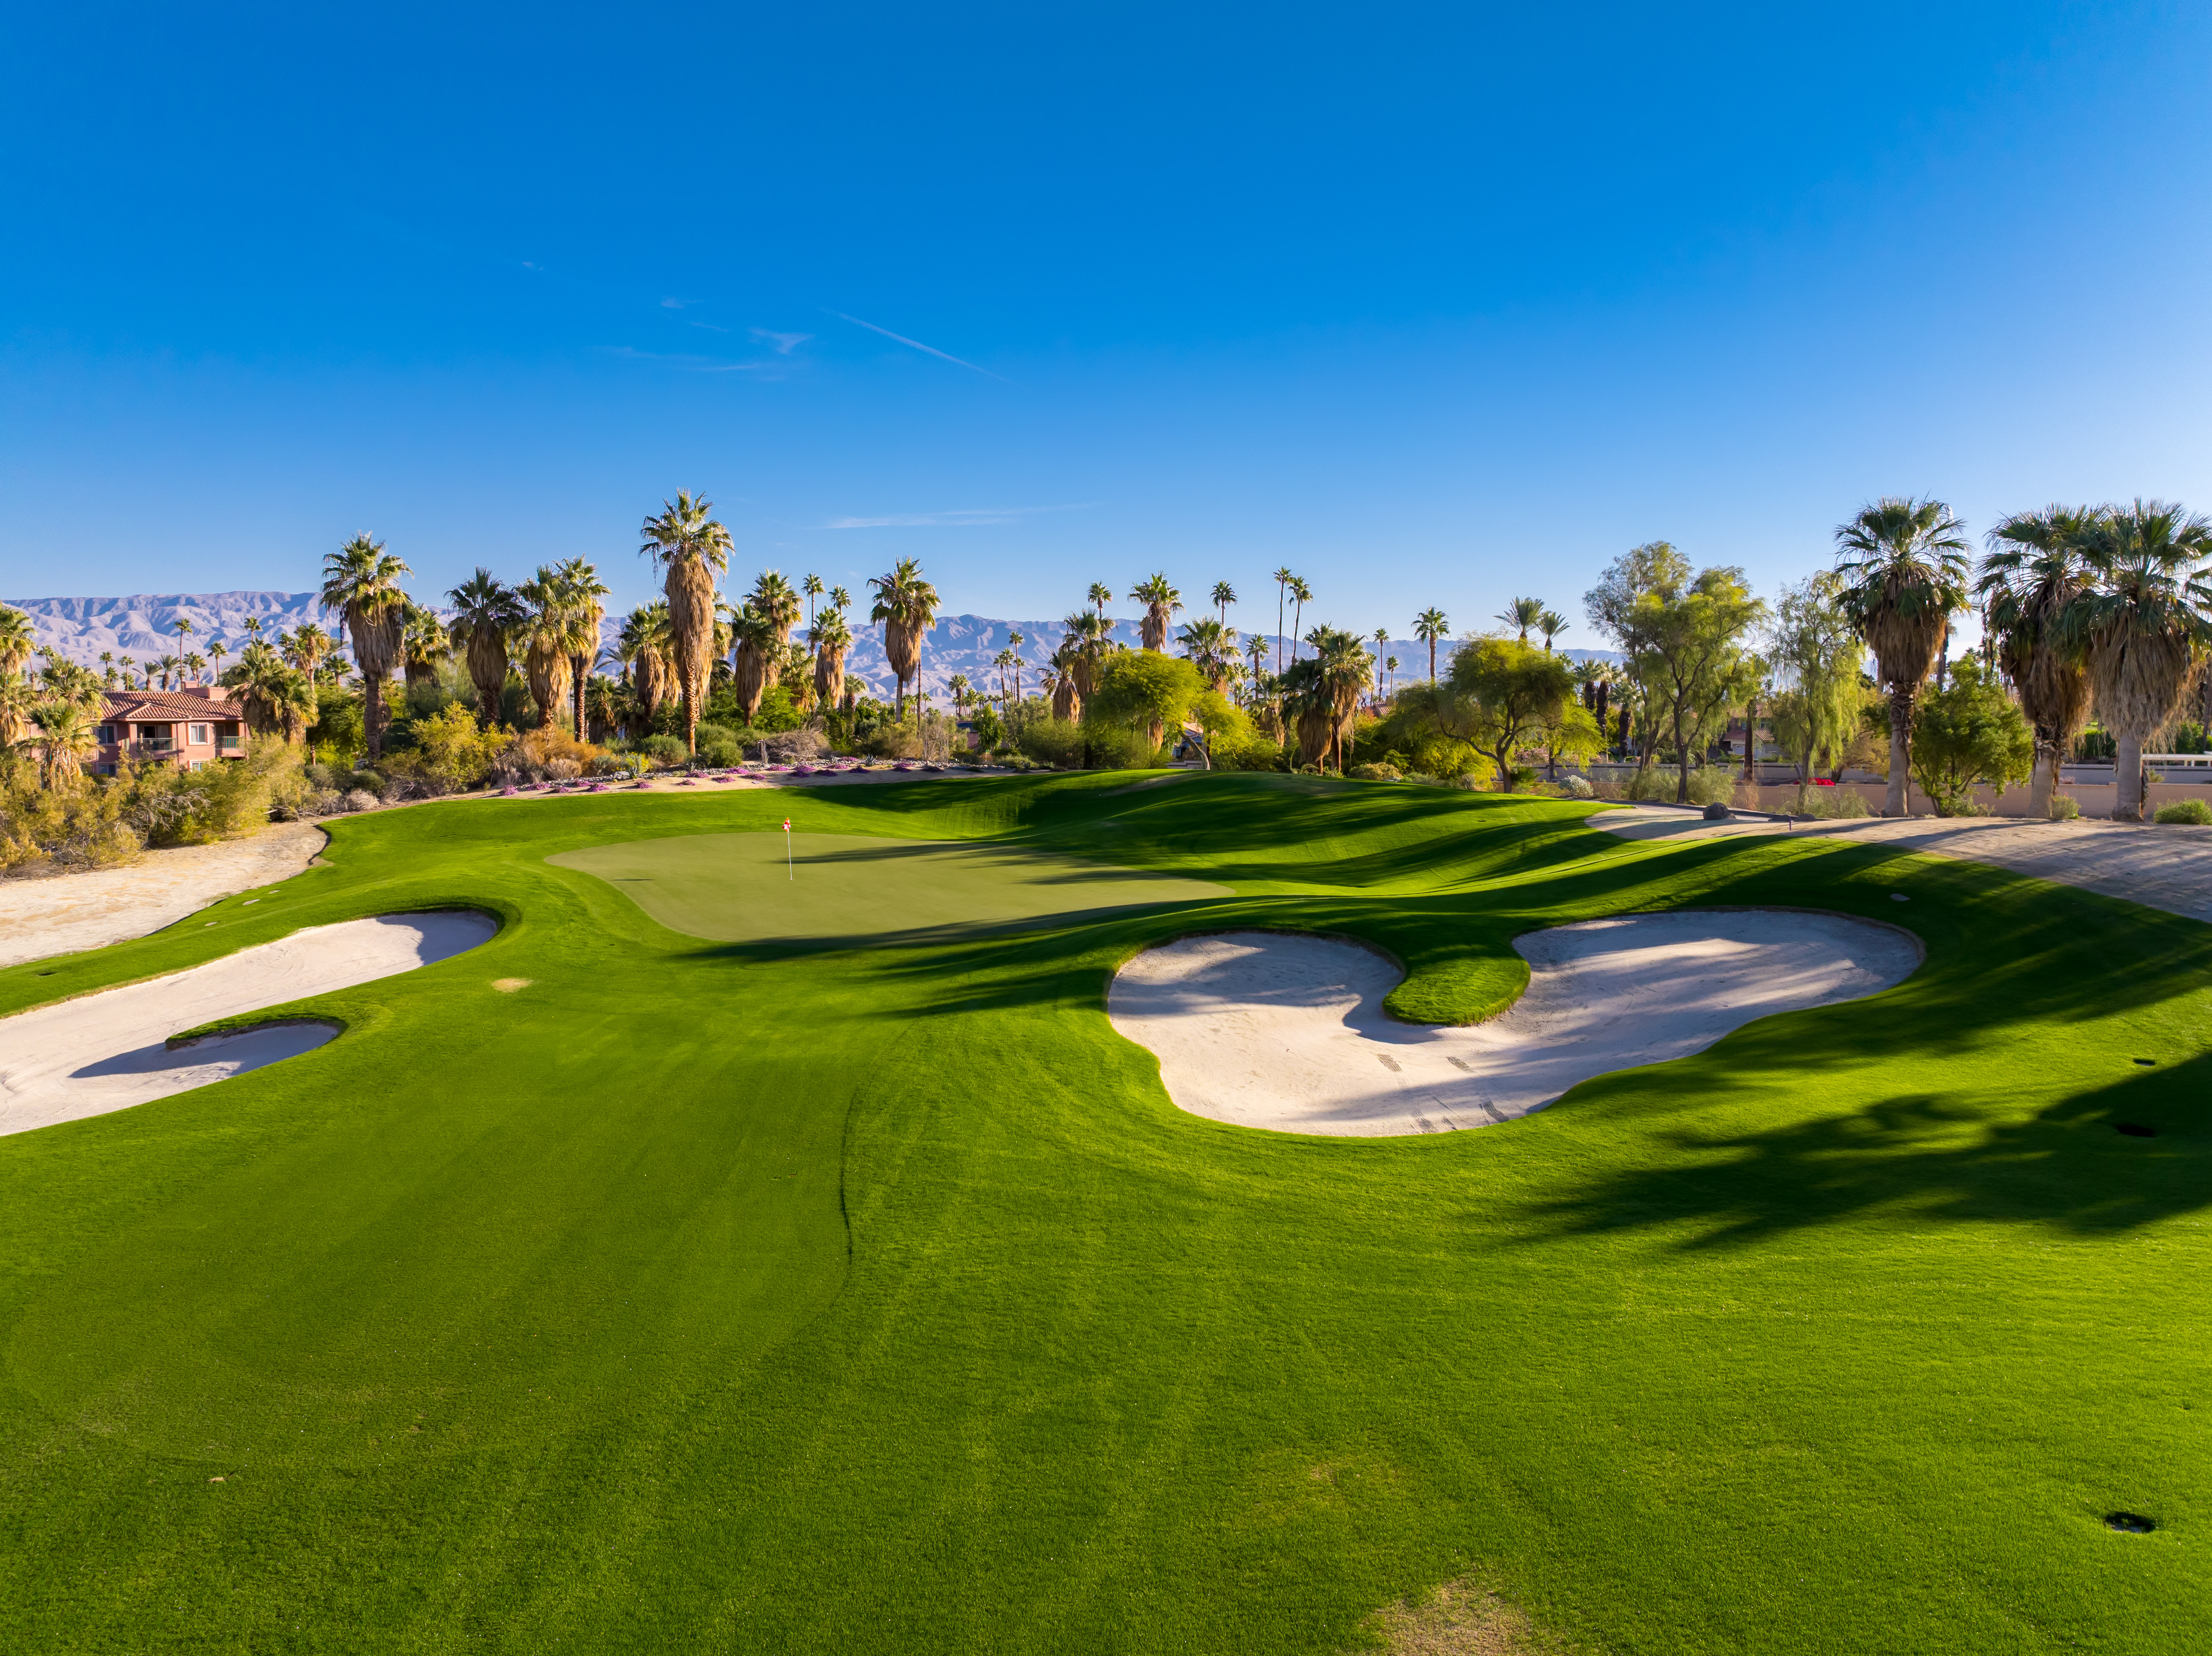
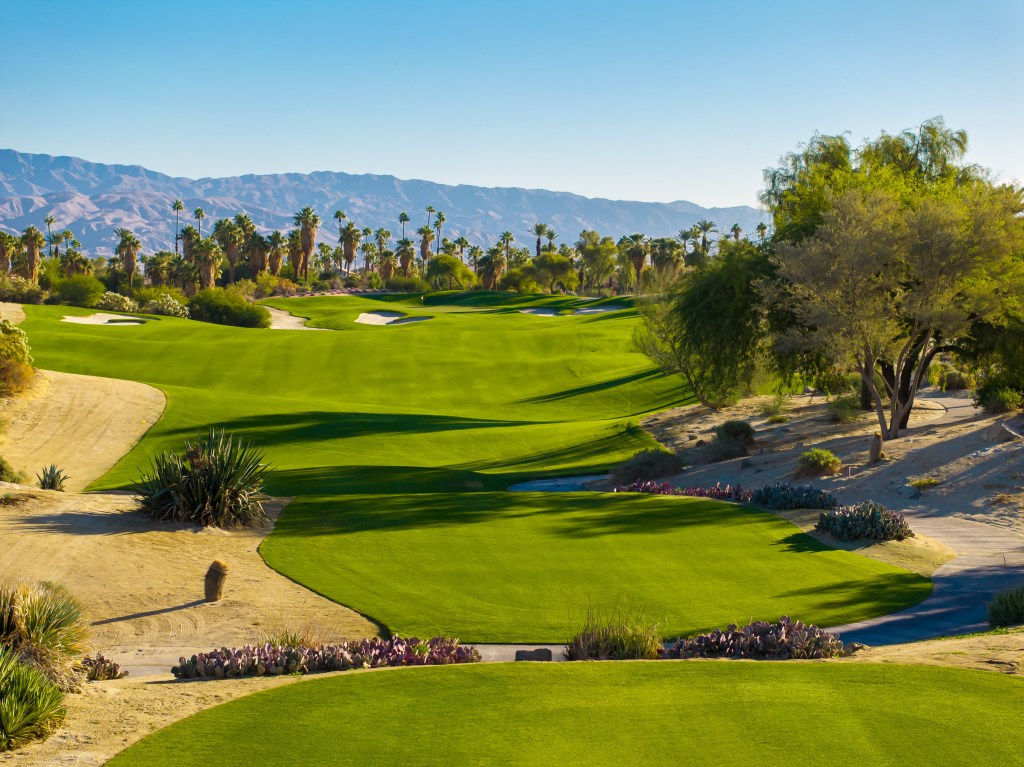
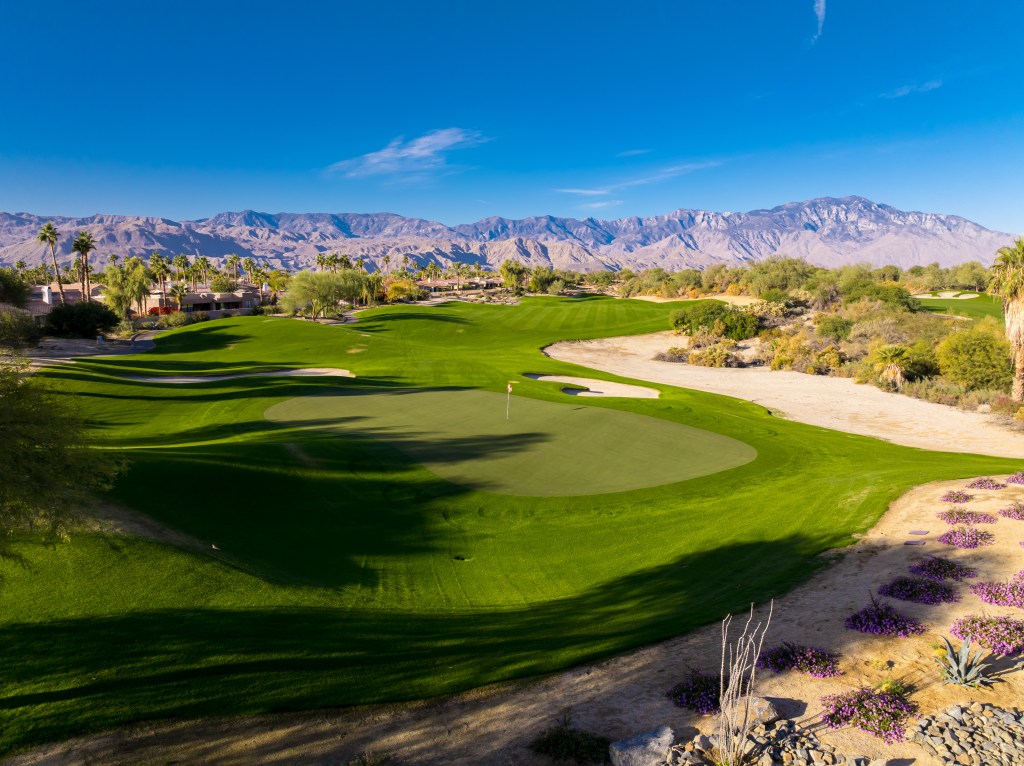
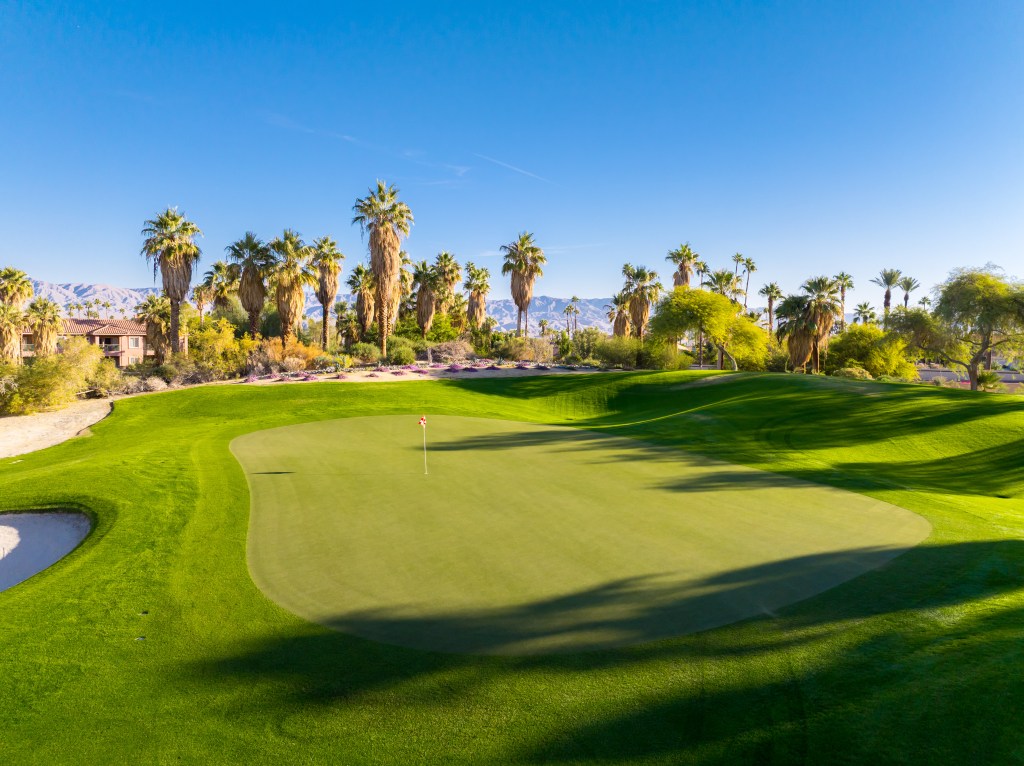
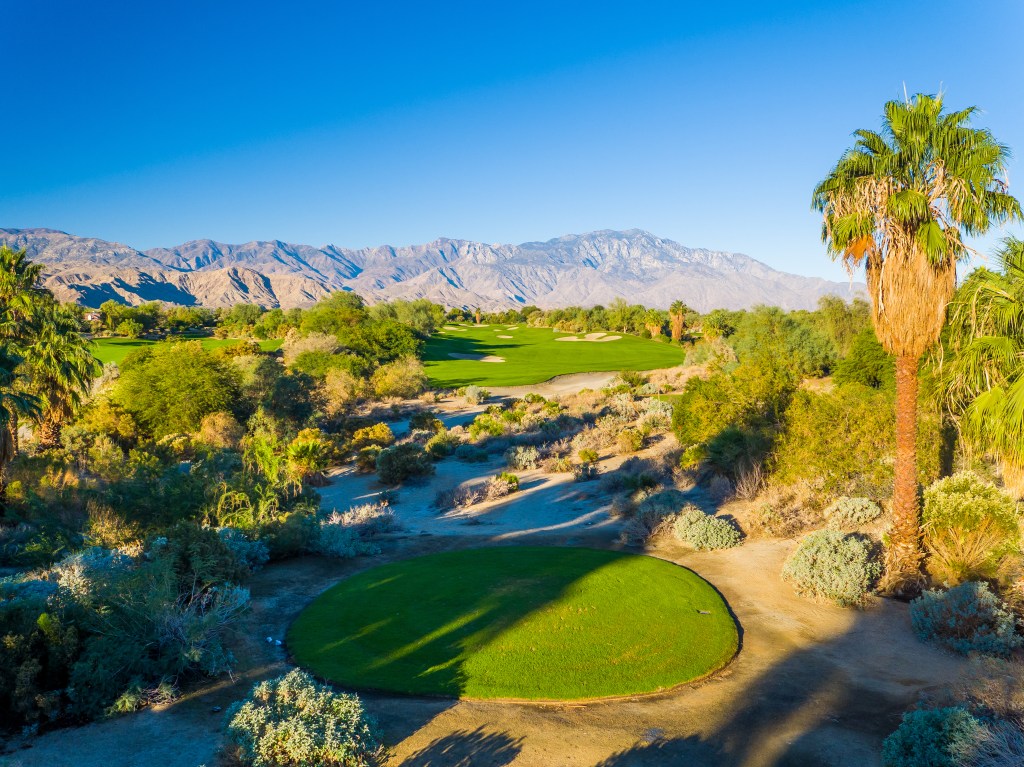
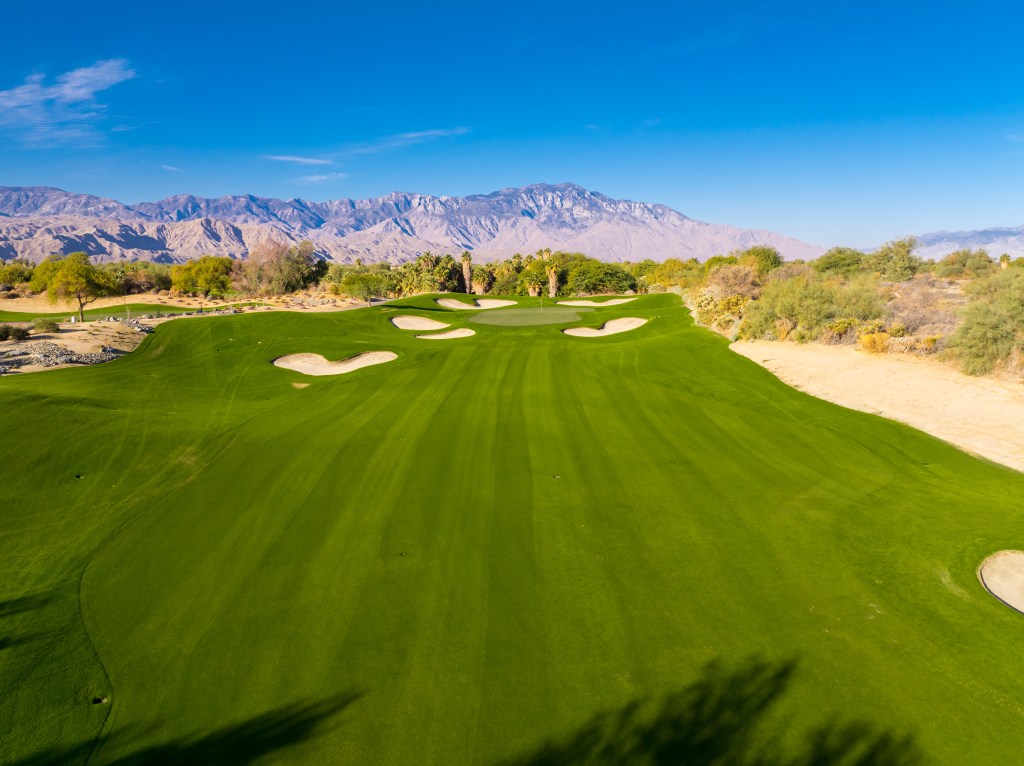
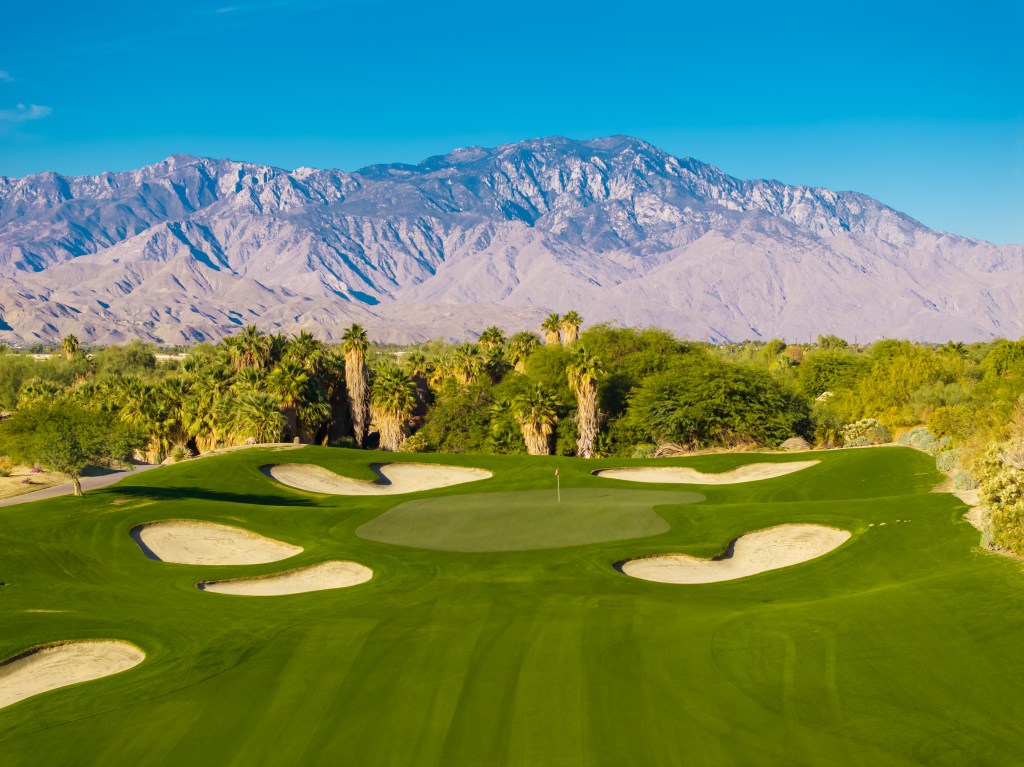
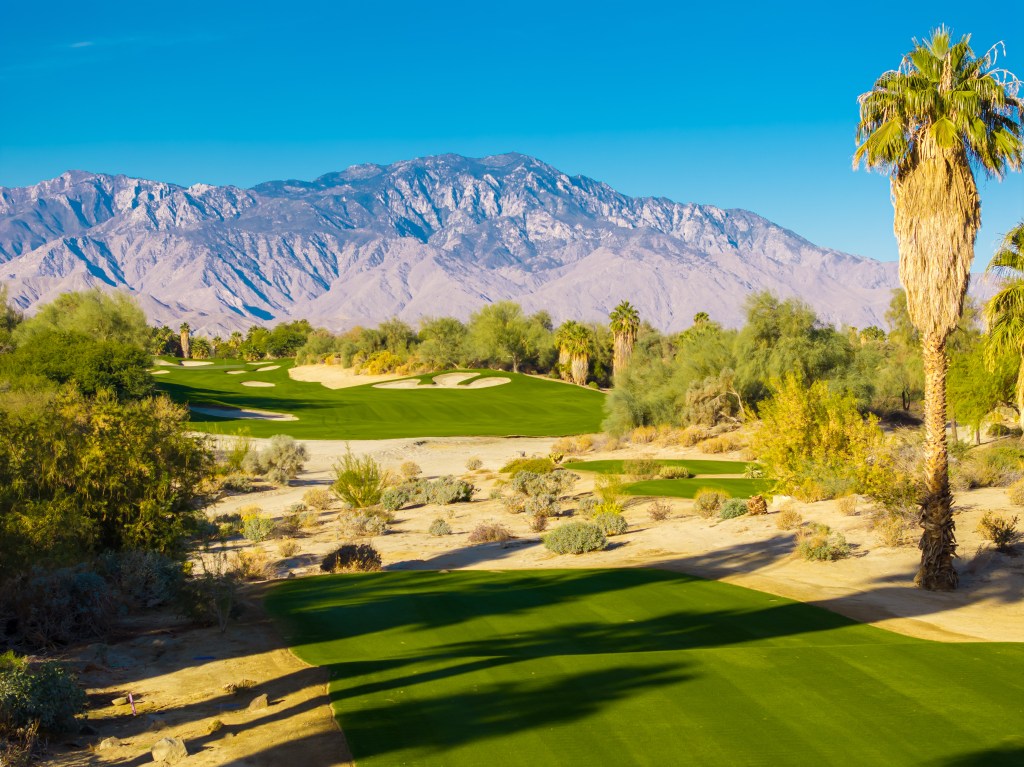
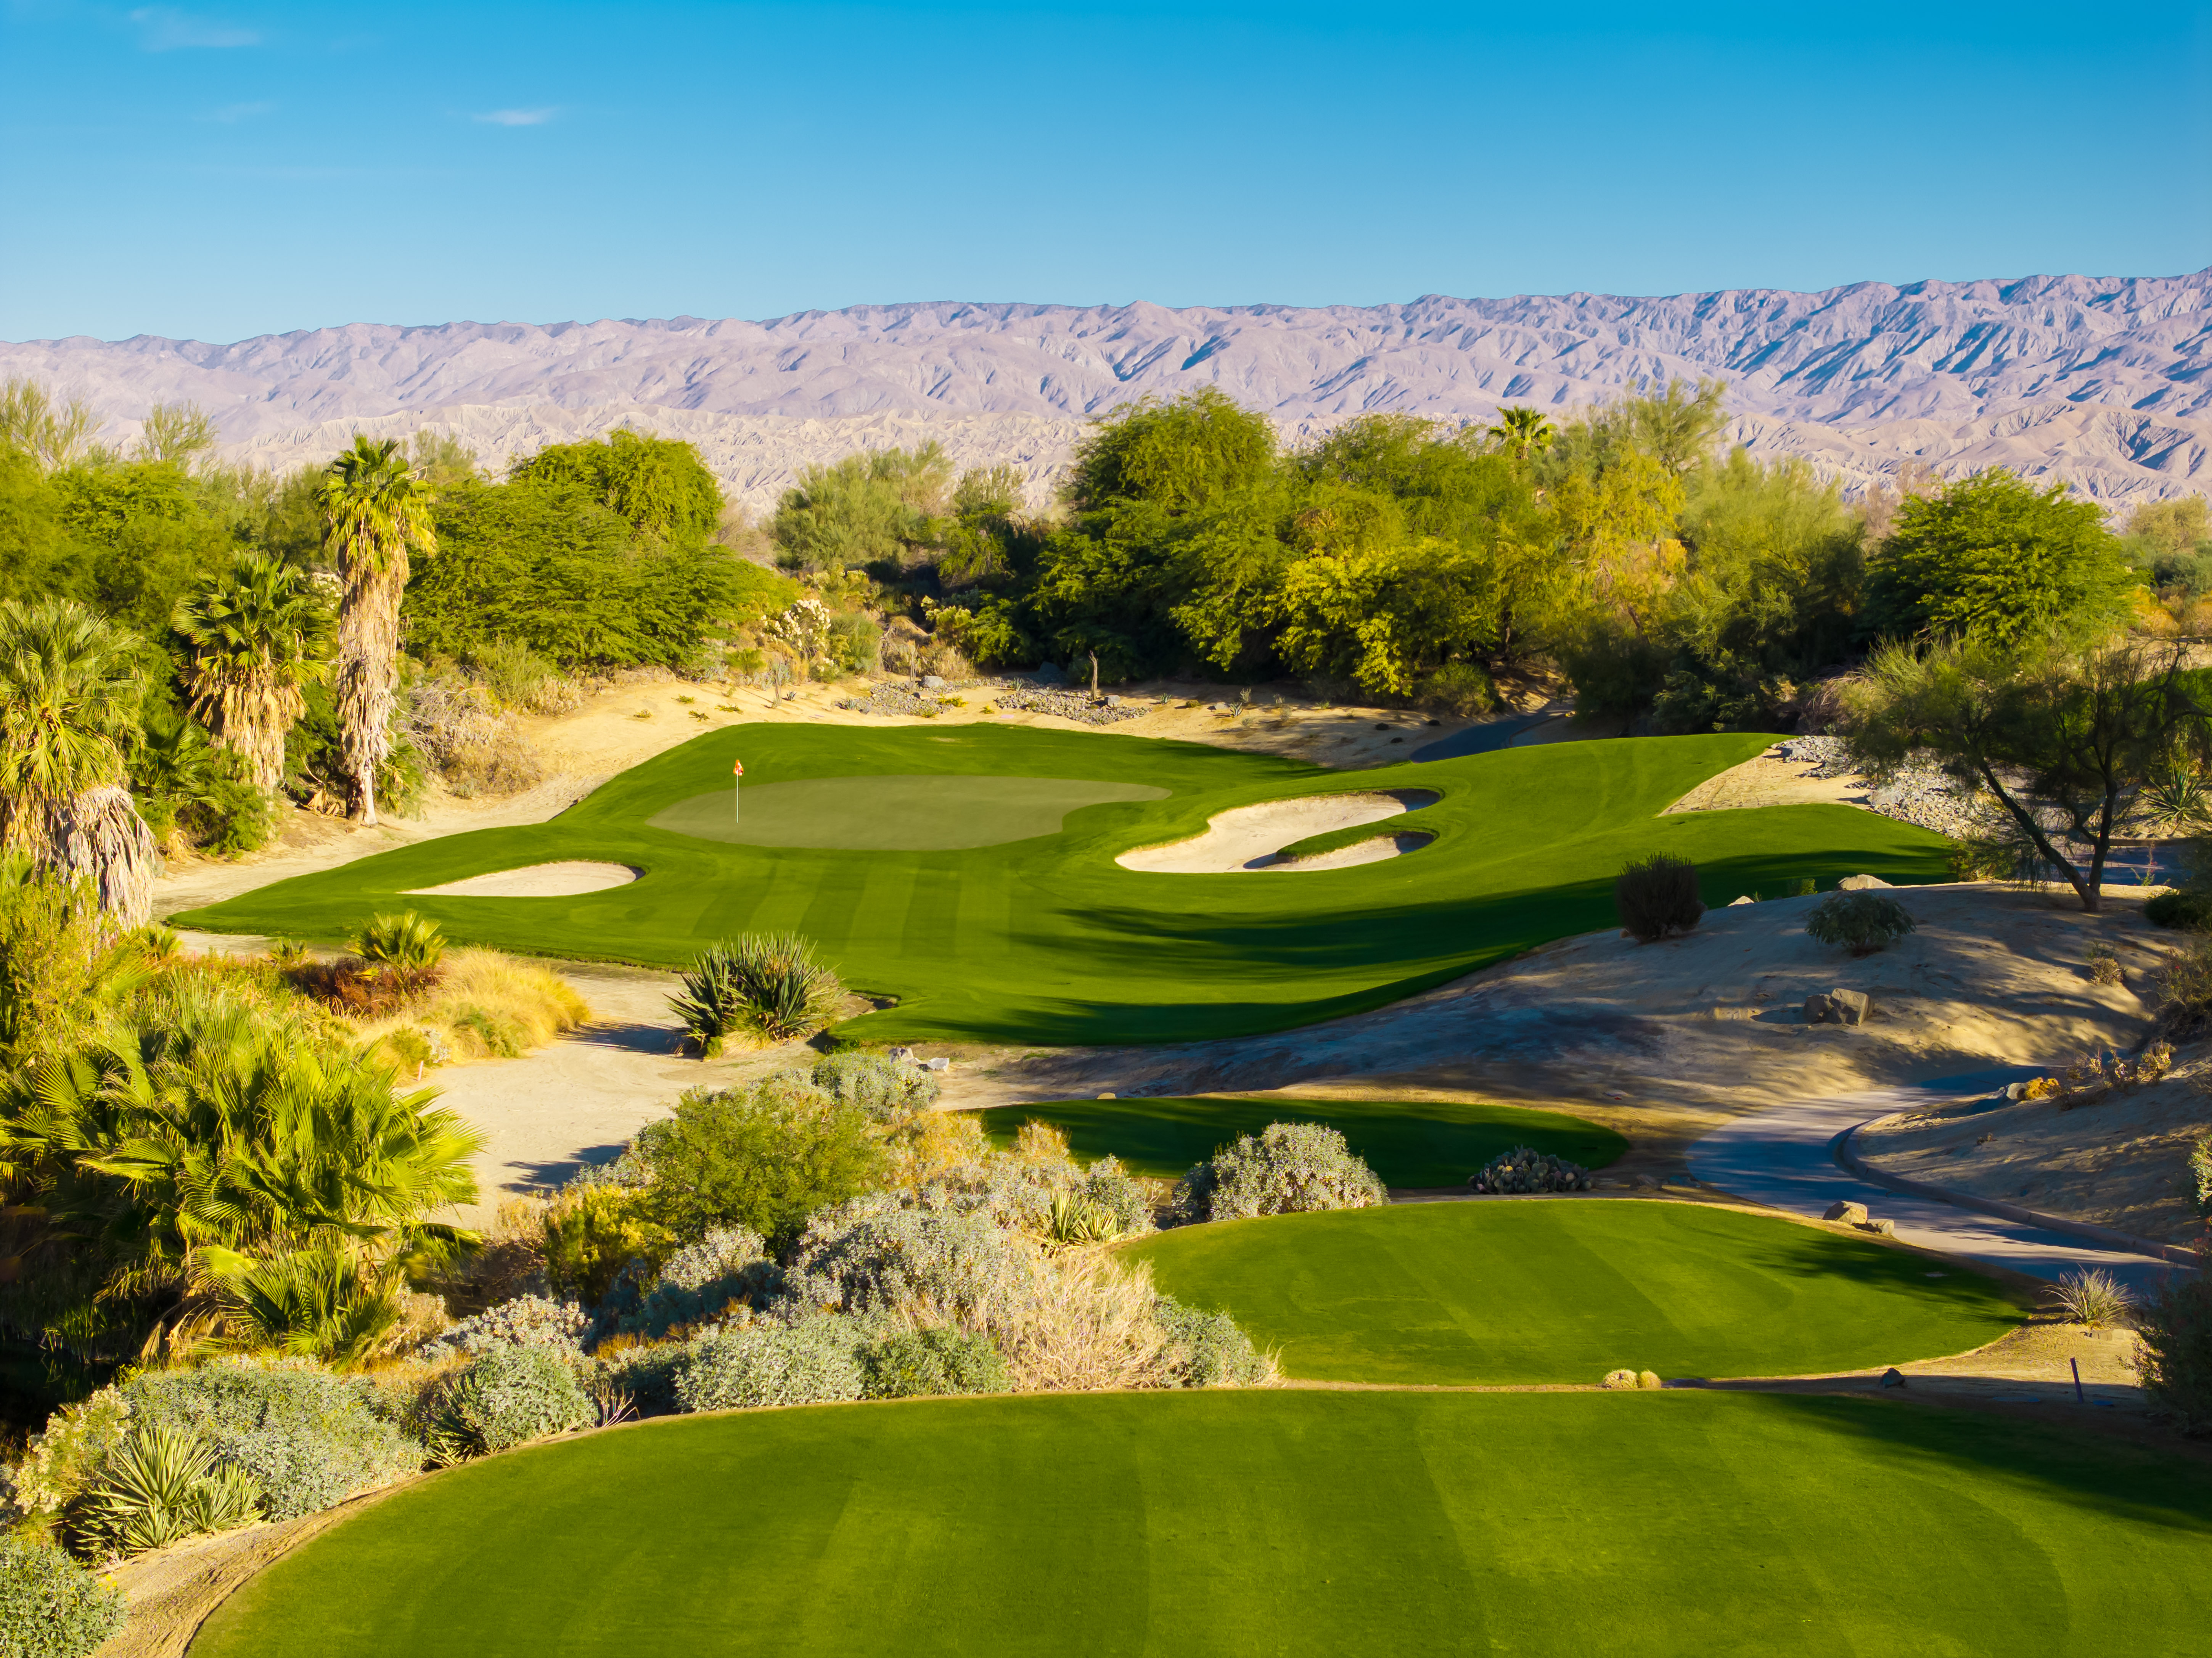
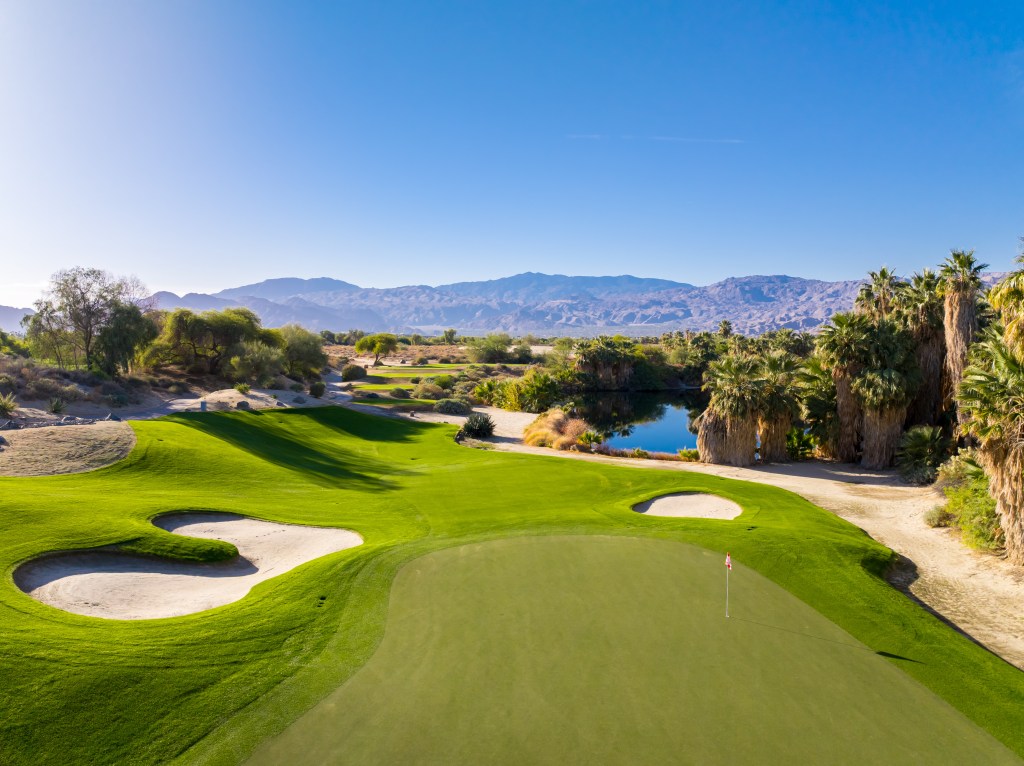
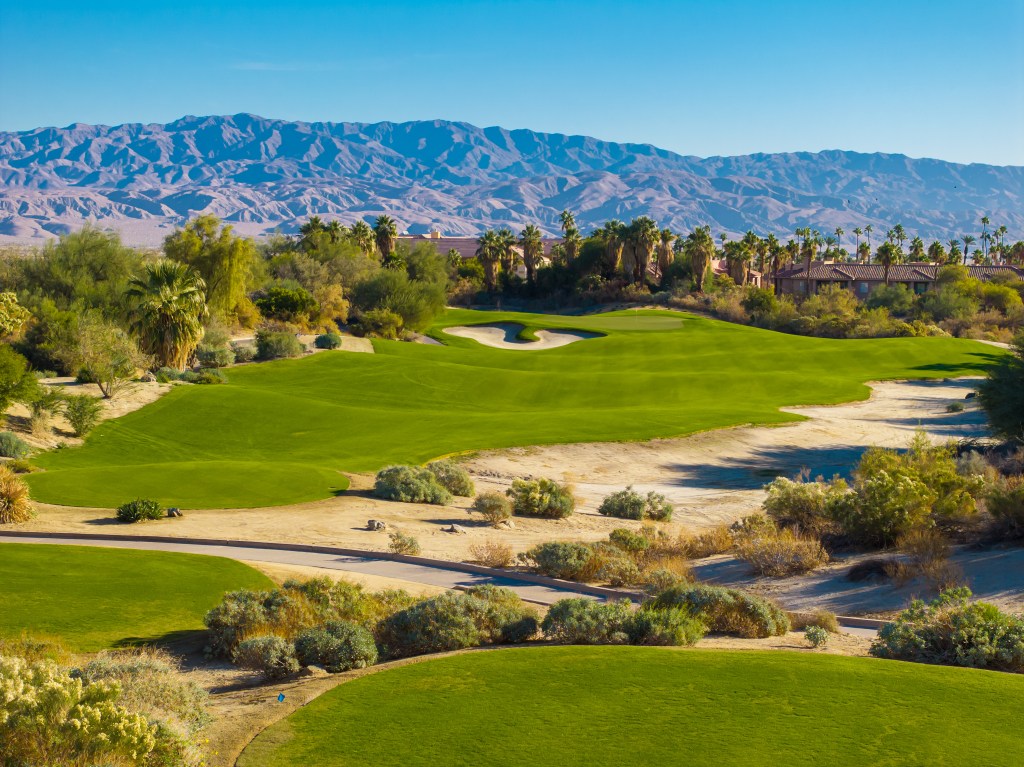
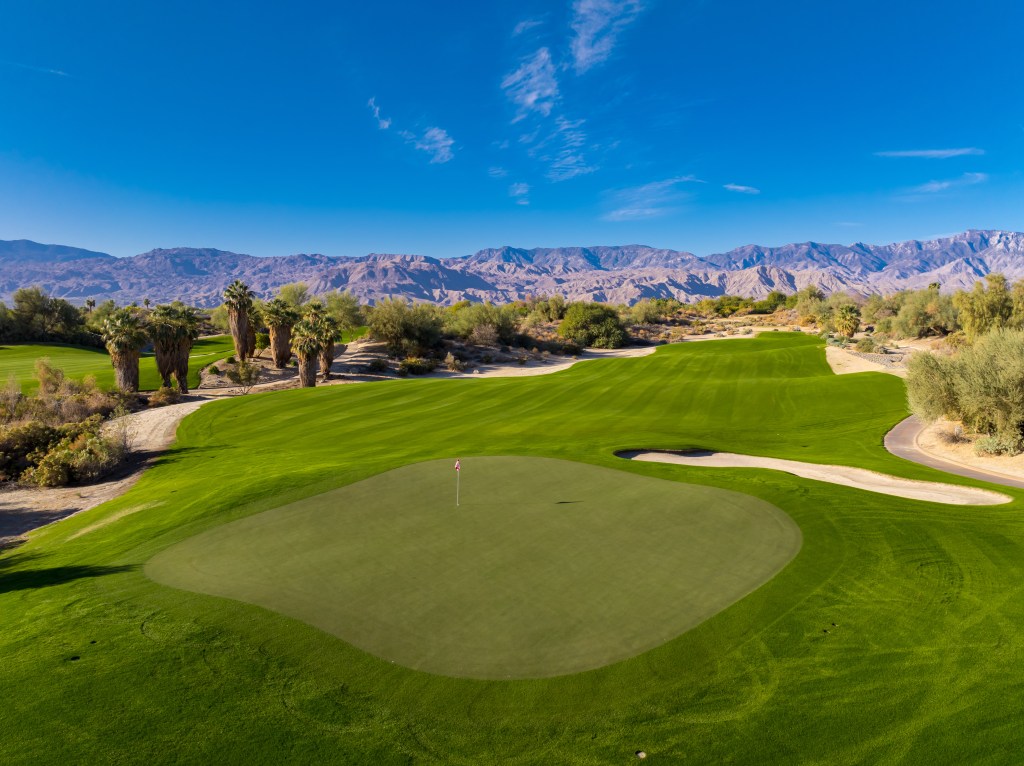
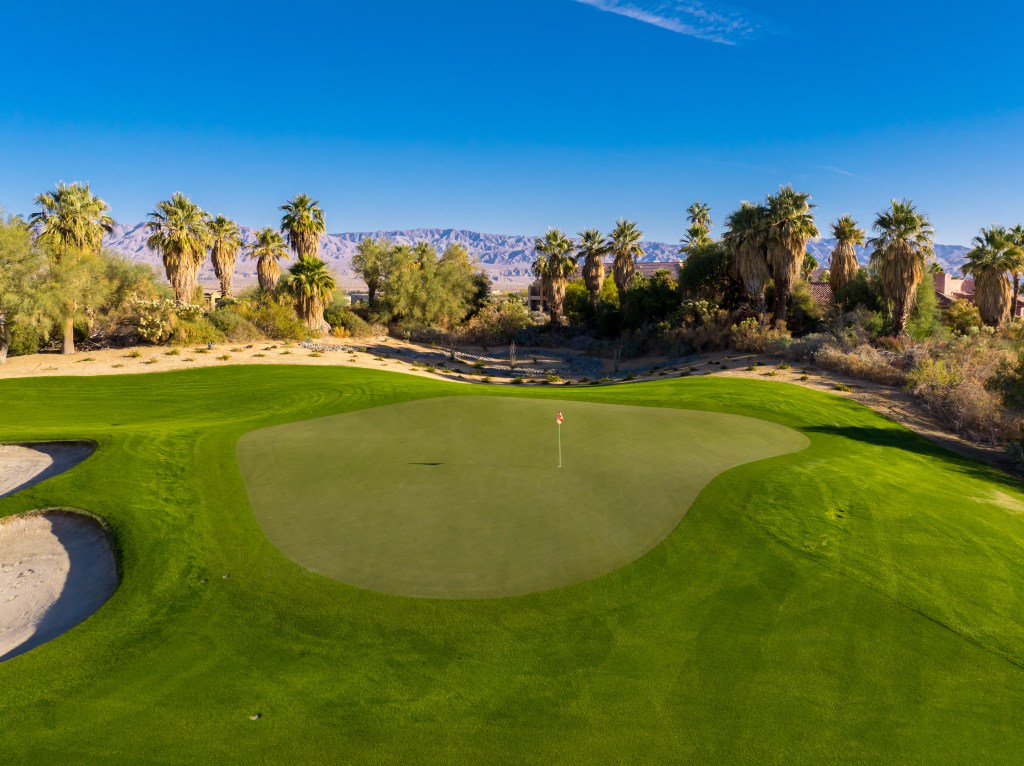
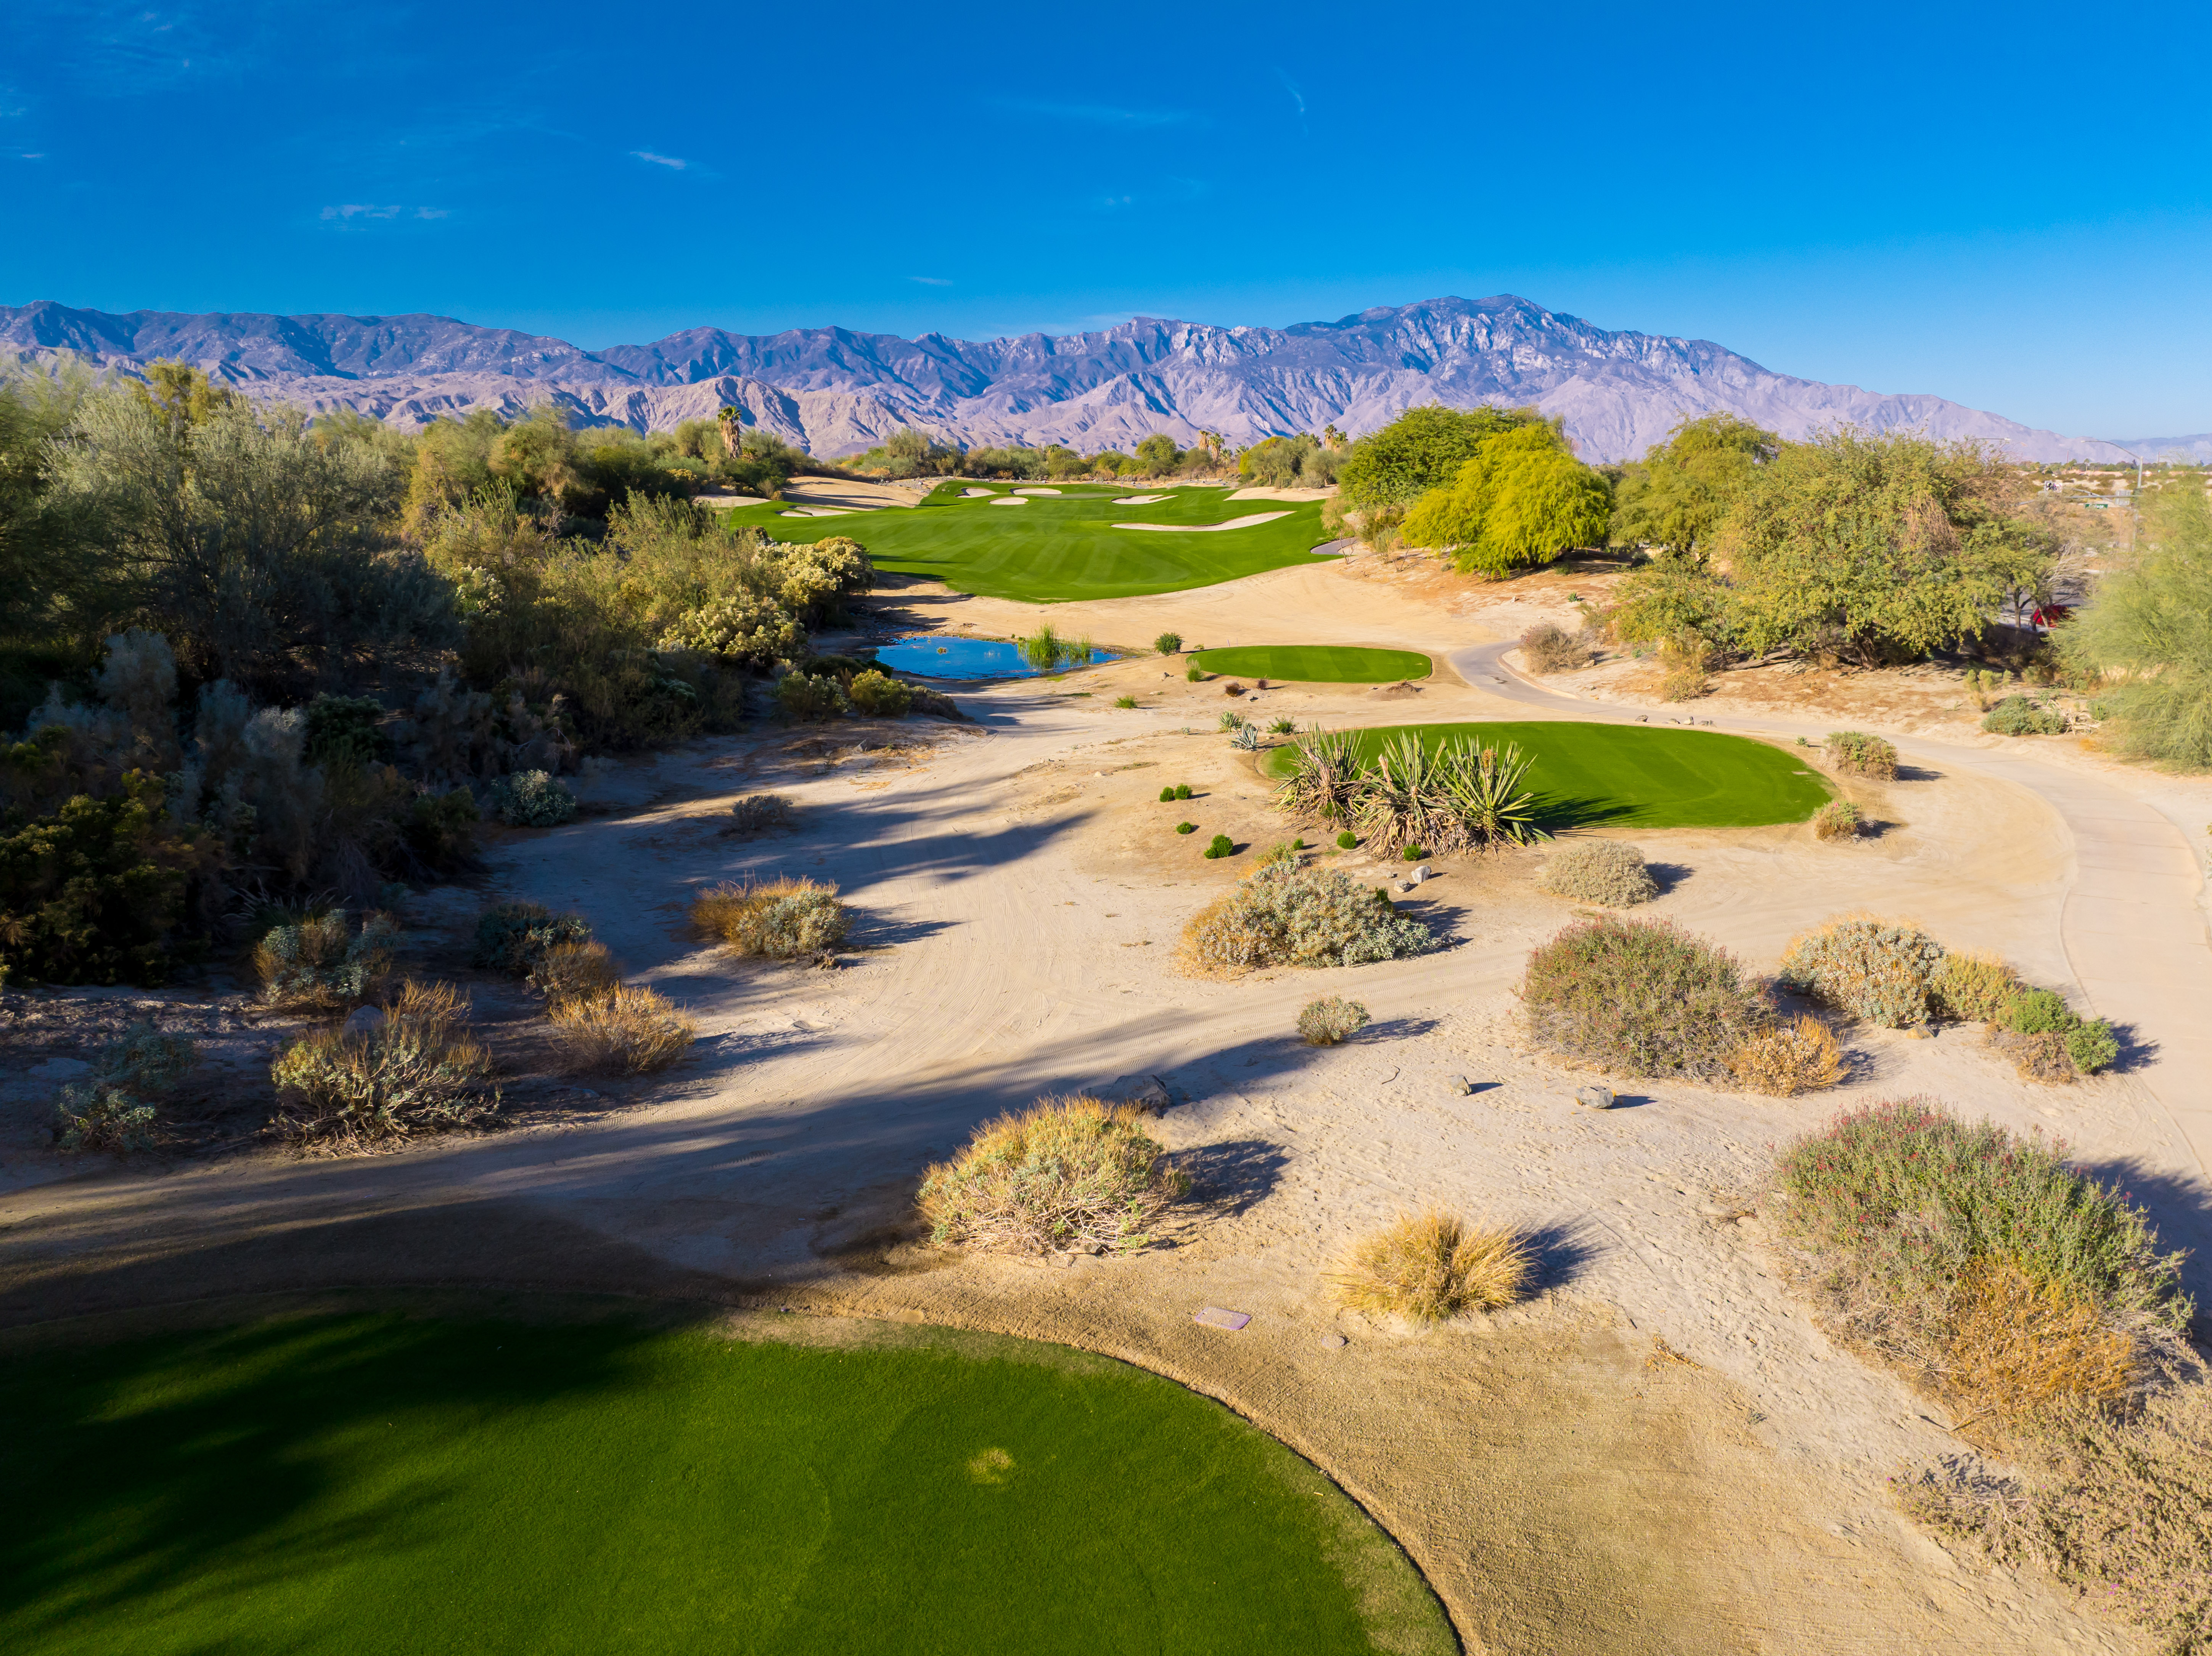
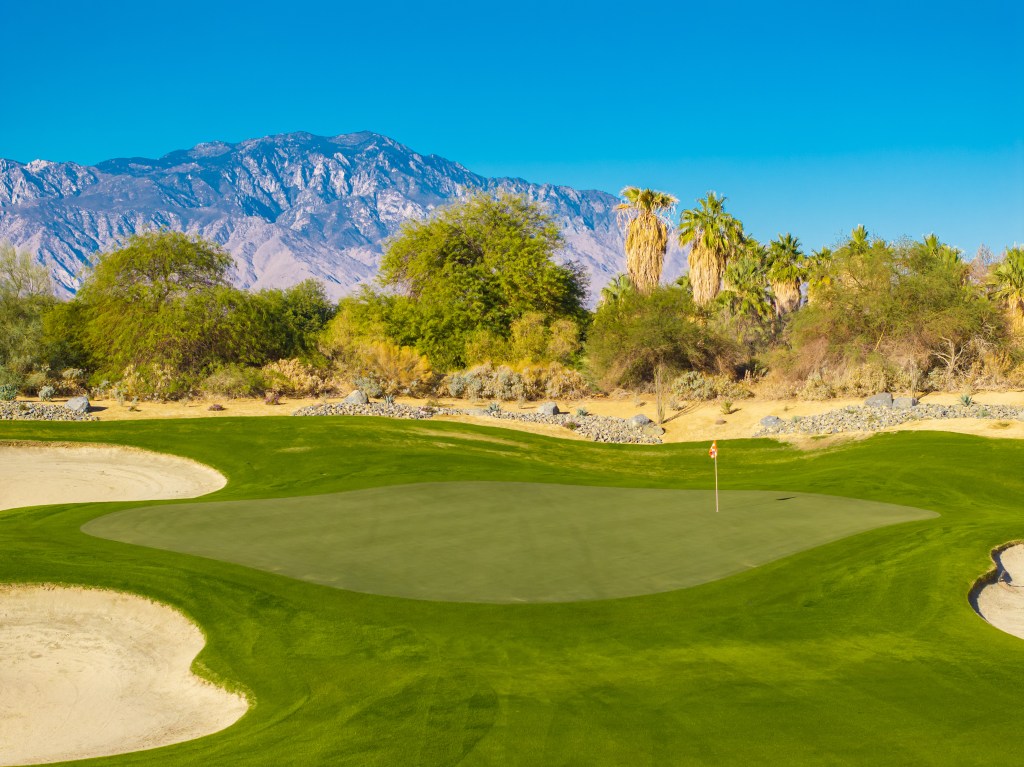
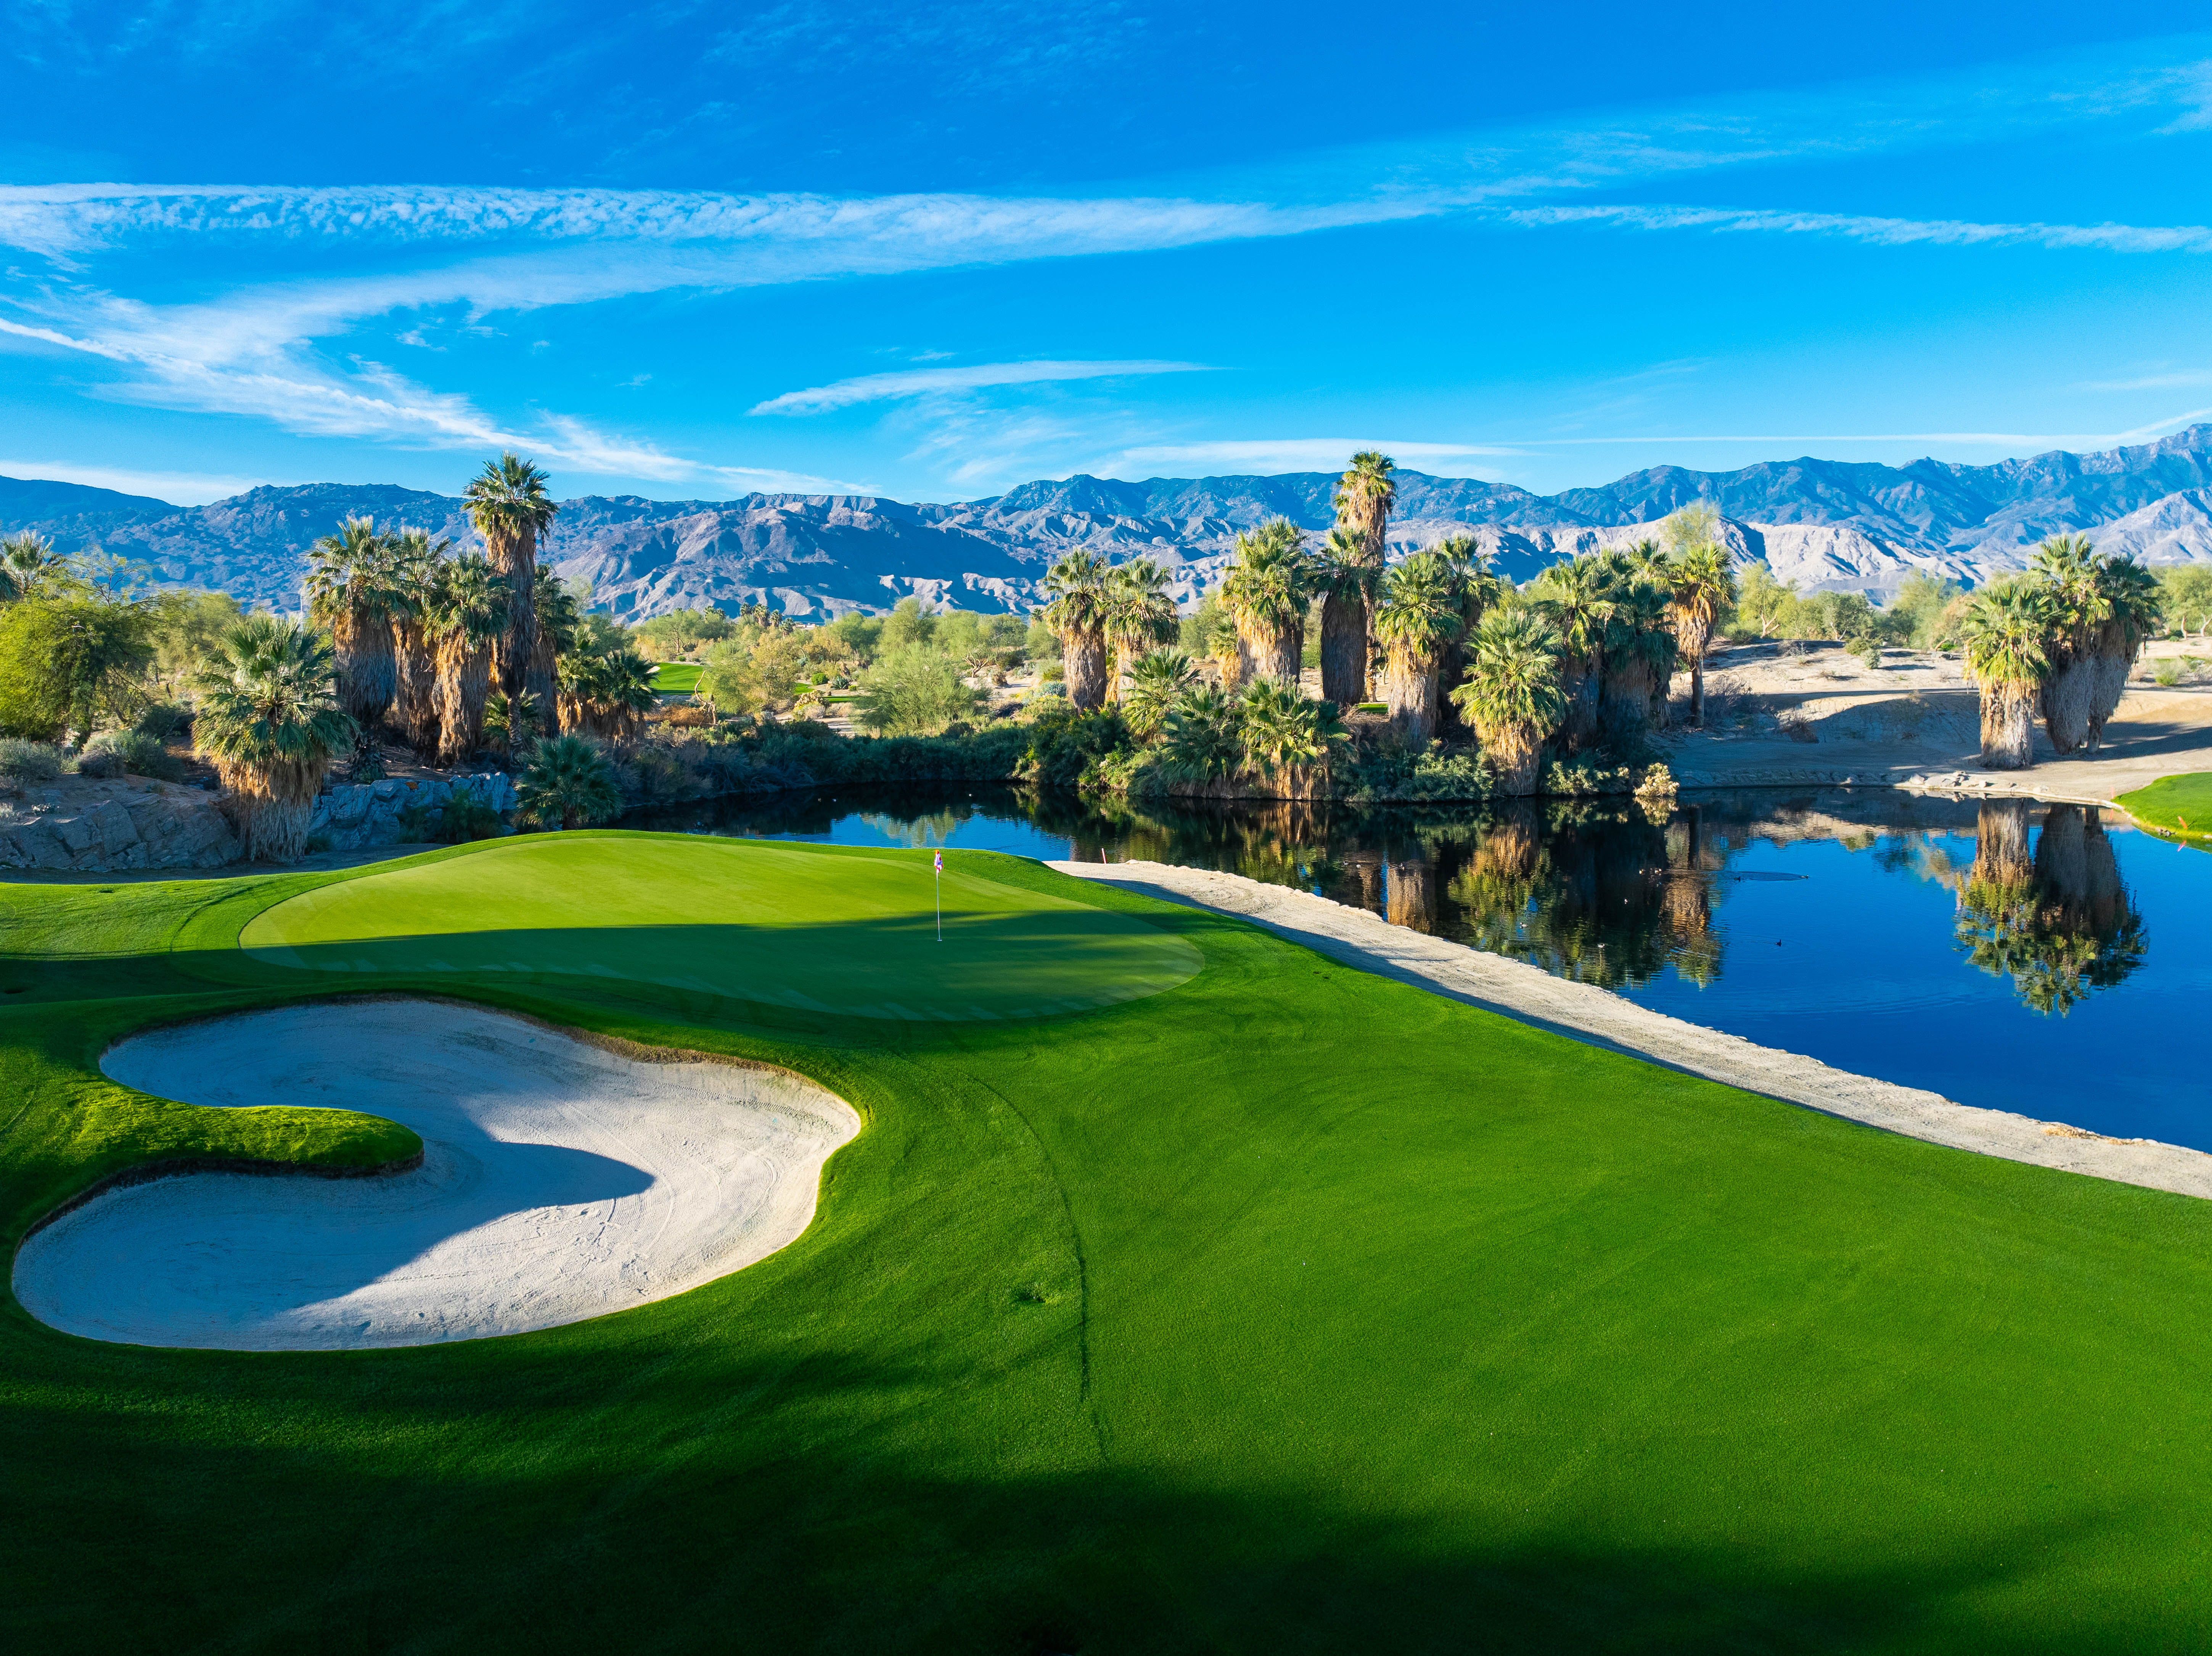
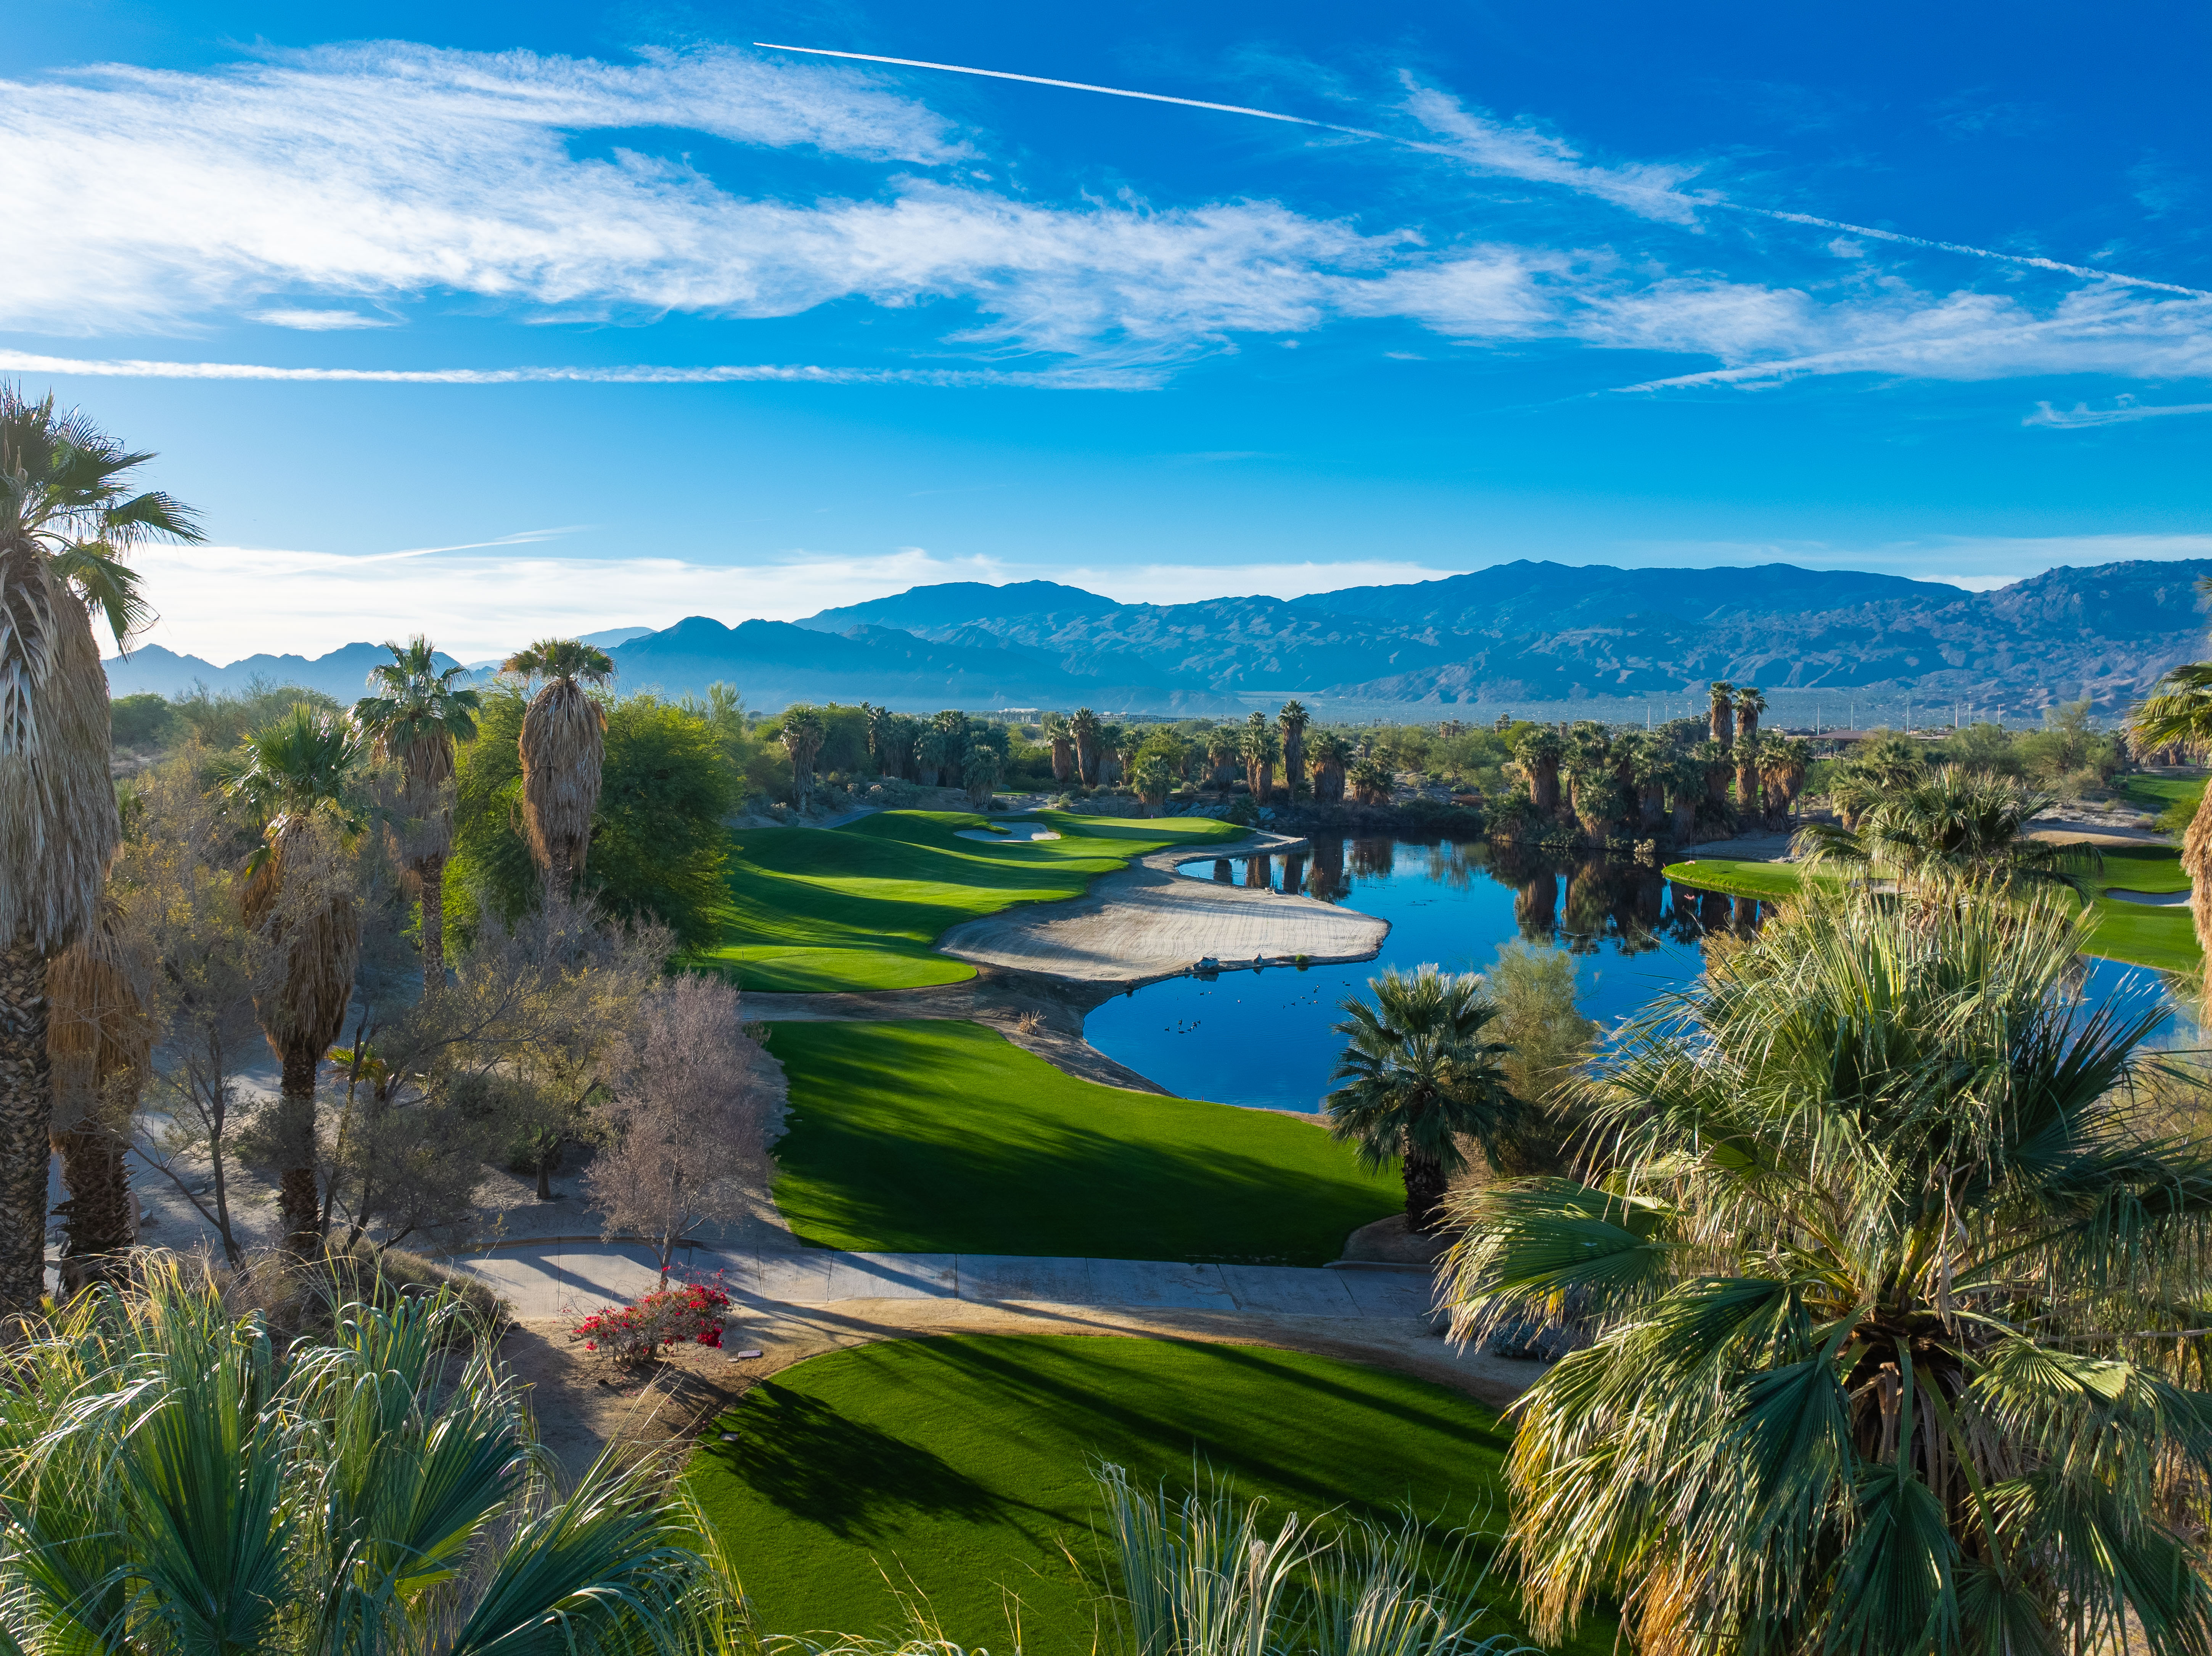
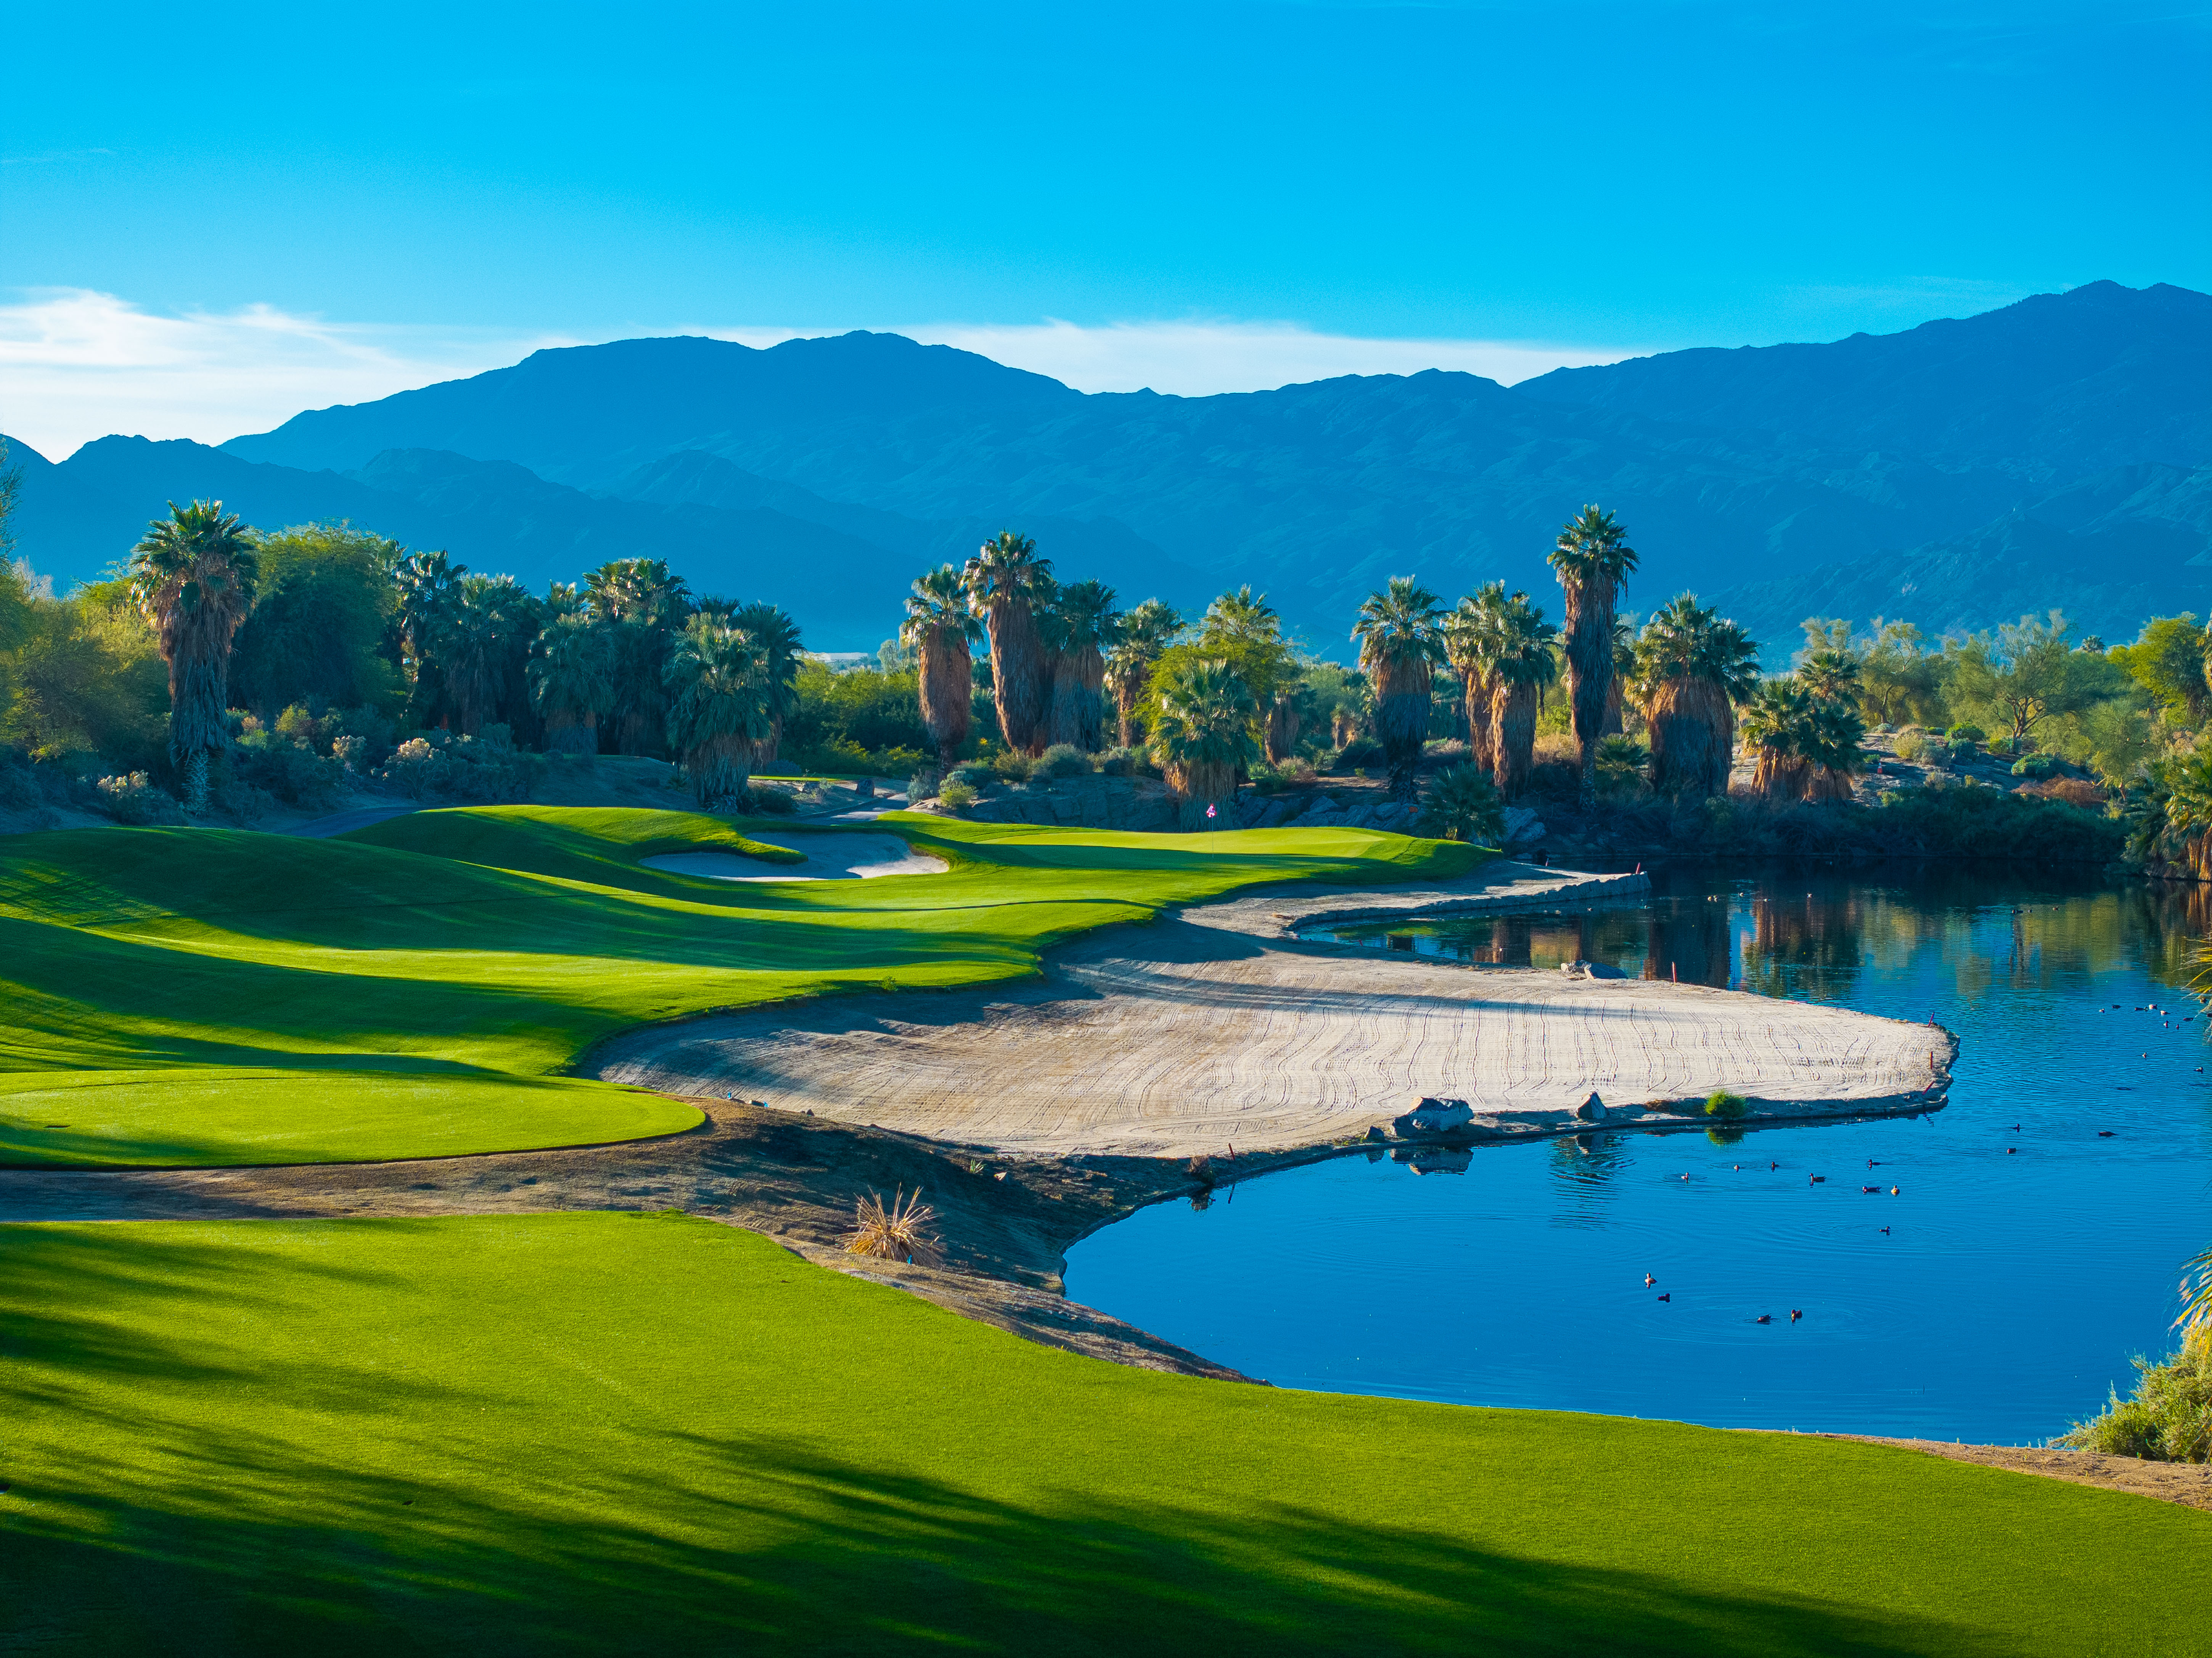
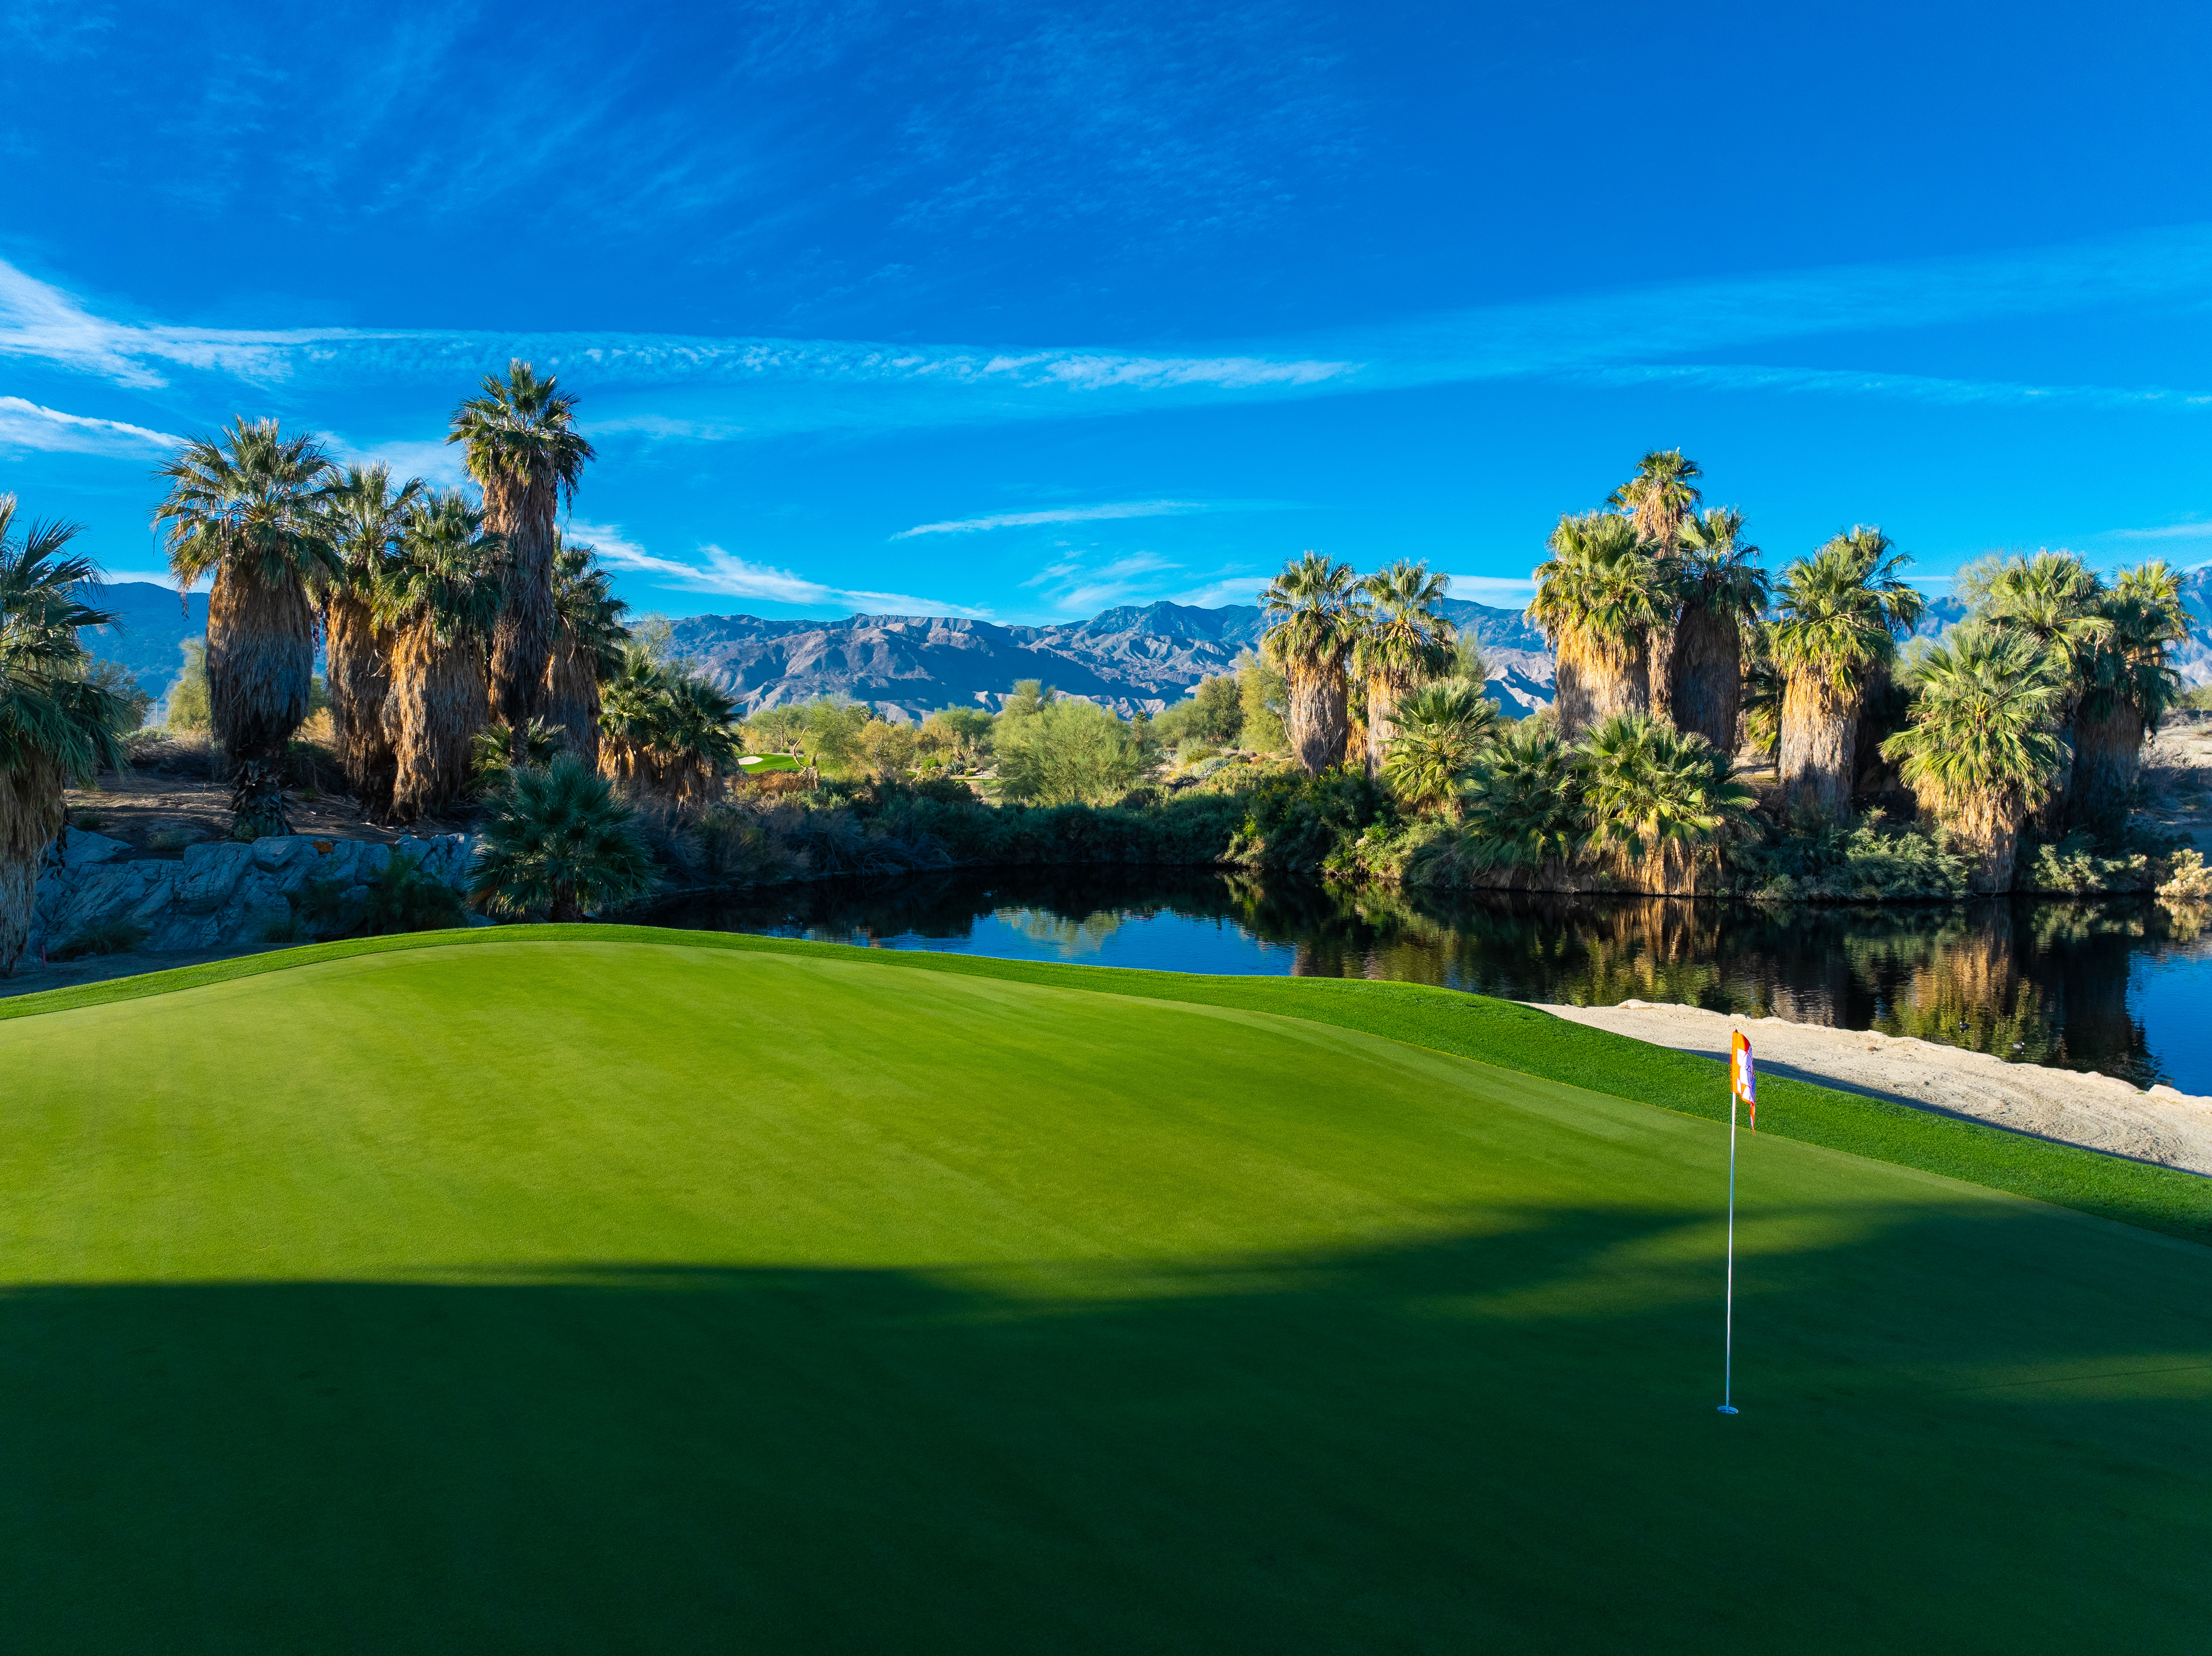
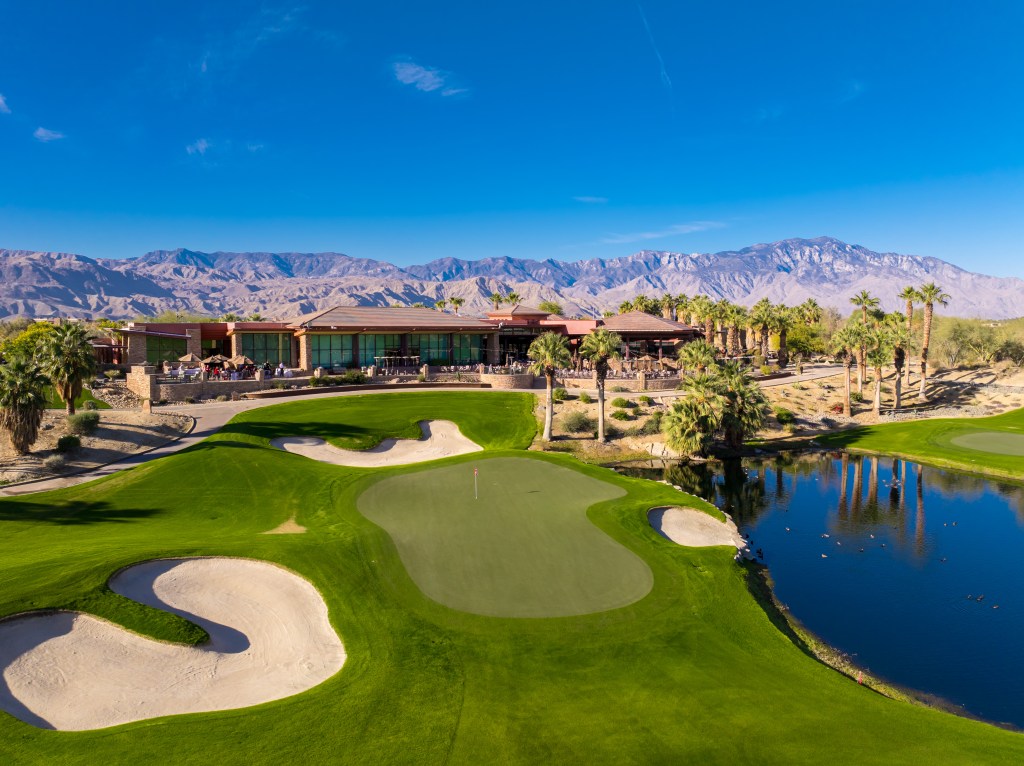
Designed to inspire both awe and strategy, Firecliff invites golfers to take on lush fairways, natural desert landscapes, and over 100 strategically placed bunkers that test your skill at every turn. This par-72 course stretches 7,056 yards across 18 visually stunning and challenging holes, showcasing dramatic desert terrain, native flora, and shimmering water features.
Whether you’re a seasoned competitor or an avid weekend golfer, Firecliff delivers an unforgettable round framed by breathtaking mountain views and meticulously maintained conditions. Recognized in Golfweek’s 2025 rankings as #21 in Best Courses You Can Play: California, Firecliff continues to set the standard for desert golf excellence.
Course Highlights
Every hole at Firecliff is designed to inspire, challenge, and showcase the natural beauty of the desert landscape.
18 Holes of
Championship Golf
A masterfully designed par-72 layout that blends strategy, beauty, and challenge across 7,056 unforgettable yards.
Rated 4.5 Stars
by Golf Digest
Nationally acclaimed for its design, playability, and course conditions.
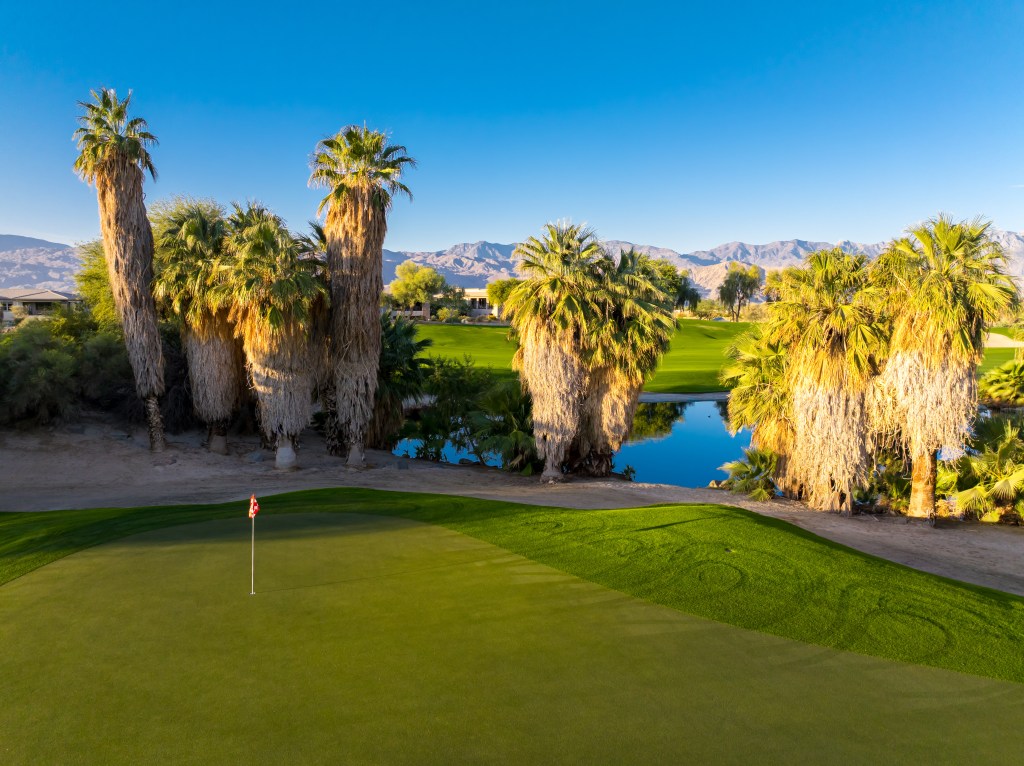
Desert Landscaping
Blended with Native Flora
Experience the natural beauty of the Coachella Valley with native plants, colorful blooms, and sculpted desert features.
Mini Verde Bermudagrass Greens
& Immaculate Fairways
Stunning desert panoramas frame every hole, enhancing the visual drama of your round.
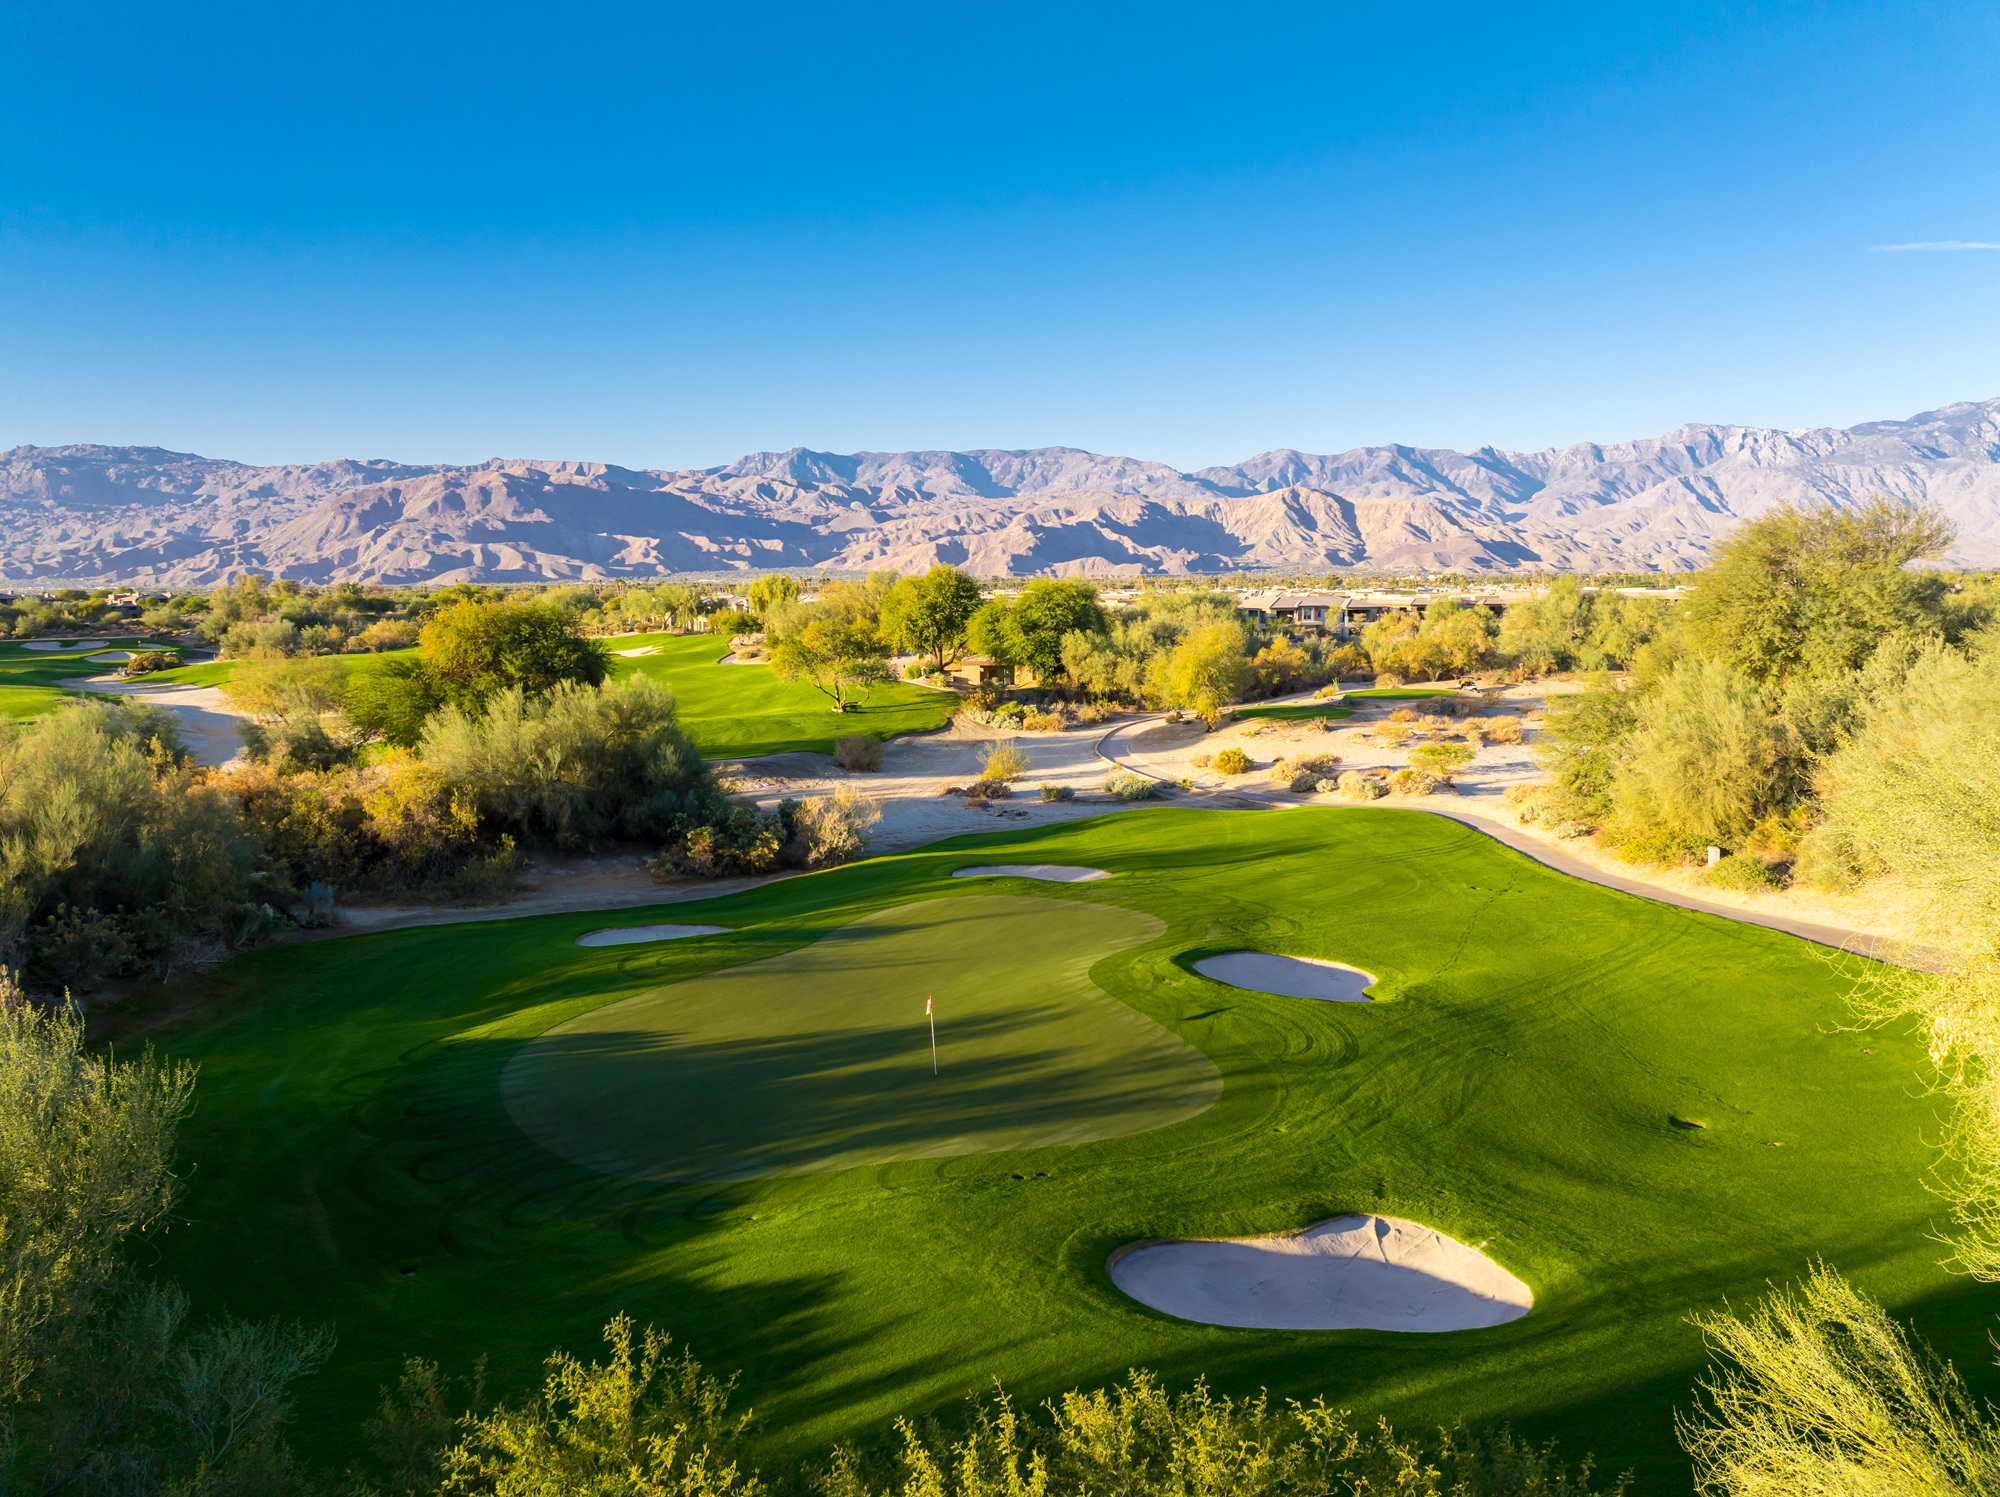
More Than 100 Bunkers
& Forced Carries
Strategically placed hazards demand precision, rewarding smart shot-making and confident play.
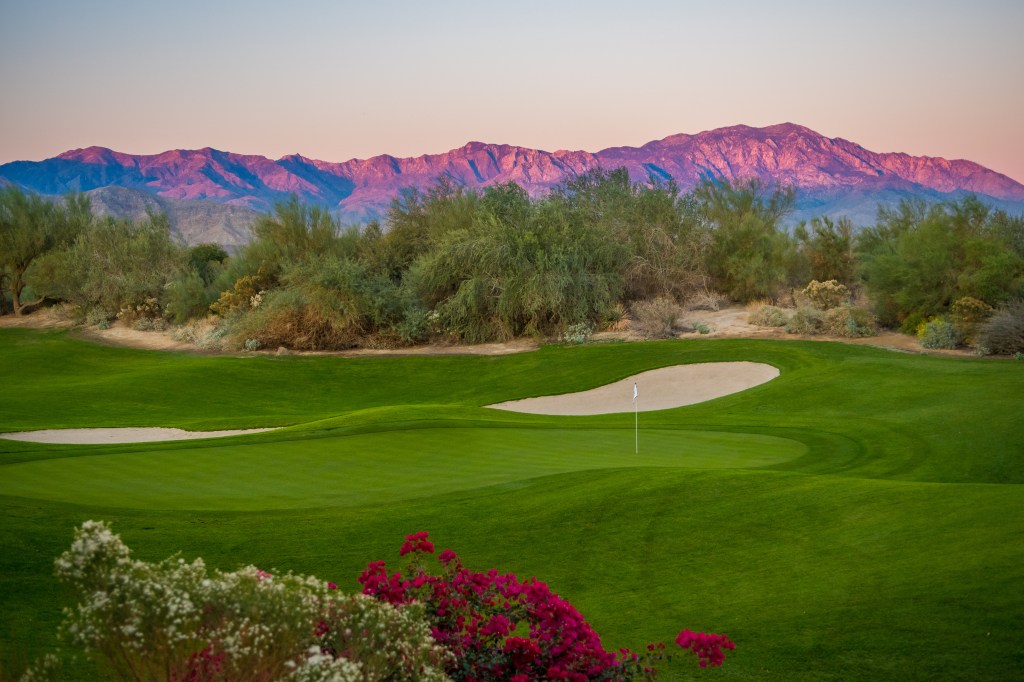
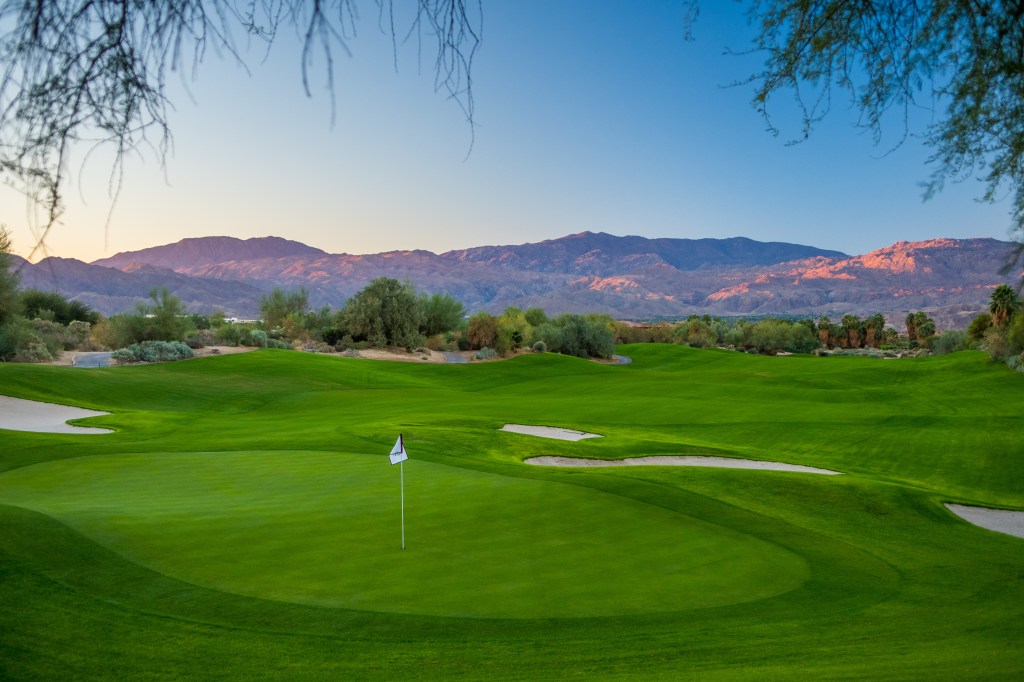
Scenic Views of the
Santa Rosa Mountains
Stunning desert panoramas frame every hole, enhancing the visual drama of your round.
Experience One of the Most Celebrated Desert Golf Courses in California!
Firecliff recognized by Golfweek in 2025: #21 – Best Courses You Can Play: California
Course Details
Holes
Par
Rating
Slope
Yardage
| Firecliff | Rating | Slope | Yards |
| Black Tees | 141 | 74.1 | 7,056 |
| Purple Tees | 136 | 72.1 | 6,676 |
| White Tees | M128 | 69.9 | 6,173 |
| L140 | 75.7 | 6,173 | |
| Tan Tees | M120 | 67.5 | 5,642 |
| L133 | 72.5 | 5,642 | |
| Green Tees | M112 | 65.0 | 5,079 |
| L127 | 69.4 | 5,079 |
Discover All 18 Holes of Firecliff
Experience Firecliff one hole at a time, 18 distinctive challenges carved into the desert, each brought to life with stunning imagery, strategic flyovers, and the unmistakable beauty of Palm Desert.
Par 5, 535 Yards
Begin your round with a strategic par 5 lined with bunkers, rewarding smart decisions from tee to green.
Read More
Off the tee, accuracy is key; set up your second shot by favoring the right side of the fairway to give yourself the best angle into the green.
Greenside bunkers are ready to catch any missteps, so be sure to leave a comfortable distance for your approach. Playing it smart here can set the tone for a successful round.

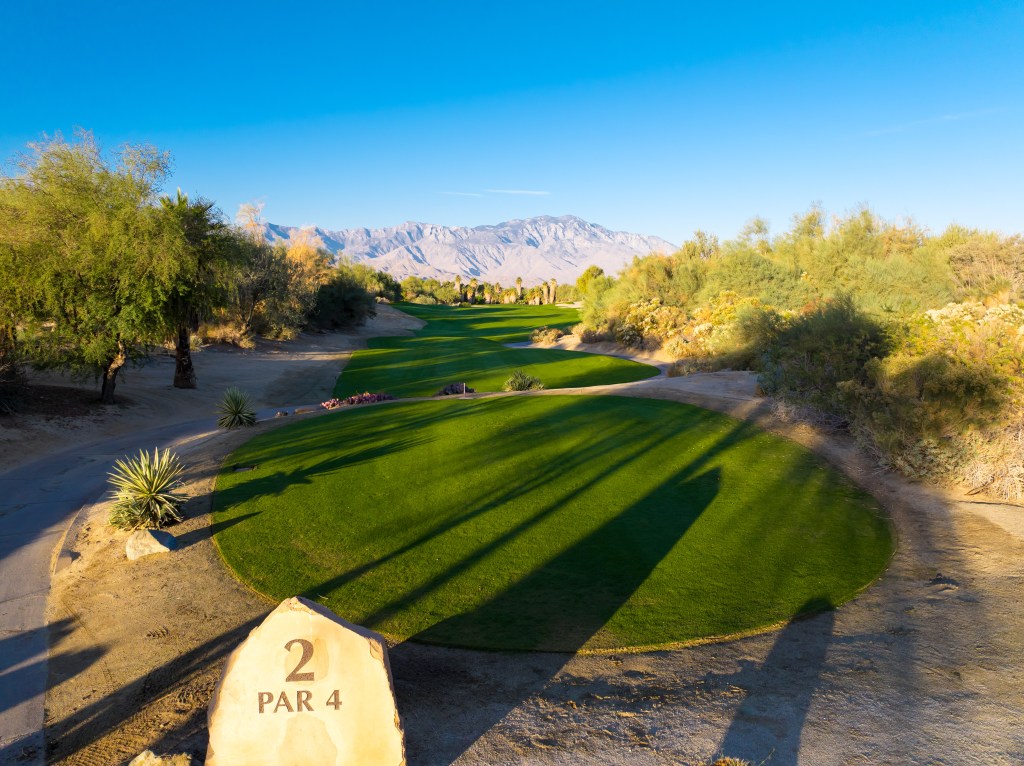
Par 4, 410 Yards
A visually striking par 4 that rewards precision off the tee and careful navigation of its sculpted terrain.
Read More
Favor the left side of the fairway to steer clear of the deep bunkers guarding the right. Positioning is everything here; setting up the right angle into the green is key.
The spacious, undulating green makes for a demanding approach. Pay close attention to the day’s pin location, as slopes and tiers can quickly turn a good shot into a tough two-putt.

Par 3, 194 Yards
A scenic but demanding par 3 where precision is key to holding the well-guarded green.
Read More
Native desert landscaping stretches from tee to green, creating a dramatic visual frame and emphasizing the importance of accuracy.
The long, narrow green is well protected and calls for confident club selection. Distance control is critical—shots left short or long can leave tricky recoveries and putt-breaking challenges. A well-executed tee shot here is a true test of skill.


Par 4, 446 Yards
Among the toughest on the course, this par 4 demands both distance and pinpoint accuracy from start to finish.
Read More
The approach shot is key, as the green is well protected by deep bunkers, particularly on the right.
A smart miss short and left offers your best chance at an up and down, especially with the tightly mown collection area providing a manageable recovery. Walk away with a par here, and you’ve earned it.


Par 4, 429 Yards
This slight dogleg left par 4 rewards a well-placed tee shot and sets up a confident approach to a guarded green.
Read More
Favor the right side of the fairway to set up a clean angle into the green.
A miss to the left brings a fairway bunker into play, making the approach into the small, well-guarded green significantly more difficult. With bunkers surrounding the putting surface, precision on your second shot is essential to scoring well.

Par 4, 331 Yards
A signature risk-reward par 4, this short hole tempts bold play and ranks among the most exciting in the Coachella Valley.
Read More
Big hitters may be tempted to drive the green, but the complex of bunkers and water guarding the putting surface makes precision essential.
If the pin is tucked right, a more conservative layup followed by a full swing approach is the safer play. A left-side pin, however, offers a prime opportunity to walk away with a birdie—if you manage your strategy wisely.

Par 5, 569 Yards
Stretching to 569 yards, this par 5 is a true three-shot challenge that tests distance and discipline from tee to green.
Read More
Off the tee, favor the left side of the fairway to steer clear of the cluster of bunkers waiting on the right.
On the approach, players must navigate a large front greenside bunker, making it essential to carry the ball all the way to the putting surface. Strategic placement and smart club selection are key to setting up a birdie chance.

Par 3, 155 Yards
A short par 3 framed by one of the most breathtaking views in the desert, scenic, serene, and deceptively simple.
Read More
Players should favor the right Short in length but big on scenery, this par 3 offers one of the most picturesque views in the desert. Don’t let the beauty distract you; precision is still essential.
Favor the right center of the green off the tee to avoid trouble and set up a makeable birdie putt. With elevation and wind often in play, club selection can make all the difference on this memorable hole.


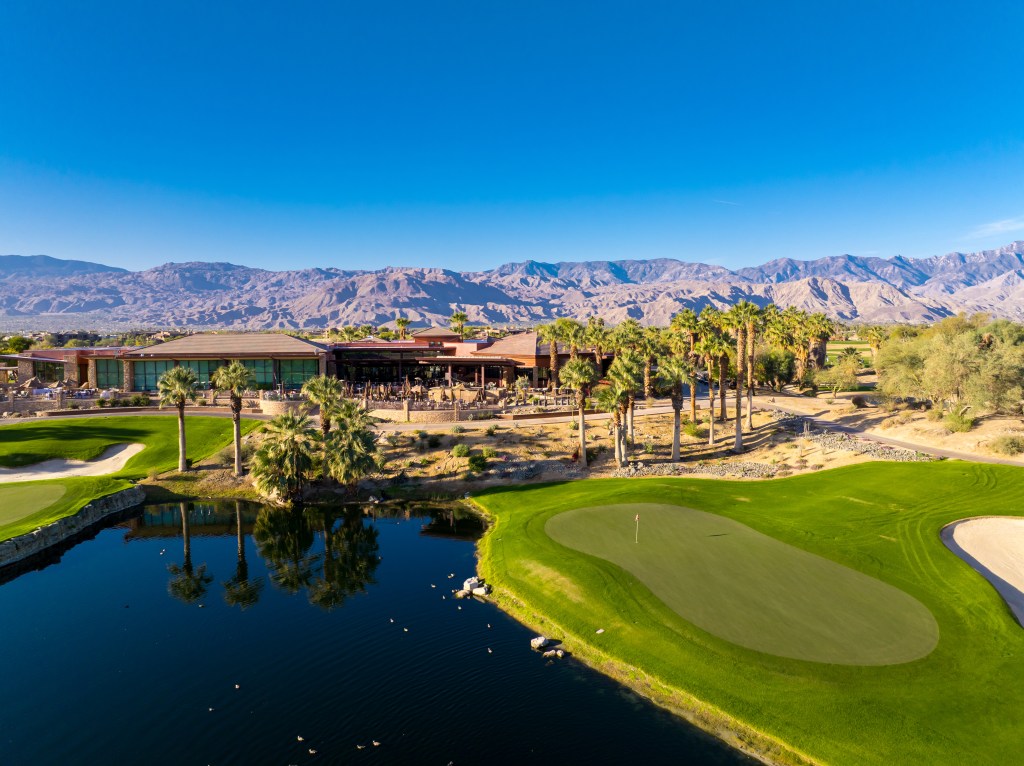
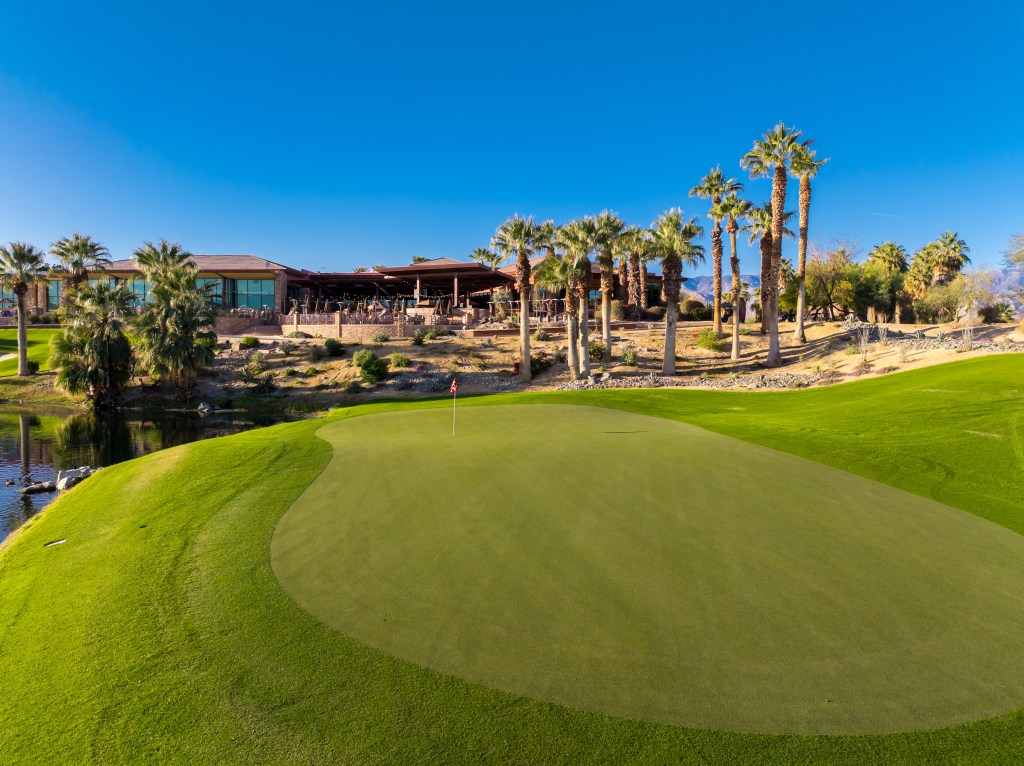
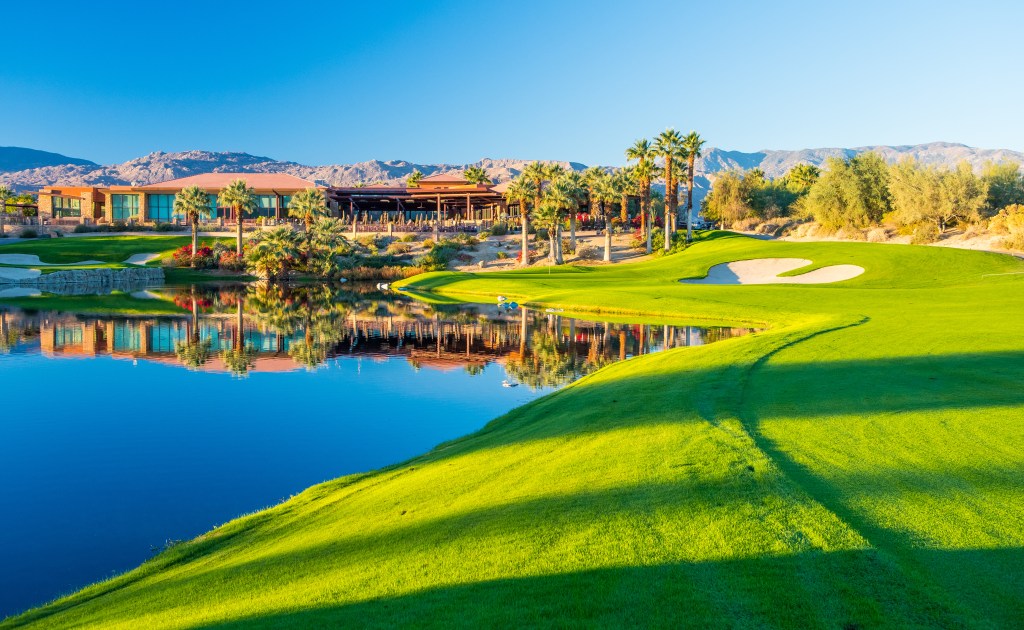
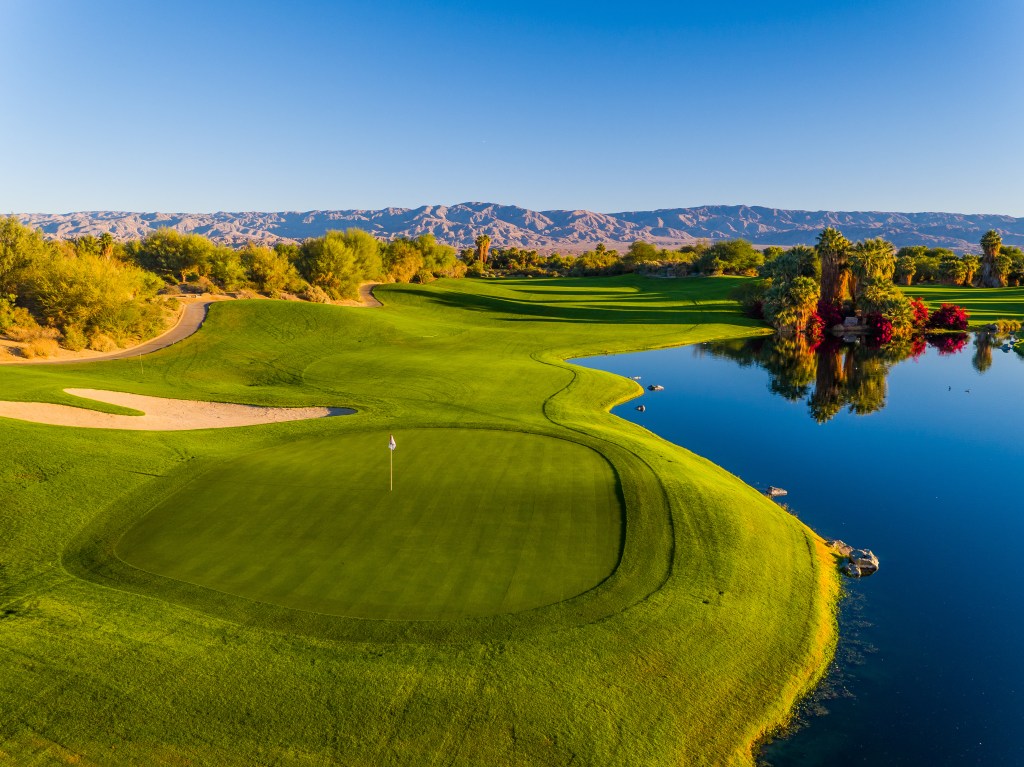
Par 4, 455 Yards
A long, scenic par 4 that finishes the front nine with an uphill approach toward the clubhouse, blending beauty with challenge.
Read More
The fairway sets up a challenging second shot, where water guards the entire left side of the green and bunkers protect the right.
An accurate approach shot is critical to avoid trouble and set up a look at par. It’s a strong finish to the outward nine—and a true test of control under pressure.


Par 4, 435 Yards
Opening the back nine, this solid par 4 rewards smart tee shot placement to set up a confident approach.
Read More
Play down the left side of the fairway to steer clear of the well-placed bunkers on the right.
On the approach, a miss short and right leaves a manageable recovery and a good chance to save par. Precision and course management are key to navigating this straightforward, yet strategic hole.


Par 4, 452 Yards
A slight dogleg right par 4 that rewards a well-placed drive down the left side, setting up a clear and inviting approach to the green.
Read More
The approach plays into a green with a generous chipping area, particularly forgiving for shots that come up short. Even a slight miss leaves a good opportunity for an easy up and down, making this hole a fair but strategic test.
Par 4, 427 Yards
A straightaway par 4 that plays tougher than it looks, demanding a solid tee shot to set up a manageable approach.
Read More
A large waste bunker runs along the left side of the fairway near the green, ready to catch any misaligned second shots. Play it smart and favor the right half of the fairway to give yourself the best chance at reaching this well-guarded green in regulation.


Par 5, 550 Yards
An uphill par 5 that tests patience and strategy, with well-guarded landing areas from tee to green.
Read More
Fairway bunkers stretch along the length of the hole, requiring players to carefully navigate each shot, especially on the approach. Aggressive play can lead to trouble—but well-executed, conservative decisions are rewarded with a real birdie opportunity.
Par 3, 176 Yards
A scenic, well-protected par 3 that demands precision and full focus to find the green.
Read More
The green is surrounded by bunkers, making accuracy off the tee essential to avoid a difficult recovery.
The smart play is to favor the left side, where there’s a bit more room for error and a safer angle into the pin. A well-placed shot here can set up a great look at birdie.

Par 4, 332 Yards
An exciting risk-reward par 4 that invites bold strategy off the tee and rewards smart decision-making.
Read More
A native waste bunker runs the length of the hole on the right, ready to penalize any errant shots.
If the pin is positioned up front, a tee shot down the right side of the fairway provides the best angle in. Whatever your strategy, avoid the left greenside bunker—it’s deep, demanding, and best left out of play.

Par 4, 420 Yards
A solid par 4 where smart positioning off the tee sets up a straightforward approach to the green.
Read More
Tee shots should favor the left side of the fairway to set up the ideal angle for your approach.
The second shot plays slightly uphill to a green that is well protected by bunkers, requiring precise distance control and confident execution. Par is a solid score as you head into the final stretch.

Par 3, 204 Yards
A long, picturesque par 3 that pairs stunning desert views with a demanding tee shot.
Read More
Stunning desert and mountain views frame the hole, but don’t let the scenery distract you—a solid tee shot is essential to scoring here.
Water runs the full length of the hole, creating a visually intimidating carry, while a greenside bunker on the left is ready to catch any misfires. Club selection and confidence are key on this demanding par 3.


Par 5, 536 Yards
A memorable finishing par 5 that rewards a well-placed tee shot with a real chance to close your round on a high note.
Read More
Accuracy off the tee sets up a strategic approach, but beware of the water guarding the right side, especially as you near the green.
A miss to the left side is generally safe, but anything short and right can find the water, turning a potential birdie into a big number. Firecliff closes with both beauty and bite—finish strong!

What Golfers Are Saying
Course Accolades
Jemsek Regional Course of the Year – West Region
National Golf Course Owners Association
– 2025 –
Top 200 Resort Golf Courses
in the U.S.
Golfweek
– 2024 –
Top 25 Public Golf Courses
in California
Golfpass – Golfer’s Choice
– 2024 –
CGCOA Course of the Year

California Golf Course Owners Association
– 2023 –
Top 10 Municipal Courses in the US
LINKS Magazine
– 2024 –
Best Courses You Can Play
in California
Golfweek
– 2025 –

Firecliff Course Overview
Explore the most frequently asked questions about the Firecliff Course at Desert Willow Golf Resort.
What is the Firecliff Course at Desert Willow Golf Resort?
The Firecliff Course is a championship 18-hole, par-72 golf course located at Desert Willow Golf Resort in Palm Desert, California. Known for its challenging layout, desert beauty, and strategic design, Firecliff is consistently ranked among the top public courses in California.
What makes the Firecliff Course unique?
Firecliff is celebrated for its blend of natural desert terrain and demanding shot values. The course features over 100 bunkers, dramatic elevation changes, strategic water features, and forced carries that require thoughtful play. The recent renovation; featuring Mini Verde Bermudagrass greens, leveled tee boxes, and refreshed fairways; elevates both aesthetics and playability.
How long is the Firecliff Course?
Firecliff stretches 7,056 yards from the championship tees. Multiple tee boxes are available to accommodate various skill levels, offering a memorable round for both competitive and casual golfers.
Is Firecliff suitable for beginners?
While Firecliff is designed to challenge experienced players, the course includes multiple tee options that make it playable for high-handicap and beginner golfers. That said, newer players may find it more rewarding with a bit of course management and guidance.
What kind of greens does Firecliff have?
As of its latest renovation, Firecliff features Mini Verde Bermudagrass greens, known for their exceptional speed, smooth roll, and resistance to heat, ensuring excellent playing conditions year-round.
Are there water features on the course?
Yes. Firecliff integrates several strategic water features, including lakes and streams, which enhance both the beauty and complexity of the layout. These elements come into play on multiple holes, adding an extra layer of strategy.
Has Firecliff received any awards or national recognition?
Yes. In Golfweek’s 2025 rankings, Firecliff was listed as:
- #21 in Best Courses You Can Play: California
- #150 in the Top 200 Resort Golf Courses in the U.S. in Golfweek’s 2024 rankings
- It has also earned 4.5 stars from Golf Digest and is often cited by golfers as a must-play in the Coachella Valley.
What facilities are available before or after a round on Firecliff?
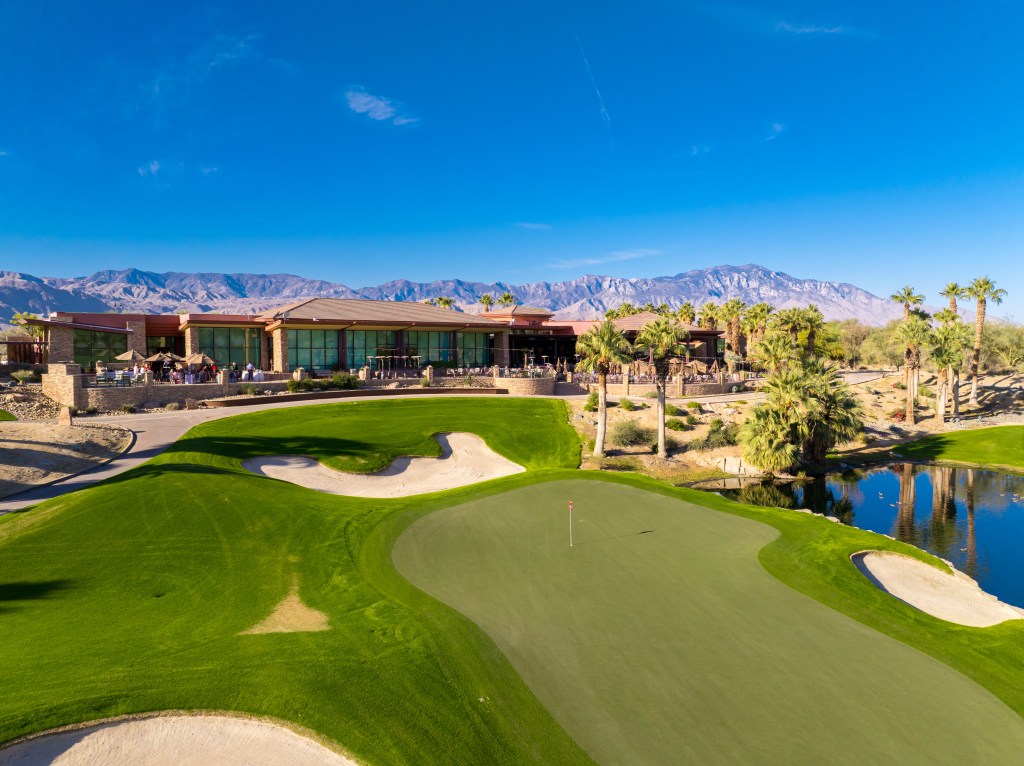
Guests can warm up on Desert Willow’s expansive practice facilities, including a driving range, short game area, and putting greens. After your round, enjoy a scenic meal or cocktail at The Terrace Restaurant, overlooking the 18th green.
How do I book a tee time on the Firecliff Course?
Tee times can be booked online via the Desert Willow Golf Resort website or by downloading the Desert Willow Mobile App for the best available rates, live course updates, and exclusive offers.
Ready to Play Firecliff?
Explore tee time options, course layout, and current conditions.
Challenge your game. Take in the views. Make your next round unforgettable.